


Hassle free, 2-Year Warranty
Fast, Free Shipping on Orders $35+
Lifetime Technical Support
30-Day Money Back Guarantee
Plugable USB-C to VGA Adapter
$19.95 USD
SKU: USBC-VGAAmazon Rating : (51 Reviews)
Features
- USB-C to VGA— Utilizes the native video capabilities of USB-C ports on supported computers to drive a VGA monitor with resolutions up to 1920x1200 @ 60Hz
- Operating Systems— Supported on Windows, macOS, Chrome OS, and Linux, as long as the device has a USB-C port which supports video. Plug and Play; no software installation required
- Great For Travel— The compact and lightweight design of this USB-C to VGA adapter allows you to quickly pack it for business trips, commuting, or anytime you need a way to connect to a monitor or projector.
- Compatibility— Works with iPhone 15, modern MacBooks, Dell XPS, Microsoft Surface, HP Spectre x360 systems with Thunderbolt 3, Thunderbolt 4, and USB4, and DisplayPort Alternate Mode over USB-C ports
- 2-Year Coverage, Lifetime Support— Every Plugable product, including this USB-C to VGA adapter, is covered against defects for 2 years and comes with lifetime support. If you ever have questions, contact our North American-based team - even before purchase
For volume orders or business inquiries contact sales@plugable.com
Free 3-Day Continental U.S. Shipping on Orders Over $35!


Plugable's USB-C to VGA Adapter
Plugable's USB-C to VGA Adapter allows you connect a VGA display to your laptop, tablet, phone, or desktop with a USB-C DisplayPort Alternate Mode video output.

Uncompromising Performance
USB-C Alt Mode graphics adapters utilize a direct pipeline to the graphics processor in your system, and your connected monitor will function and perform as a natively attached display.
Plug and Play installation means that no drivers are required!
Connect USB-C to VGA cable to support resolutions up to 1920x1200 at 60Hz refresh rates when connected to a VGA input on monitors, projectors, and other displays.
Can be used with a VGA cable to Mac, Windows, ChromeOS, and Linux devices. Works as an adapter to connect popular display models like Acer, LG, and Dell monitor cord to laptop, and connect any other computer monitor to MacBook cable. Displays can be used in mirrored or extended mode.
Compatibility
Popular Use Cases
Business: Connect your laptop to a projector or large display to present to a crowd. Portability makes it easy to pack for traveling or commuting for work.
Education: Allows your computer or tablet to connect to a projector for slides or subject material for a class
Personal: Add a VGA monitor to your setup to increase productivity and screen space
Compatible Systems
Plug and Play installation on any Windows, Mac, ChromeOS, or Linux host which supports DisplayPort Alternate Mode (Alt Mode) video output functionality.
The Fine Print
This adapter does not support DisplayLink or SMI InstantView technology, so it will not work with their respective softwares.
This device is not a full VGA cable. A VGA to VGA cable is still required to connect this adapter to a display.


Filter Help Articles and Frequent Questions by Category
Choose one or more filters within each category to narrow down the articles. Each selection will result in only displaying articles that include all of your choices.
Articles
Well how about that, it looks like we don't have any articles matching your filters! Try removing one of your choices or clear the filters to show all articles.
You can always contact support if you need help too!
My Docking Station/Adapter Works Well With My Windows Laptop, but When I Close the Lid the Displays and Laptop Turn Off or Sleep. How Do I Fix This?
Windows defaults to putting the computer to sleep when the lid is closed, even if there are external displays and devices connected, we can change this setting to enable closing the lid while using a docking station.
Recommended Setup
To ensure the computer can reliably function with the lid closed there are some requirements and recommendations:
- The system should be powered: This can be from a USB Type-C Docking Station with host charging, or by connecting the laptop's original power source.
- There should be at least one external display connected, this can be through a docking station, or directly to the computer.
- There should be a keyboard and mouse connected, either through a docking station, USB Hub, or directly to the computer.
Windows 11 24H2 and Newer
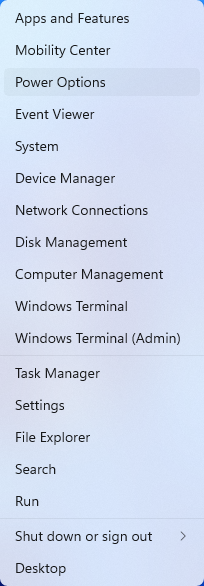
- Right-click on the Start menu and select Power Options from the context menu

- Expand the Lid, power & sleep button controls sub-section

- Under Plugged in select Do Nothing from the Closing the lid will make my PC context menu
Windows 11 23H2 and Earlier
- Right-click on the Start menu and select Power Options from the context menu
- In the upper left corner of the settings window, in the search box, type "lid" then select Change what closing the lid does from the search results
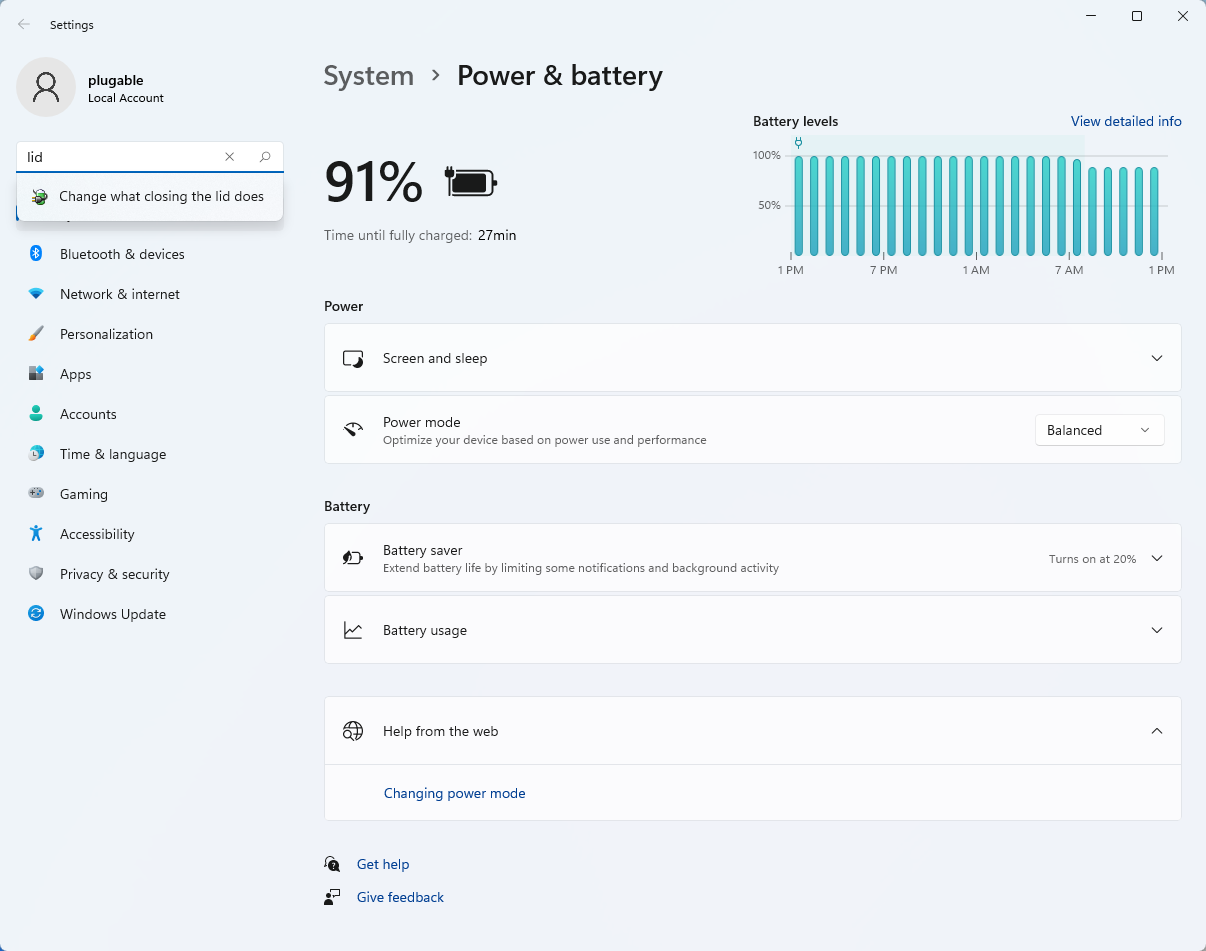
- Make sure the setting for When I close the lid under the Plugged In column is set to Do Nothing
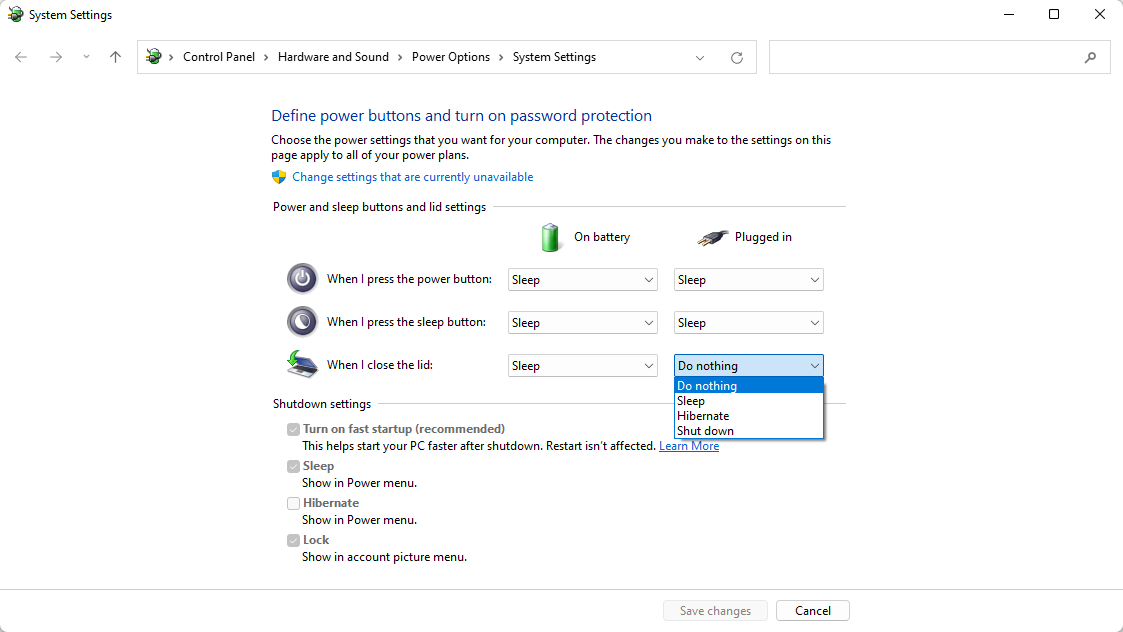
- Click the Save Changes button to apply the new settings.
Windows 10
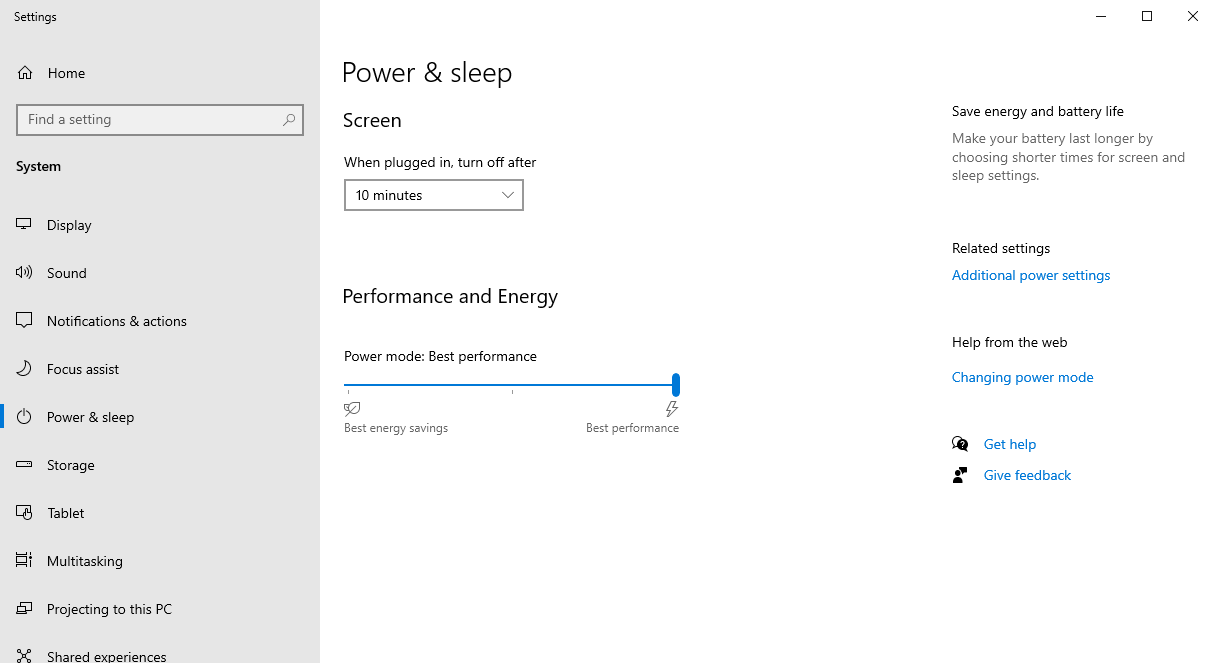
- Start by right-clicking on the Start button and select Power Options from the menu.
- From the right side of the Power Options settings page, select the blue link for Additional power settings
- From the choices present on the left-hand side of the Power Options window, please click on Choose what closing the lid does
- Make sure the setting for When I close the lid under the Plugged In column is set to Do Nothing
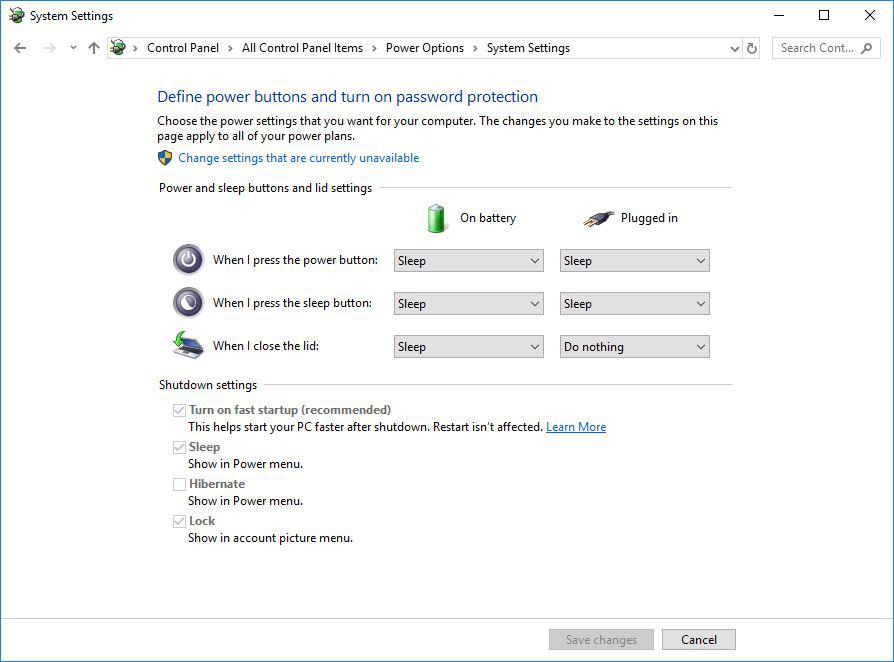
- Click the Save Changes button and restart the system (making sure that the laptop's power adapter is also connected) and test the behavior again.
Closing the lid should no longer put the computer into sleep mode when an external display and power source is connected, instead one of the external displays should now become the Primary display with the desktop icons instead of the laptop's built-in display.
When to open the lid?
The laptop lid may still need to be opened when performing any of the following:
- To power on the computer from a fully powered off state
- To log into the computer if logged out or if the computer is restarted with the lid closed
- To wake the computer from a deep sleep state (hibernation, or Windows hybrid sleep states)
If you have any questions please feel free to contact us at support@plugable.com and we'll be happy to help!
Can I Add Multiple Alt Mode Adapters for Multiple Displays?
If your system supports multiple displays Thunderbolt or USB-C Alt Mode outputs, then you will be able to use multiple adapters on one system to connect to these displays. Not all systems can support multiple native displays, so consult your host's specifications to see if multiple displays are supported.
Can I use an Alt Mode video adapter with my Mac?
Most modern MacBooks with USB-C, USB4, or Thunderbolt 3/4 ports support Alt Mode-based video adapters, making them compatible with Plugable Alt Mode video adapters. This includes:
- MacBook Pro (2016 and later)
- MacBook Air (2018 and later)
- Mac Mini (2018 and later)
- iMac (2017 and later)
- Mac Studio
Important Note:
M1, M2, M3, and newer MacBooks support only one external display via Alt Mode (with exceptions for the MacBook Pro 14-inch and 16-inch with M1 Pro/Max, M2 Pro/Max, M3 Pro/Max). If you need multiple external displays for a Mac with a base M1, M2, or M3 chip, consider Plugable’s USB Graphics Adapters instead.
How To: Set the Display Refresh Rate in Windows 11
Many modern displays can support above the default 60Hz refresh rate, however this may need to be manually set within Windows 11. Please note, not all computers, graphics adapters, and docking stations can support all resolutions and refresh rates.
Setting the Display Refresh Rate in Windows 11
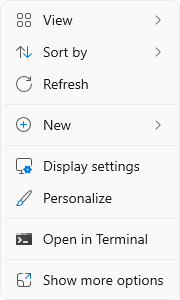
1. Right-click on the desktop and select Display Settings from the drop-down menu
2. Scroll down to the Related settings subsection and select Advanced display

3. At the top of the Advanced display window, select the external display from the drop-down menu

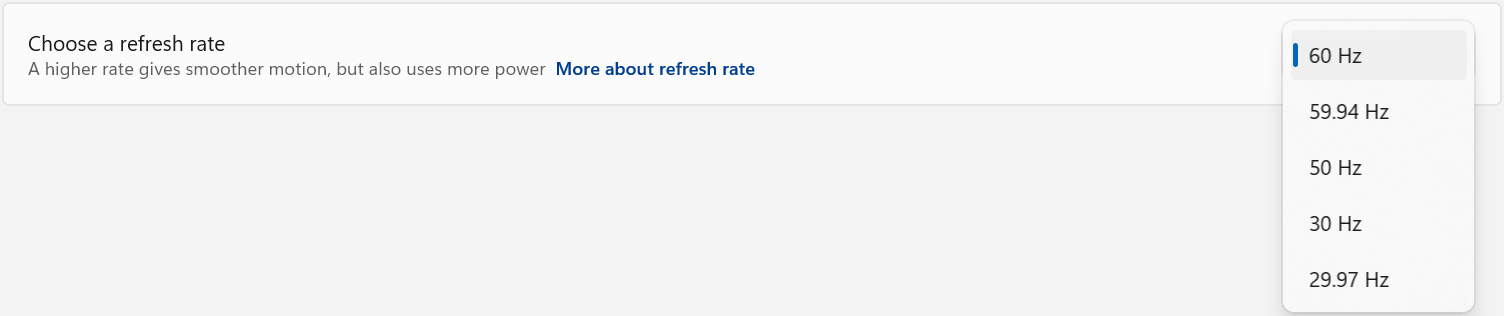
4. From the Choose a refresh rate drop-down menu select the desired refresh rate
Refresh Rate Limitations
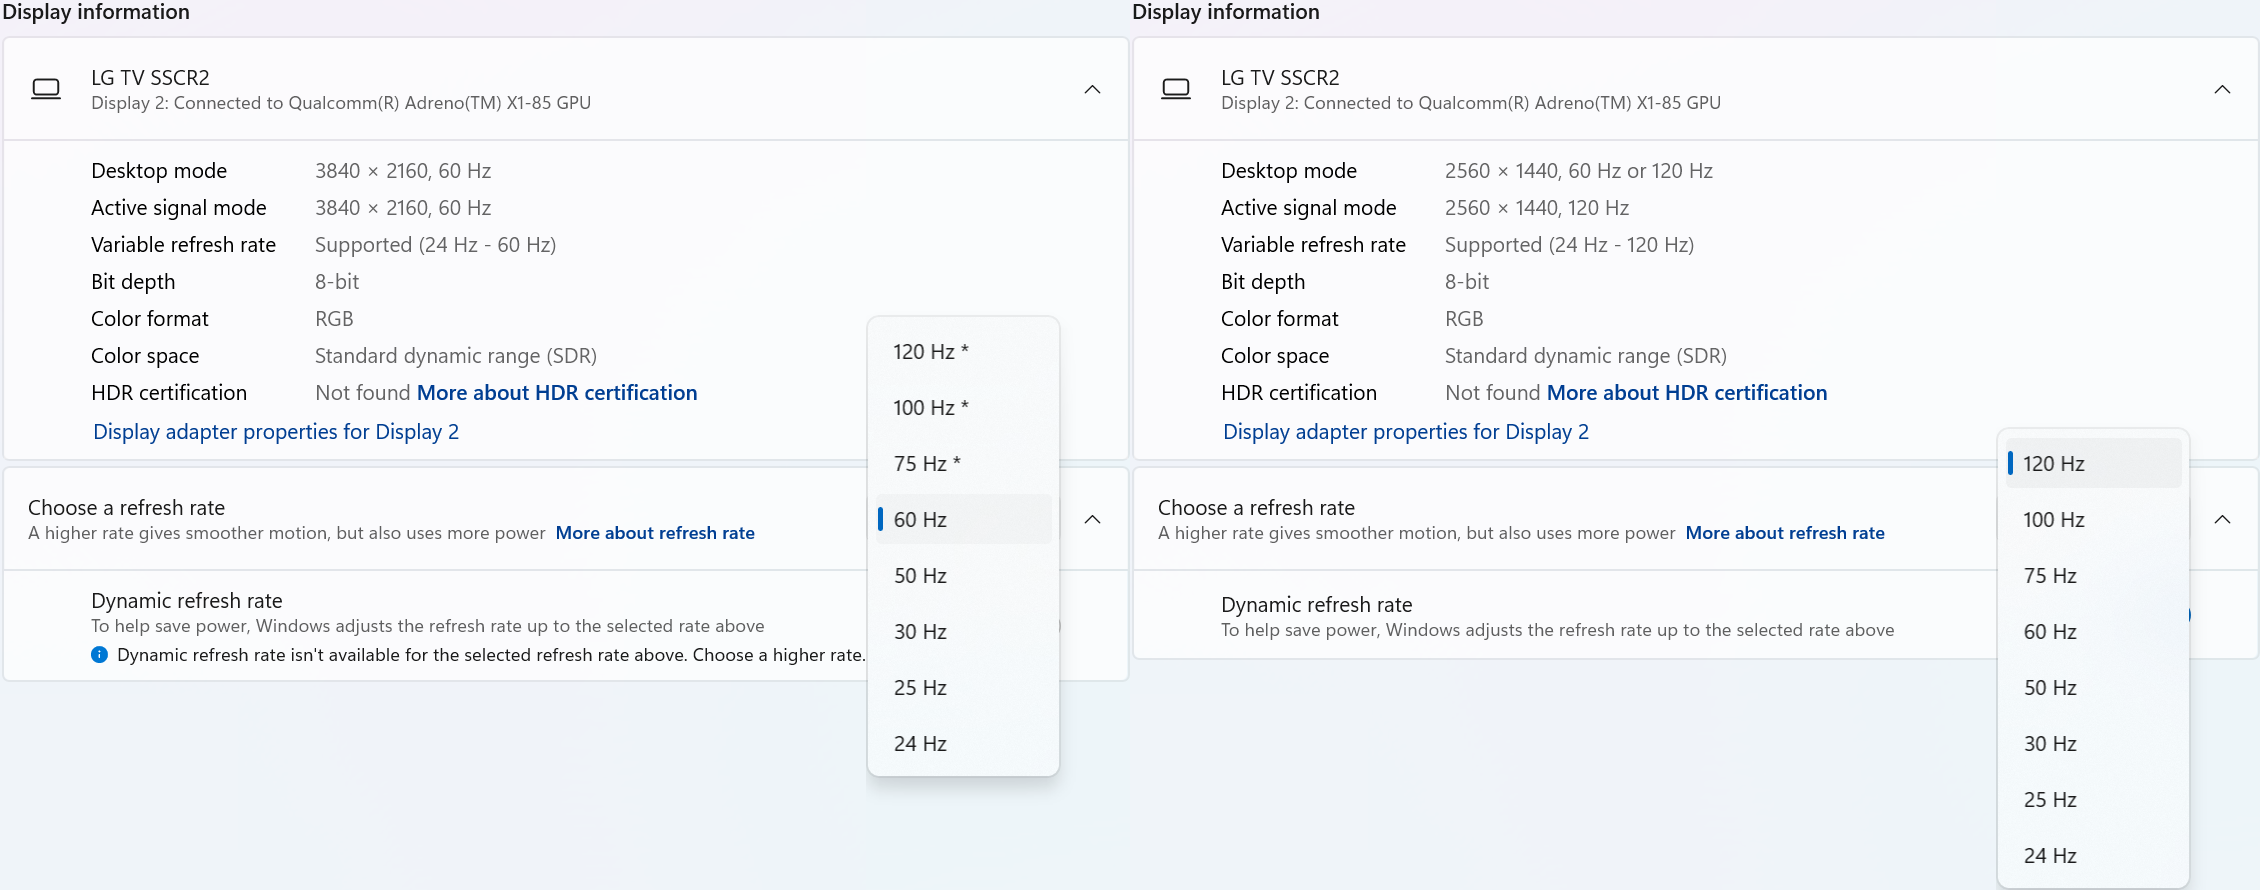
With Windows 24H2 and newer, dynamic refresh rates are supported, this allows the system to adjust the display refresh rate to save power, up to the selected refresh rate. As a consequence of this new mode, when selecting the display refresh rate you may see an asterisk. This indicates that selecting the specific refresh rate may reduce the display resolution or image quality in order to prioritize the refresh rate. This exposes the refresh rate option from the display even if the display cable or computer is incapable of supporting that refresh rate at the native resolution and is the intended behavior per Microsoft. [1]
In the screenshot below the left side shows the 4K 120Hz capable display limited to 60Hz refresh rate without asterisks, and on the right the same display after setting the refresh rate to “120 Hz*”, the “Desktop mode” resolution has been reduced to 2560 x 1440 (1440p) instead of 3840 x 2160 (4K UHD). Unlike when using the display scaling option this also causes a reduction in image quality. On the right side asterisks are no longer shown in the refresh rate list. Setting the refresh rate back to 60Hz does not change the resolution, you will have to go back one page and set the resolution manually.
References
[1] Windows Insider description of new behavior (https://blogs.windows.com/windows-insider/2023/08/31/announcing-windows-11-insider-preview-build-25941-canary-channel/)
Understanding External Display Support on Apple M1, M2, M3, M4 and M5 Chips
Apple's M1, M2, M3, M4 and M5 chips deliver high performance, but each generation has unique capabilities for supporting external displays via the system’s Thunderbolt ports. This article explains how many displays each chip can support while directly connected to the laptop, and will assist you in identifying if a software solution (DisplayLink, InstantView, etc.) is needed. This article largely applies to the MacBook Air and MacBook Pro models. Other Apple models, such as the Mac Mini and iMac may have similar display restrictions, but always check your specific device's documentation for confirmation.
Important Note: Native Display Limits
Even if you connect a Thunderbolt dock or adapter, extended displays cannot exceed what is natively supported by the Thunderbolt ports on your Mac device.
- Example: A MacBook with a base M1 or M2 CPU supports only one external display via Thunderbolt. Adding a Thunderbolt dock will not increase this limit due to hardware constraints.
- In several cases of the ‘Max’ variation of CPU, multiple Thunderbol ports must be used in order to connect mutliple displays. This can be done utilizing all Thunderbolt ports for a single display, or using a Thunderbolt dock to connect up to two of the displays.
- Plugable offers alternative solutions, such as USB DisplayLink technology-based docks and adapters, which allow for additional displays on devices with limited native support. This technology combines software and hardware to send video signals over USB data connections.
Display Support by CPU Version (Base, Pro, or Max)
Apple Base M5 (only model as of 12/12/25)
-
Base M5 CPU
- Supports two external displays via Thunderbolt ports up to 6K at 60Hz, or one external display with up to 6K resolution at 60Hz over Thunderbolt and one external display with up to 4K resolution at 144Hz over HDMI
- One external display supported at 8K resolution at 60Hz or one external display at 4K resolution at 240Hz over HDMI
Apple Base M4, M4 Pro and M4 Max
-
Base M4 CPU
- Supports two external displays via Thunderbolt ports up to 6K at 60H, or one external display with up to 6K resolution at 60Hz over Thunderbolt and one external display with up to 4K resolution at 144Hz over HDMI
- One external display supported at 8K resolution at 60Hz or one external display at 4K resolution at 240Hz over HDMI
-
M4 Pro CPU
- Up to two external displays with up to 6K resolution at 60Hz over Thunderbolt ports, or one external display with up to 6K resolution at 60Hz over one Thunderbolt port and one external display with up to 4K resolution at 144Hz over the laptop HDMI port
- One external display supported at 8K resolution at 60Hz over HDMI or one external display at 4K resolution at 240Hz over HDMI
-
M4 Max CPU
- Up to three external displays with 6K resolution at 60Hz over two of the laptop's Thunderbolt ports and one external display with up to 4K resolution at 144Hz over HDMI
- Up to two external displays with 6K resolution at 60Hz over Thunderbolt ports and one external display with up to 8K resolution at 60Hz or one external display with 4K resolution at 240Hz over HDMI
Apple Base M3, M3 Pro and M3 Max
-
Base M3 CPU
- With macOS version14.6, the MacBook Air and MacBook Pro laptops with a Base M3 CPU supports two external displays when the lid is closed
- One external display can support up to 6K at 60Hz, the second external display can support up to 5K at 60Hz
- Note: Steps to set up a dual display with the laptop lid closed can be found here
-
M3 Pro CPU
- Supports two external displays via Thunderbolt ports up to 6K at 60Hz
- Or supports one external display with up to 6K at 60Hz over Thunderbolt and one external display with up to 4K at 144Hz over the laptop's HDMI port
-
M3 Max CPU
- Supports up to three external displays with 6K resolution at 60Hz over two of the laptop's Thunderbolt ports and one external display with up to 4K resolution at 144Hz over HDMI
- Or up to two external displays with 6K resolution at 60Hz over Thunderbolt and one external display with up to 8K resolution at 60Hz or one external display with 4K resolution at 240Hz over HDMI
Apple Base M1/M2 and M1/M2 Pro and M1/M2 Max
-
Base M1/M2 CPU
- Supports one external display via the Thunderbolt port up to 6K at 60Hz
-
M1/M2 Pro CPU
- Supports two external displays via the Thunderbolt port up to 6K at 60Hz
- Or Supports one external display via one Thunderbolt port up to 6K at 60Hz and one external display via the HDMI port up to 4K at 60Hz (for a total of two displays)
-
M1/M2 Max CPU
- Supports three external displays via two of the laptop's Thunderbolt ports up to 6K at 60Hz and one additional display via the HDMI port up to 4K at 60Hz, for a total of four external displays
With all of the above information taken into account, and you're unable to achieve the amount of displays you have or would prefer a more simplified solution-- a software-enabled device may be what you need. This is where devices like our USBC-6950M or UD-ULTC4K would come in handy to expand your desktop passed any limitations (even on Pro and Max chips).
If you’re unsure about your setup, encounter any issues, or would like a recommendation for a software-enabled device contact our support team at support@plugable.com
How to Determine Your USB-C Port Video Capabilities
under
Understanding your laptop's video output capabilities is essential when connecting to external displays. This guide will help you identify what video technologies your laptop supports and how to find the relevant information.
Common Video Output Technologies
Modern laptops commonly use one or more of the following technologies to transmit video to external monitors:
1. Thunderbolt 3
- Supports video output using the DisplayPort protocol.
- Capable of driving up to two 4K displays at 60Hz or one 5K display at 60Hz.
- Uses a USB-C connector and features a lightning bolt symbol next to the port.

Note: An example of Thunderbolt 3 ports
2. Thunderbolt 4
- Provides improved performance over Thunderbolt 3.
- Supports up to two 4K displays at 60Hz or one 8K display.
- Uses a USB-C connector with the same lightning bolt symbol but may also include the number "4" for identification.
Note: Thunderbolt 4 has the same physical connection and “lightning” bolt icon as Thunderbolt 3
3. Thunderbolt 5 (As of 2024)
- Up to 80 Gbps bi-directional bandwidth (Double that of Thunderbolt 4’s 40 Gbps).
- Up to 120 Gbps bandwidth for displays (With Bandwidth Boost — 120 Gbps upstream and 40 Gbps downstream for display-intensive use cases).
- Support for dual 6K or 8K displays (Compared to Thunderbolt 4’s dual 4K support).
4. USB-C DisplayPort "Alt Mode"
- Allows video output directly through the USB-C port using DisplayPort technology.
- Commonly supports one 4K display at 60Hz, but capabilities may vary.
- Often marked with a DisplayPort ("DP") symbol, but this feature may also be specified in your system's documentation.

Note: An example of a USB-C port with DisplayPort capabilities
How to Identify Your Laptop's Video Capabilities
To determine what video technologies your laptop supports, follow these steps:
1. Check Your Laptop's User Manual:
- Locate your laptop's user manual (often available online from the manufacturer's support site).
- Search for keywords like "Thunderbolt," "DisplayPort Alt Mode," or "video output capabilities."

2. Visit the Manufacturer's Website:
- Go to the support page for your laptop model and find the technical specifications section.
- Look for details on Thunderbolt or USB-C video capabilities.

3. Inspect Your Laptop's Ports:
-
Check for identifying symbols next to USB-C ports:
- Thunderbolt 3/4 ports may have a lightning bolt symbol.
- DisplayPort Alt Mode may be marked with a "DP" icon.
“What if I do not have the above technologies?”: USB 3.0 (Type-A) and Display Expansion
While USB 3.0 (Type-A) ports do not support native video output, they can still be used to extend to two or more displays using software-based solutions like DisplayLink or Silicon Motion's InstantView. These technologies enable video through USB-A ports by utilizing dedicated drivers and software.
If your laptop lacks Thunderbolt or USB-C video capabilities, DisplayLink or InstantView may be a viable alternative for expanding your display setup. A few other things to consider:
- Not all USB-C ports support video output. Checking your laptop's documentation is crucial to confirm this capability.
- Thunderbolt ports are backward compatible with USB-C DisplayPort Alt Mode but provide enhanced performance and flexibility.
If you have further questions about connecting your Plugable docking station or adapter to your laptop, please reach out to our support team for guidance.
What Video Output Conversions Are Possible?
When connecting displays across different ports—USB-C, HDMI, DisplayPort, DVI, and VGA—some conversions are possible, while some are not practically possible with simple adapters. Here’s a quick guide to what you can and can’t do when adapting video output formats.
Compatible Video Output Conversions
USB-C to:
HDMI – Supported
DisplayPort – Supported
DVI – Supported
VGA – Supported
Tip: Ensure your USB-C port supports DisplayPort Alt Mode for video output compatibility.
DisplayPort to:
HDMI – Supported via passive adapters or cables (if the source supports DP++), or via active adapters (if the source does not support DP++)
USB-C – Supported, but requires a bidirectional USB-C to DisplayPort adapter
DVI – Supported using an active DisplayPort to DVI adapter.
HDMI to:
DVI – Supported
VGA – Requires an active HDMI to VGA adapter (HDMI is digital, VGA is analog).
Incompatible or Limited Conversions
Not all conversions are technically or electrically possible, especially when going “backward” from digital standards to analog or from display-focused outputs to data-centric inputs.
These will not work without practically without more complex adapters:
HDMI to DisplayPort – Requires an active HDMI to DisplayPort adapter, which can have mixed results
HDMI, VGA, or DVI to USB-C – Not supported
VGA to HDMI, DVI, or DisplayPort – Being analog, VGA needs active conversion to work with digital video standards like HDMI or DisplayPort.
Understanding Uni-Directional vs. Bi-Directional Video Cables
When connecting a laptop/dock to a monitor, the right direction matters. Many “converter” cables only work one way. If the cable’s intended direction doesn’t match your source (video output) and display (video input), you’ll get no signal. Even if the connectors fit.
Key terms
- Source (Output): Laptop, dock, GPU port sending video
- Display (Input): Monitor/TV/projector receiving video
- Uni-directional: Works only one way (e.g., DP to HDMI)
- Bi-directional: Works both ways (common with HDMI to/from DVI, DP to/from mDP)
- Active adapter: Has electronics to convert formats/directions (e.g., HDMI to DP)
- Passive adapter/cable: No electronics; relies on source capabilities (e.g., DP++ to HDMI)
What typically works and what doesn’t
Rule of thumb: For DP to/from HDMI, assume DP to HDMI unless the product explicitly says HDMI to DP (Active).
Docking stations: quick notes
- USB-C/Thunderbolt docks output standard HDMI/DP signals (direction rules above still apply)
- DisplayLink-based docks still output HDMI/DP at the port (same direction rules)
- DP MST/daisy-chain works only in DP domain; converting to HDMI at the first hop ends DP-specific features downstream
Resolution, refresh, and features
- Achievable resolution/refresh (e.g., 4K60) depends on source + cable/adapter + display
- Features like HDR, HDCP, and VRR may require active adapters and sufficient bandwidth
- For long runs or flaky links, prefer active solutions
Shopping checklist (esp. on Amazon)
- Check the pictures: Listings often show Source to Display with icons/arrows (match this to your setup)
- Read the title/bullets: Look for explicit direction (“DP to HDMI,” “HDMI to DP (Active)”)
- Scan specs: “Active” vs. “Passive,” DP++, supported resolutions, and any power needs
Quick examples
- Dock (DP out) to Monitor (HDMI in): DPtoHDMI cable/adapter; use active if DP++ isn’t supported or for higher reliability
- Laptop (HDMI out) to Monitor (DP in): Active HDMItoDP adapter required
- USB-C laptop (Alt Mode) to HDMI monitor: USB-CtoHDMI cable/adapter; not reversible
FAQs
Why doesn’t my “DP to HDMI” cable work from an HDMI laptop to a DP monitor?
It’s uni-directional (DP to HDMI). Your path is the reverse and needs an active HDMI to DP adapter.
Are “bi-directional” cables truly both ways?
Commonly for HDMI to/from DVI and DP to/from mDP. For DP to/from HDMI, true bi-directional products are uncommon—verify the exact directions in the listing images/text.
Update Graphics Drivers in Windows
Up to date graphics drivers are necessary for ensuring the best performance of your computer's built-in display, as well as the capability and compatibility with external displays and docking stations.
Windows has a built-in system update service: Windows Update, however this may not provide up to date drivers or timely updates. We often see systems with out of date drivers, in some cases systems may not receive updated graphics drivers for months or even years, leaving the computer with drivers incompatible with the installed version of Windows 11.
However, we can manually update the graphics drivers to ensure the best possible performance, reliability, and compatibility.
The first step is to identify the graphics hardware, then downloading, and installing the latest drivers.
Identifying Graphics Controller
For notebooks and many desktop computers, the primary graphics controller is embedded in the processor, both AMD and Intel provide graphics driver updates based on the processor model, as well as for discrete graphics controllers. Our first step is to identify up the processor or graphics hardware model details:
- Right-click on the Start Menu and select Settings from the pop-up menu
- From the left column select System and from the bottom of the right side select About
- From the top of the about page the processor details will be on the right side, and duplicated lower down on the page.

- In this example the processor is a 12th Gen Intel(R) Core(TM) i7-1260P, we'll keep that detail for the next step.
If your computer has two graphics controllers (it may show "Multiple GPUs Installed" under Graphics Card) then we can get the graphics card model details from the Windows System Information Utility.
- Open the Start menu and search for "msinfo32"
- Select the first result
- From the left-column expand the Components section, then select Display

- In this example the Intel Iris(R) Xe Graphics is enabled by the processor, while the Intel(R) Arc(TM) Pro B60 Graphics is a discrete graphics controller.
Downloading the Drivers
Intel Graphics
- In a web browser navigate to the Intel Driver Download Page
- In the "Search Drivers & Software" field, search for the Intel graphics card model or CPU model, "Arc Pro B60" in this example

- Select the appropriate "Intel Arc Pro Graphics - Windows" or similar entry from the search results, for modern hardware Intel will normally have at least one release per month, the list should return recent results within the last month
- Select the Download button to save the installer to your Downloads folder or selected location
AMD Graphics
AMD provides an Auto-Detect utility, this works relatively well and can be used to update the system available from the AMD Drivers and Support page.
This page also provides a search and browse option for finding drivers and specific compatibility details, we'll look up the drivers for an AMD Ryzen Pro 5650U processor with Radeon Graphics:
- Navigate to AMD Drivers and Support page
- From the Browse section, fill out the processor details and click the Submit button
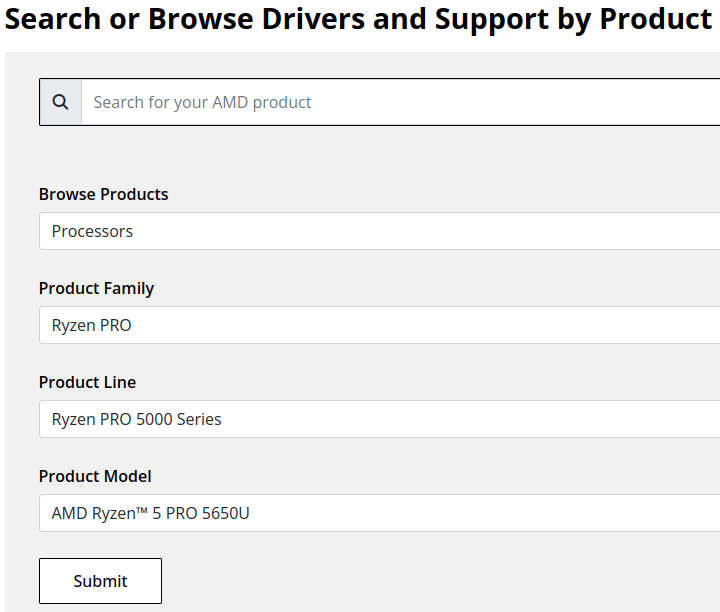
- Expand the "Windows 11 - 64-Bit Edition" section and select the Download button for the latest graphics drivers
NVIDIA Graphics
Like AMD, NVIDIA provides an automatic installation utility, as well as a Manual Driver Search on the NVIDIA Drivers support page. We will look up the drivers for an NVIDIA RTX 5080 graphics card.
- Navigate to NVIDIA Drivers support page
- Fill out the Manual Driver Search drop-downs and select the "Find" button when complete
- From the search results, select the "View" button for the GeForce Game Ready Driver or NVIDIA Studio Driver (if you need the studio driver features)
- Select the green Download button for the latest graphics drivers
Installing the Graphics Drivers
For the most part this is relatively simple, we recommend disconnecting any external docking stations or devices that are not necessary for the driver installation, and for notebook computers connecting the system's original power supply.
Double-click on the downloaded driver installation executable and follow the on screen steps.
For more in-depth details on Intel, AMD, and NVIDIA's driver installation processes check out our step-by-step guides here:
- Intel Driver Installation In Detail
- AMD Driver Installation In Detail
- NVIDIA Driver Installation In Detail
If you have any questions or would like a recommendation, feel free to reach out to our support at support@plugable.com
How-To: Install the latest Intel Graphics Drivers
For a step-by-step guide to identify your graphics hardware and download the appropriate drivers, check out our KB article here
Download the drivers for your GPU or Processor Graphics
- In a web browser navigate to the Intel Driver Download Page
- In the Search Drivers & Software field, search for the Intel graphics card model or CPU model, "Arc Pro B60" in this example
- Select the appropriate Intel Arc Pro Graphics - Windows or similar entry from the search results, for modern hardware Intel will normally have at least one release per month, the list should return recent results within the last month
- Select the Download button to save the installer to your Downloads folder or selected location
Install the Intel Graphics Driver
To update the Intel Graphics Drivers to the latest version from Intel's website:
- Save and close any open applications
- Navigate to the downloaded graphics driver, then right-click on the saved driver installation file and select Run as administrator to start the installation process
- Allow the Intel driver installation through the User account control window, the drivers will be extracted
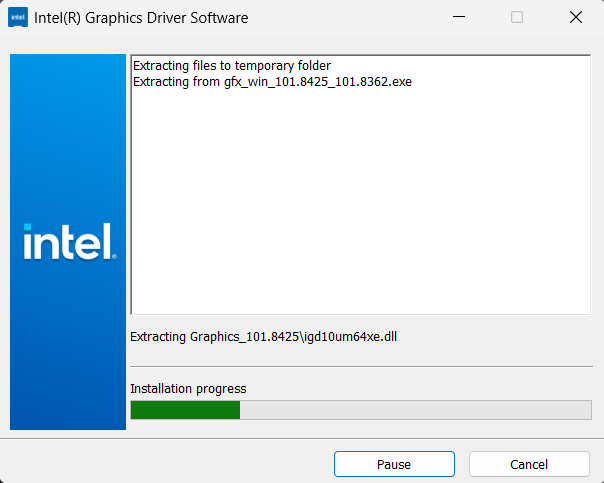
- When the extraction is complete select the Begin installation button

- Agree to the Intel Software License Agreement by selecting the I agree button
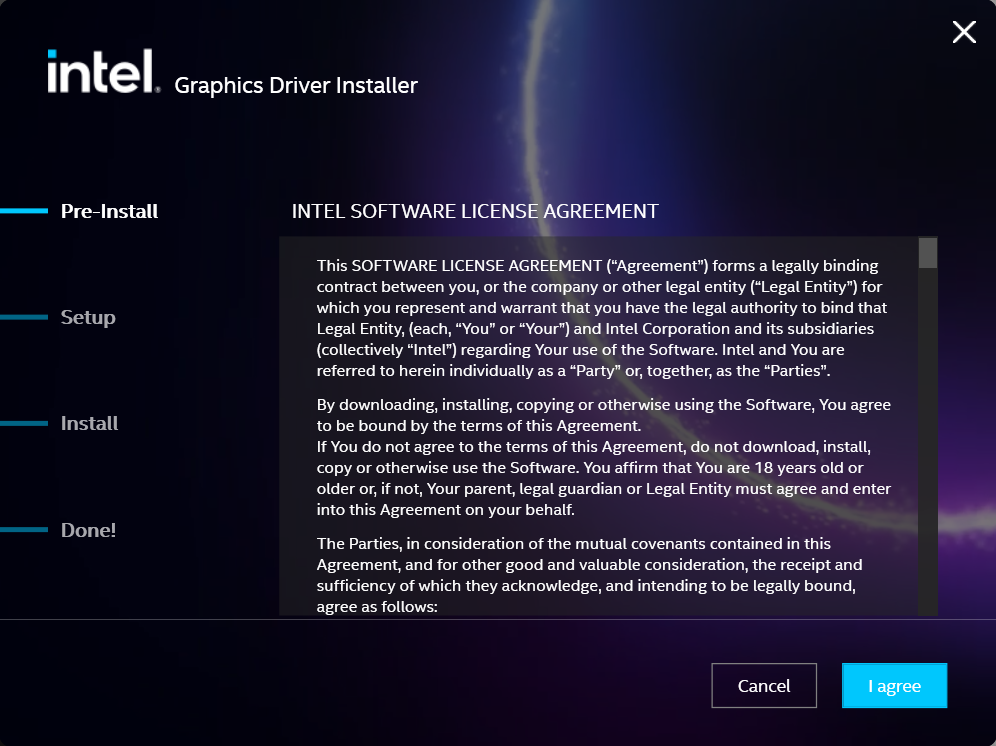
- Ensure all applications are saved and closed before selecting the I agree button
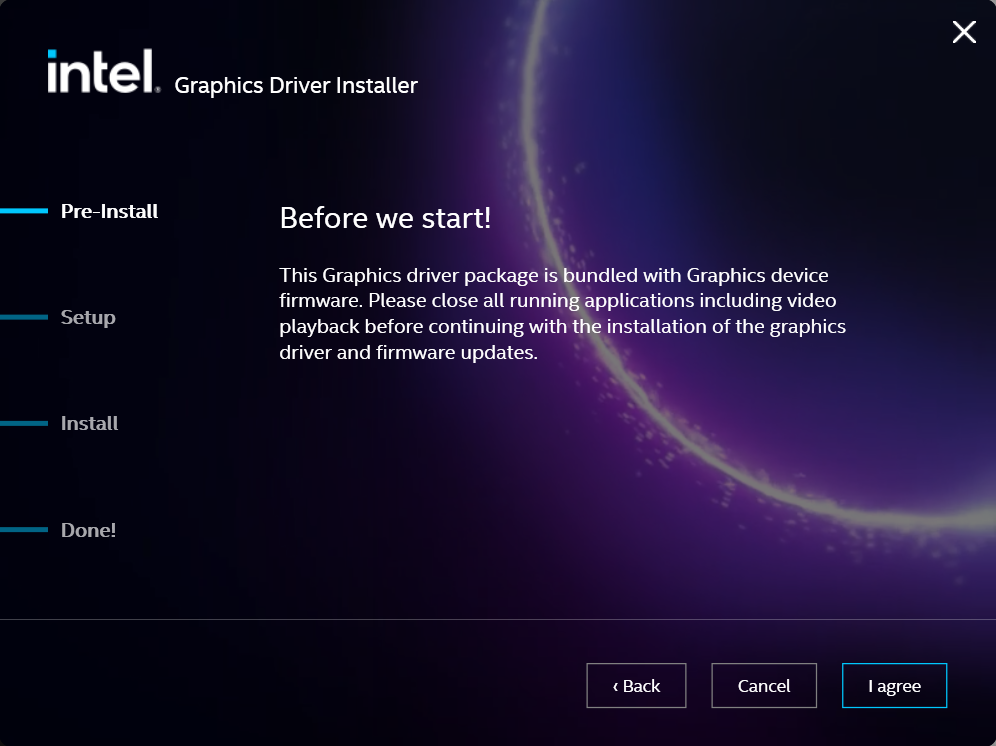
- For most installations, we recommend not selecting the Execute a clean installation checkbox. This option will remove previous driver versions and can lead to Windows Update reverting to an even older graphics driver. Select the Start button to proceed

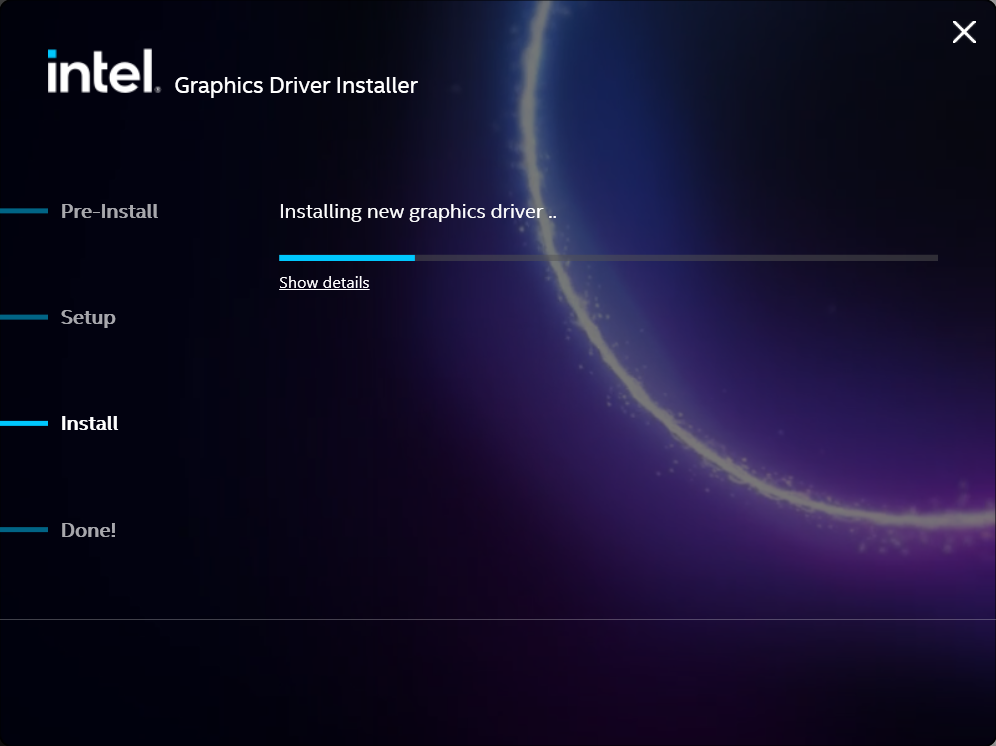
- The installation process will proceed, but can take some time to complete
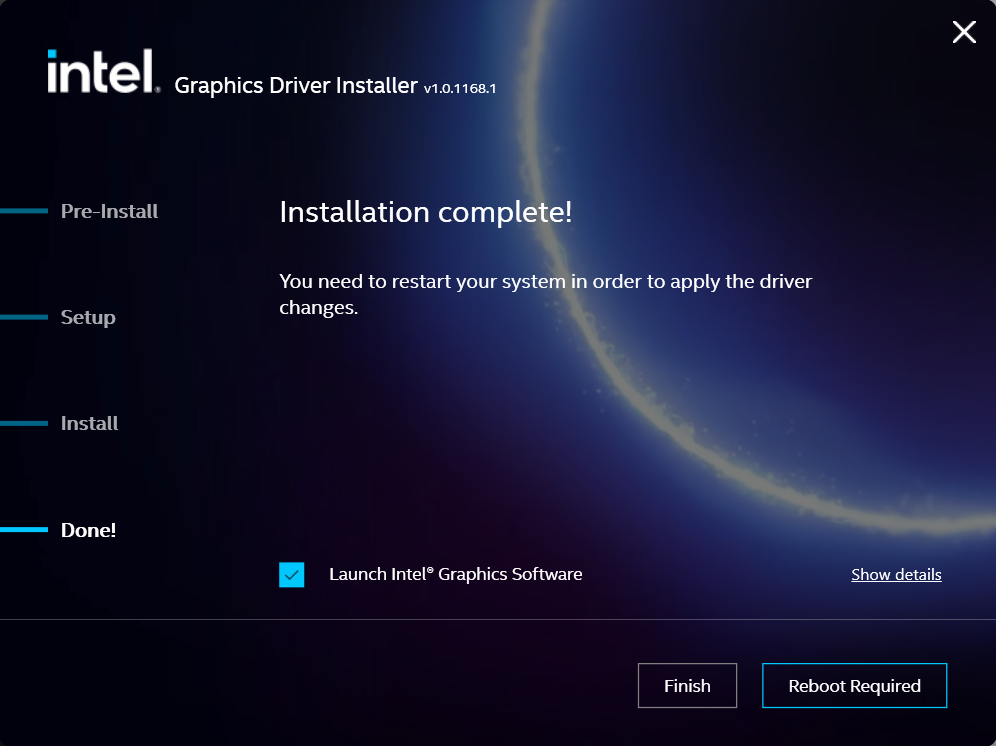
- When the installation has completed, deselect the Launch Intel Graphics Software checkbox - we don't need that right now, select the Reboot Now button to restart the computer applying the new graphics drivers
Windows should now detect the Intel Graphics Controller in the Device Manager and show the latest drivers.
If you have any questions or would like a recommendation, feel free to reach out to our support at support@plugable.com
How-To: Install the latest AMD Graphics Drivers
For a step-by-step guide to identify your graphics hardware and download the appropriate drivers, check out our KB article here
Download the drivers for your GPU or Processor Graphics
- In a web browser navigate to the AMD Drivers and Support page
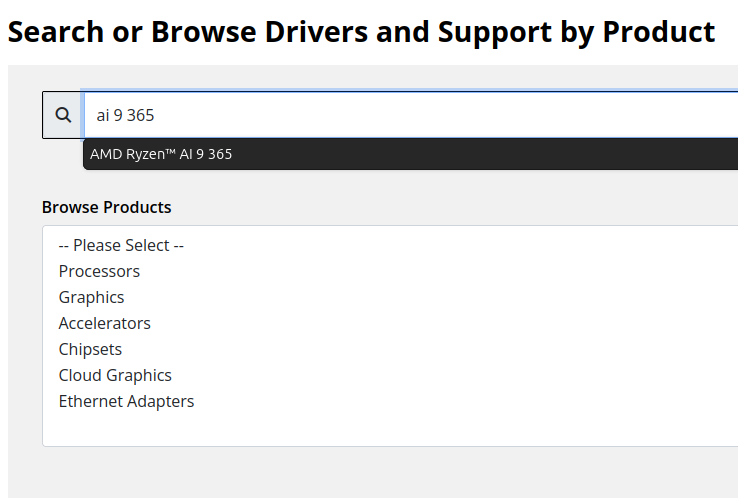
- In the Search for your AMD product field, type in the model name, for example “RX 5600XT” for the AMD Radeon RX 5600 XT graphics controller, or a processor model like "AI 9 365", then select the best fitting result and select the Search button - note: Searching for a processor the "™" is required, so I recommend searching for the text after that symbol.
- On the results page, expand the section for Windows 11 64-bit then select the Download button for the latest AMD Software: Adrenalin Edition drivers, AMD may not provide a direct download for all hardware, in that case use the Auto-Detect and Install option
- Save the installer to your Downloads folder or selected location
Install the AMD Graphics Driver
To update the AMD Graphics Drivers to the latest version from AMD’s website:
- Save and close any open applications
- Navigate to the downloaded graphics driver, then right-click on the saved driver installation file and select Run as administrator to start the installation process
- Allow the Intel driver installation through the User account control window, the drivers will be extracted
- For most users the express installation is fine, ensure all applications are saved and closed selecting the Accept & Express Install button. If you have been having issues with older graphics drivers causing crashes or errors the Factory Reset (Optional) checkbox may be selected, but it isn’t necessary for most installations.

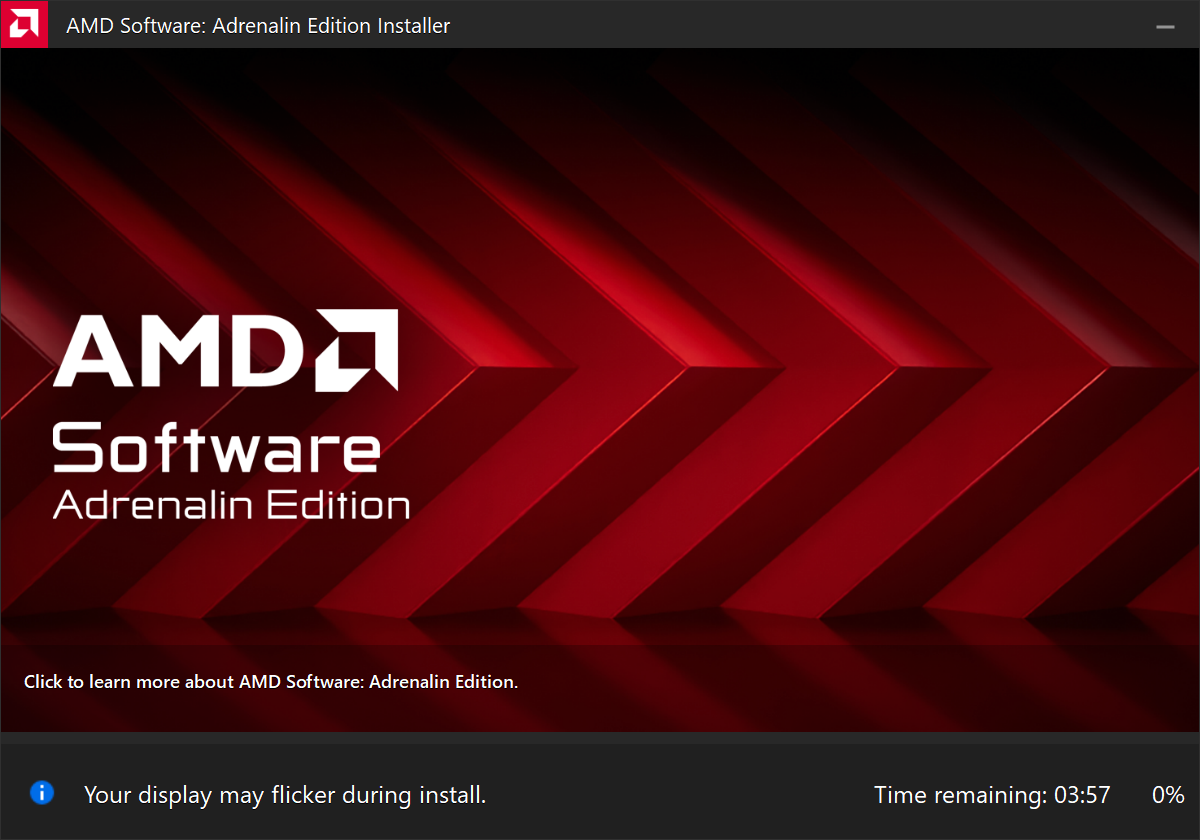
- The installation will proceed, the displays may flicker or flash off/on while the drivers are installing.
- When complete you will be prompted to Launch AMD Software: Adrenalin Edition and Keep AMD software up to date, you can uncheck the Launch AMD Software option
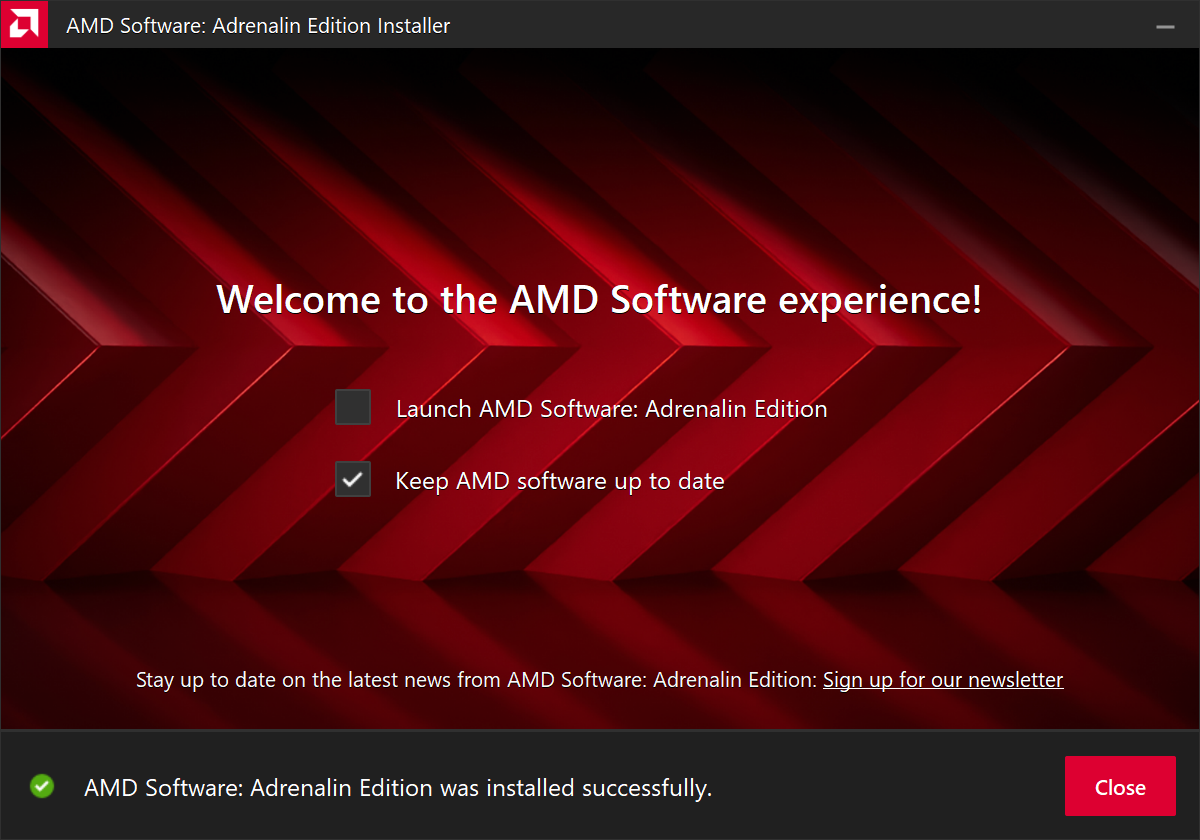
- Restart the computer to ensure the latest drivers are loaded from boot Start Menu > Power Icon > Restart
Windows should now detect the Intel Graphics Controller in the Device Manager and show the latest drivers.
If you have any questions or would like a recommendation, feel free to reach out to our support at support@plugable.com
How-To: Install the latest NVIDIA Graphics Drivers
For a step-by-step guide to identify your graphics hardware and download the appropriate drivers, check out our KB article here
Download the drivers for your GPU
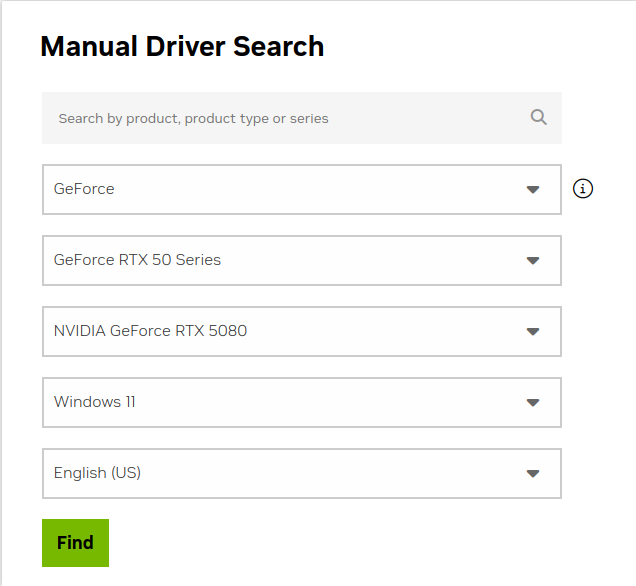
Check your invoice for the specific model of NVIDIA graphics card, for this example we will use the RTX 5080 (the manufacturer is not relevant).
- In a web browser navigate to the NVIDIA Driver Download Page
- In the Manual Driver Search field, search for the NVIDIA graphics card model, "RTX 5080" in this example
- Select the GeForce RTX 50 Series | NVIDIA GeForce RTX 5080 | Windows 11 entry from the list
- Left-click the Find button
- Select either View buttons from the GeForce Game Ready Driver or NVIDIA Studio Driver
- Select the Download button to save the installer to your Downloads folder or selected location
Install the NVIDIA Graphics Driver
To update the NVIDIA Graphics Drivers to the latest version from NVIDIA's website:
- Save and close any open applications
- Navigate to the downloaded graphics driver, then right-click on the saved driver installation file and select Run as administrator to start the installation process
- Allow the NVIDIA driver installation through the User account control window
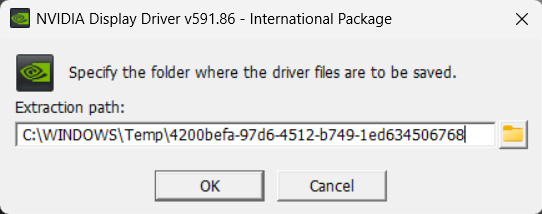
- Click OK to extract the NVIDIA Display Driver package contents
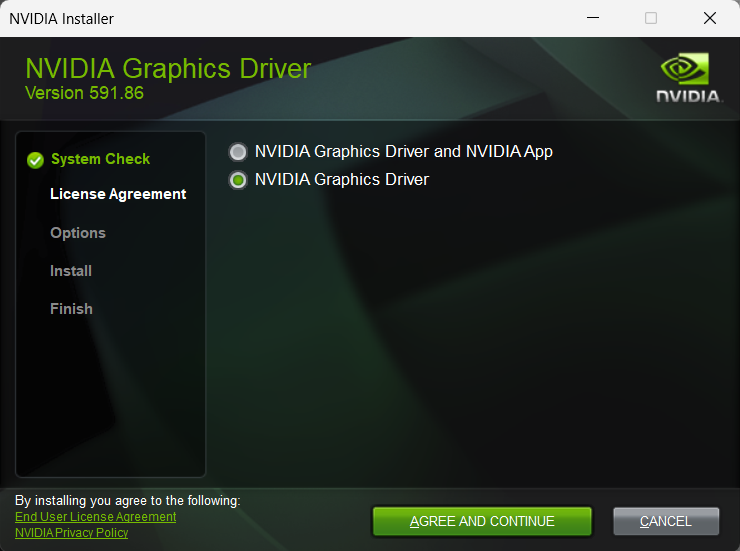
- At the System Check step, select either the NVIDIA Graphics Driver with NVIDIA App or the NVIDIA Graphics Driver alone, the NVIDIA App is gaming oriented and unnecessary for most users. Select AGREE AND CONTINUE
- At the License Agreement step, select the Express (Recommended) radio button then select NEXT to continue

- The installation will take some time to complete
- When complete please restart the computer Start > Power > Restart
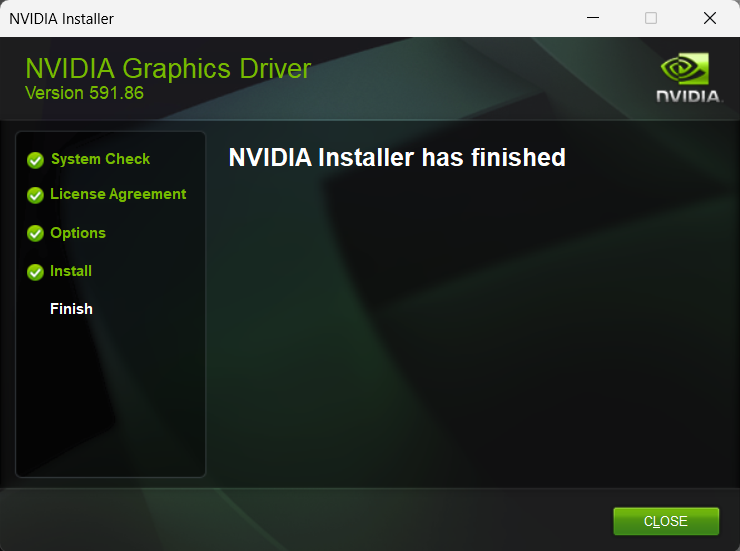
Windows should now detect the NVIDIA Graphics Controller in the Device Manager and show the latest drivers.
If you have any questions or would like a recommendation, feel free to reach out to our support at support@plugable.com


- Choosing a selection results in a full page refresh.