


Hassle free, 2-Year Warranty
Fast, Free Shipping on Orders $35+
Lifetime Technical Support
30-Day Money Back Guarantee
Plugable USB 2.0 Sharing Switch
$14.95 USD
SKU: USB2-SWITCH2Amazon Rating : (1760 Reviews)
Features
- Simple Device Sharing— Compact one-touch design allows you to easily switch usb devices between 2 computers
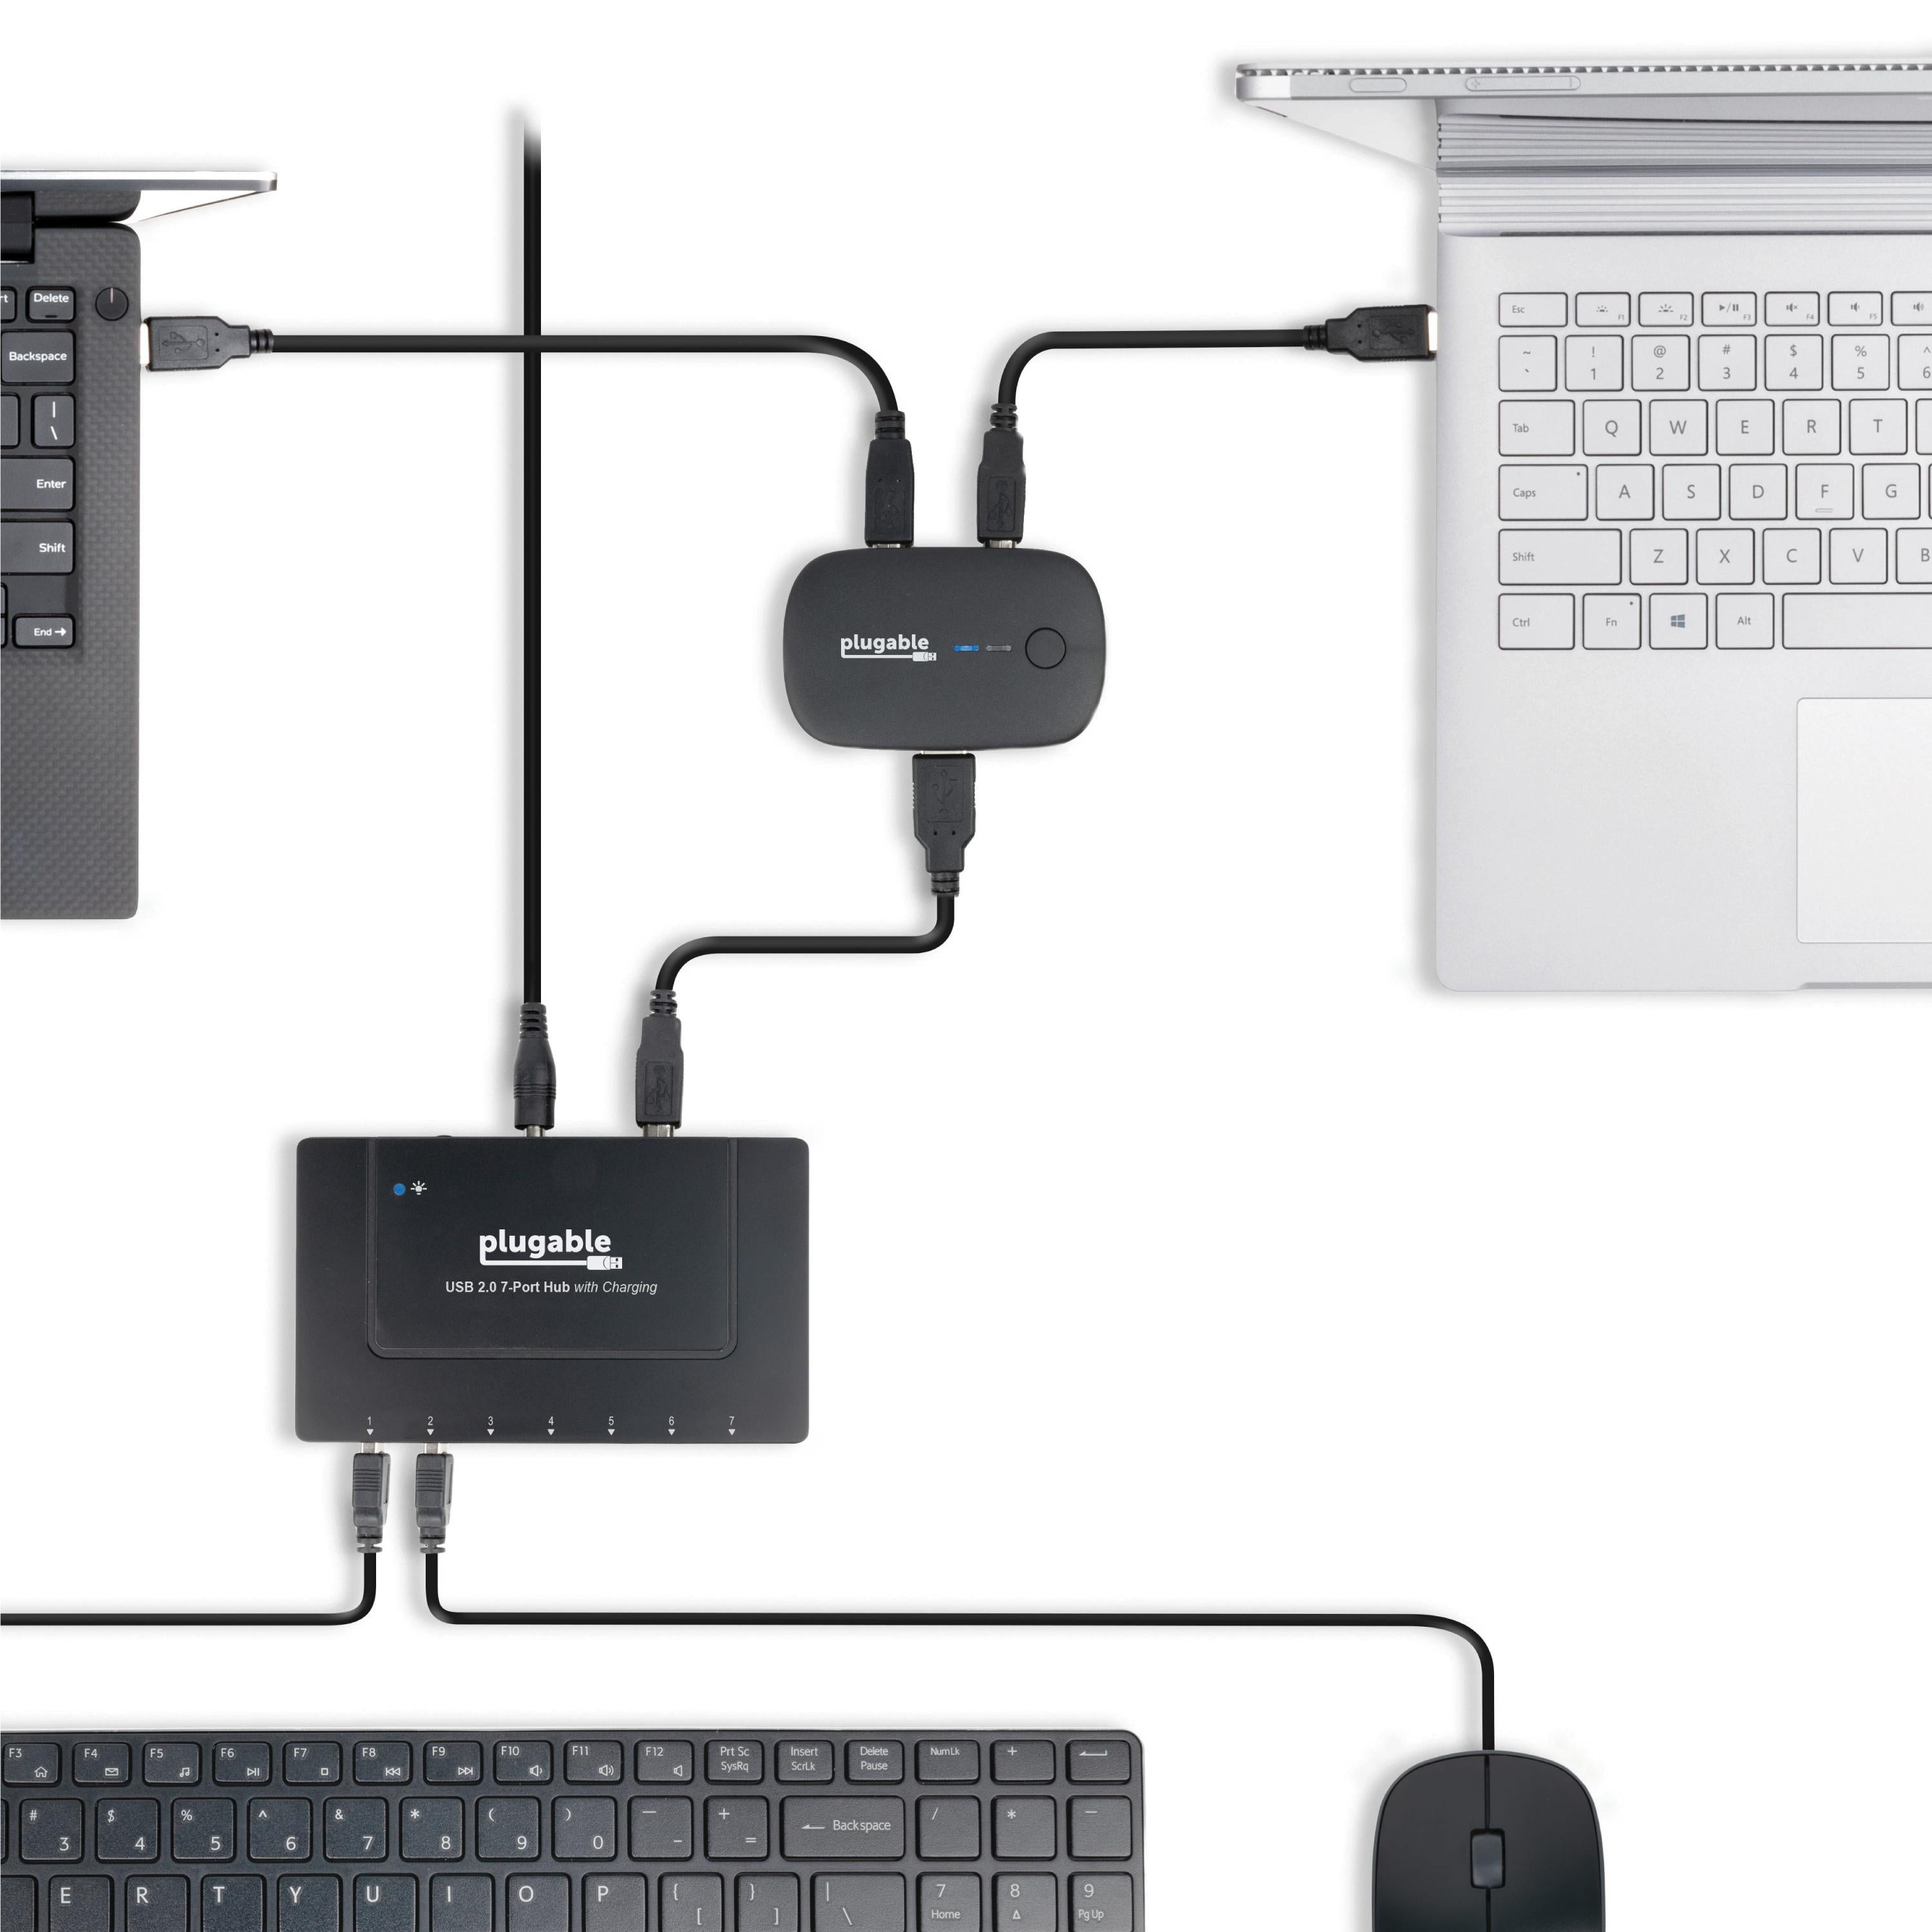
- One Button Toggle— Great for sharing a printer, scanner, or other USB device between two computers (one computer at a time). Attach a powered USB hub that is connected to the keyboard, mouse, and USB 2.0 graphics adapter for an all-USB KVM solution with this USB AB switch
- Plug and Play— Switch works with any USB-enabled computer without drivers - attached devices may require drivers as usual. LED indicator lights show which connected computer has control of the attached devices
- Compatibility— Not compatible with docking stations or USB graphics adapters. Ideal for powered USB 2.0 hubs, printers, scanners, keyboards, mice, or other USB 2.0/1.1 devices
- 2-Year Coverage, Lifetime Support— Every Plugable product, including this USB 2.0 sharing switch, is covered against defects for 2 years and comes with lifetime support. If you ever have questions, contact our North American-based team - even before purchase
For volume orders or business inquiries contact sales@plugable.com
Free 3-Day Continental U.S. Shipping on Orders Over $35!


Share Your Device(s) With Simplicity
The Plugable USB 2.0 Sharing Switch (USB2-SWITCH2) is the ideal solution for one-touch switching of access between two computers to a:
- Powered USB 2.0 hub
- Wired USB keyboard/mouse
- One wireless keyboard and mouse two computers
- USB printer or scanner
- Most other USB 2.0/1.1 devices
*Not compatible with USB-A or USB-C docking stations or USB graphics adapters
Features
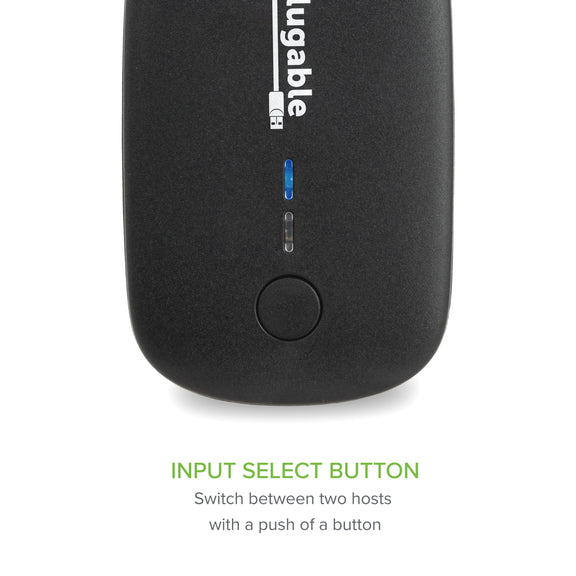
One-Touch Switching
A single button press is all that's required to toggle between connected computers. Blue LED indicator lights show which connected computer has control.
Potential To Do More
Looking to provide two-computer access to a single keyboard and mouse, or other peripherals? Just attach the switch to a powered USB hub, then connect all your desired peripherals for an all-USB solution. Ideal for a variety of USB applications including as a scanner or printer AB switch.
Just Plug In And Switch Away
Switch works with any USB-enabled computer without drivers. Attached external devices will still require drivers as usual.
In The Box
- 1x Plugable USB 2.0 Sharing Switch
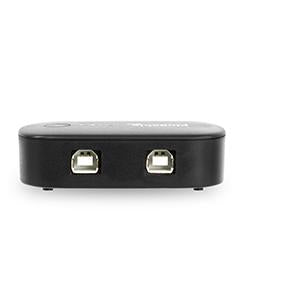
- 2x USB-A to USB-B Cables (1.5m/5ft)
System Compatibility
- Windows 11, 10, 8.x, 7, Vista, XP
- macOS
- ChromeOS
- Linux
Important Notes
- Not compatible with docking stations or USB graphics adapters
- USB switch is not bidirectional. Must be used to share device(s) between two computers
- Drivers may be required for the connected USB device
Additional Features
- The switch is backward compatible with USB 1.1 devices
- Compatible with USB hubs for switching multiple peripherals
- Simple passive USB switch means no power adapter is needed (bus-powered)
Incompatible Setups and Features
- Not compatible with docking stations or USB graphics adapters
- Autosensing of hosts is not supported; manual press of the button is required
- The use of USB-A to USB-B cables greater than 6ft/1.8m is not supported
| How is this meant to be used? | USB2-SWITCH2 shares a single USB 2.0/1.1 device or USB hub between two computers. Plug your device into the USB-A port, and each computer into the USB-B ports using the included cables. Switch between computers using the button on the product. |
| What devices are compatible? | USB2-SWITCH2 is compatible with most USB 2.0 or USB 1.1 devices including printers/scanners, keyboard, mouse, and even powered USB 2.0 hubs to connect multiple devices. |
| Docking station compatibility? | USB2-SWITCH2 is not compatible with docking stations or USB graphics adapters. USB2-SWITCH2 allows for a USB 2.0 connection which cannot provide enough bandwidth for these types of devices to function correctly. |
| Does it support USB 3.0? | The Plugable USB3-SWITCH2 is a great alternative to USB2-SWITCH2 if you need USB 3.0 for the device you wish to share between computers. This product is linked within the comparison chart below. |
 |
 |
|
|---|---|---|
Number of Computers Supported |
2 |
2 |
Port Type |
USB 2.0 |
USB 3.0 |
Maximum Data Transfer Speed |
480 Mbps |
5 Gbps |
Ideal When Used With |
Keyboards, mice, printers, scanners, or other high speed/full speed USB peripherals |
USB 3 docks, USB graphics adapters, keyboards, mice, printers, scanners, or other ultra-high speed USB peripherals |
Filter Help Articles and Frequent Questions by Category
Choose one or more filters within each category to narrow down the articles. Each selection will result in only displaying articles that include all of your choices.
Articles
Well how about that, it looks like we don't have any articles matching your filters! Try removing one of your choices or clear the filters to show all articles.
You can always contact support if you need help too!
USB Port Types
USB-A

pietz, CC BY-SA 3.0 , via Wikimedia Commons
This is the standard USB connection that most computers offered prior to the introduction of USB Type-C (USB-C). Even after the introduction of USB Type-C, this is still quite common.
It can provide data transfer rates up to the USB 3.1 Gen 2 (10 gbps) specification depending on the host and device, but does not directly support video in the way that USB-C Alternate Mode does. This limitation makes DisplayLink USB graphics adapters and docking stations ideal on systems that do not have USB-C, or in instances where more displays are needed beyond available video outputs of a PC.
USB-B

Fred the Oyster, CC BY-SA 4.0 , via Wikimedia Commons

IngenieroLoco, CC BY-SA 4.0, via Wikimedia Commons
This type of connection comes in a couple different styles depending on whether USB 3.0 and higher transfer rates are supported (bottom graphic). Usually this type of connection is used to plug into USB devices that do not have a fixed cable connected, such as USB docking stations, USB hubs, printers, and others.
USB Mini-B

Fred the Oyster, CC BY-SA 4.0 , via Wikimedia Commons
One of the first connectors for charging a smartphone, wireless game controller (such as the Sixaxis and DualShock 3), and other small devices such as external hard drives. Not commonly used today, but is still used in some cases. Most devices using USB Mini B are using USB 2.0, though a USB 3.0 variant does exist. This specification also added USB On-The-Go (OTG) functionality, though it is more commonly implemented with Micro USB.
USB Micro-B

Fred the Oyster, CC BY-SA 4.0, via Wikimedia Commons

IngenieroLoco, CC BY-SA 4.0 , via Wikimedia Commons
A smaller connector that serves many of the same uses as the Mini B connector, with added optional features such as Mobile High-Definition Link (MHL) to allow devices like smartphones to output video to larger displays without requiring a dedicated port for video output.
The larger variant of USB-B is most commonly used for external hard drives for higher 5Gbps transfer rates.
USB-C, Thunderbolt™ 3, and Thunderbolt™ 4
Niridya , CC0, via Wikimedia Commons
The most recent USB connection, USB Type-C (USB-C), represents a major change in what USB can do. The connector is smaller, can be connected in two orientations, is able to carry substantially more power and data, and can directly carry video signals of multiple types (HDMI, DisplayPort, etc.) Intel has also adapted the USB-C connector for use with Thunderbolt 3 and Thunderbolt 4.
It is important to note that while all Thunderbolt 3 and Thunderbolt 4 connections are USB-C, not all USB-C connections can be used with Thunderbolt 3 or Thunderbolt 4 devices.
More details regarding physical USB connections can be found on Wikipedia . The graphics depicted here are adapted from Wikimedia Commons by various artists under the Creative Commons Attribution-Share Alike 3.0 Unported license.
Does the Plugable USB Sharing Switch Support Auto-Sense switching?
Why the Sharing Switch Requires Manual Switching
The switch is designed as a mechanical-style toggle to ensure a stable connection between the peripheral and the active host. Implementing autosense could lead to accidental switching if a computer performs a background task or power cycle while the other terminal is in use.
How to Switch Between Computers
To change which computer has control of the connected USB devices, press the silver button located on the top of the switch . the LED indicator will change to show which host port is currently active.
Applicable To
USB3-SWITCH2, USB2-SWITCH2
Why Is the USB Switch Not Recommended for Use With Hard Drives, Flash Drives, or Other Storage Devices?
Pressing the button on the switch acts identically to abruptly unplugging a storage device from one system and plugging it into another. Because of this, using storage devices with the switch increases the risk of data loss or file system corruption if the drive is being accessed when the switch occurs.
Why the Switch Can Cause Data Corruption
To access data on any storage device, the operating system must first "mount" the file system. If a device is disconnected or loses power—such as when switching control from one computer to another—without going through the proper unmounting or ejection process, data corruption can occur. This is the same reason operating systems prompt users to check a drive for errors after it is removed without being safely ejected.
How to Safely Switch Storage Devices
If you still wish to use a storage device with the switch, you can drastically reduce the risk of data corruption by ejecting the device manually before switching.
Windows: Click the Safely Remove Hardware icon in your taskbar and stop/eject the appropriate device.
Mac: Open Finder, navigate to Devices on the left, and click the eject icon next to the corresponding device.
Linux: Unmount the device by ejecting it through your graphical environment, or by using the umount command.
Windows Only Alternative: Enable the Quick removal setting for your storage device inside your operating system. Windows 7 and later will often implement this setting by default on devices that it detects as portable, but confirming it is enabled can help. Note that this is not as effective as manually ejecting the device.
Applicable To
USB3-SWITCH2 USB2-SWITCH2
Is the USB2-SWITCH2 Compatible With USB 3.0 Devices?
While the USB2-SWITCH2 can be physically connected to USB 3.0 devices, the connection speed will be bottlenecked to USB 2.0 speeds, which can cause detection and latency issues, most notably in docks.
Due to this, Plugable does not recommend using the USB 2.0 switch with USB 3.0 products, especially devices that have video/USB/Ethernet functionality.
Do Plugable products support the Apple SuperDrive?
Unfortunately Plugable products do not support the Apple SuperDrive.
The Apple SuperDrive has stringent power requirements that can only be met by directly connecting the SuperDrive to your host laptop. As a result at this time Apple recommends only using their USB-C adapter cables. You can find more information on that here → How to connect the Apple USB SuperDrive
If you have purchased a Plugable product to use with your Apple SuperDrive, and would like some additional assistance please do not hesitate to reach out. You can do so by emailing support@plugable.com, or going to Plugable.com/Support.
Can I use USB2-SWITCH2 with my docking station or USB graphics adapter?
No, USB2-SWITCH2 is not compatible with docking stations or USB graphics adapters. USB2-SWITCH2 allows for a USB 2.0 connection which cannot provide enough bandwidth for these types of devices to function correctly. It's recommended to use USB3-SWITCH2 if you need to switch a USB 3.0 Type-A docking stations between two computers.
What types of devices are compatible with USB2-SWITCH2?
USB2-SWITCH2 is compatible with most USB 2.0 or USB 1.1 devices including printers/scanners, keyboard, mouse, and even powered USB 2.0 hubs to connect multiple USB 2.0 or USB 1.1 devices.
Use-Cases and Compatibility for the USB3-SWITCH2 and USB2-SWITCH2
USB switches provide a simple yet powerful way to share USB peripherals like keyboards, mice, and printers across multiple systems. When paired with a USB 3.0 dock, they allow you to easily swap between multiple hosts with the single press of a button.
Common Use-Cases for the USB3-SWITCH2
-
Home Office Multi-System Use
Remote workers with separate devices for work and personal use can leverage USB switches and USB 3.0 DisplayLink-based docks such as the UD-3900 or UD-6950Z to share equipment like printers or webcams. This eliminates the need for duplicate peripherals. -
Education and Training
Classrooms and labs can simplify device sharing between teacher and student computers. Adding a USB3-SWITCH2 to your UD-3900 dock setup ensures easy access without constant reconnection.
Common Use-Cases for the USB2-SWITCH2
-
Small Businesses or Studios
Photographers, designers, and other professionals can benefit by specialized equipment like scanners between multiple editing or design stations. -
Swapping USB input devices between Laptops
Users can benefit by sharing external mouse and keyboards between multiple computers
However, there are important limitations to consider when using a USB Type-A switch. Both the USB3-SWITCH2 and USB2-SWITCH are not compatible with docks or downstream devices that use USB-C Power Delivery (PD) or USB-C Alt Mode (for video delivery). Additionally, the USB2-SWITCH2 is only intended for use with lower bandwidth devices such as mice and keyboards, or other USB 2.0 Type-A devices.


- Choosing a selection results in a full page refresh.