


Hassle free, 2-Year Warranty
Fast, Free Shipping on Orders $35+
Lifetime Technical Support
30-Day Money Back Guarantee
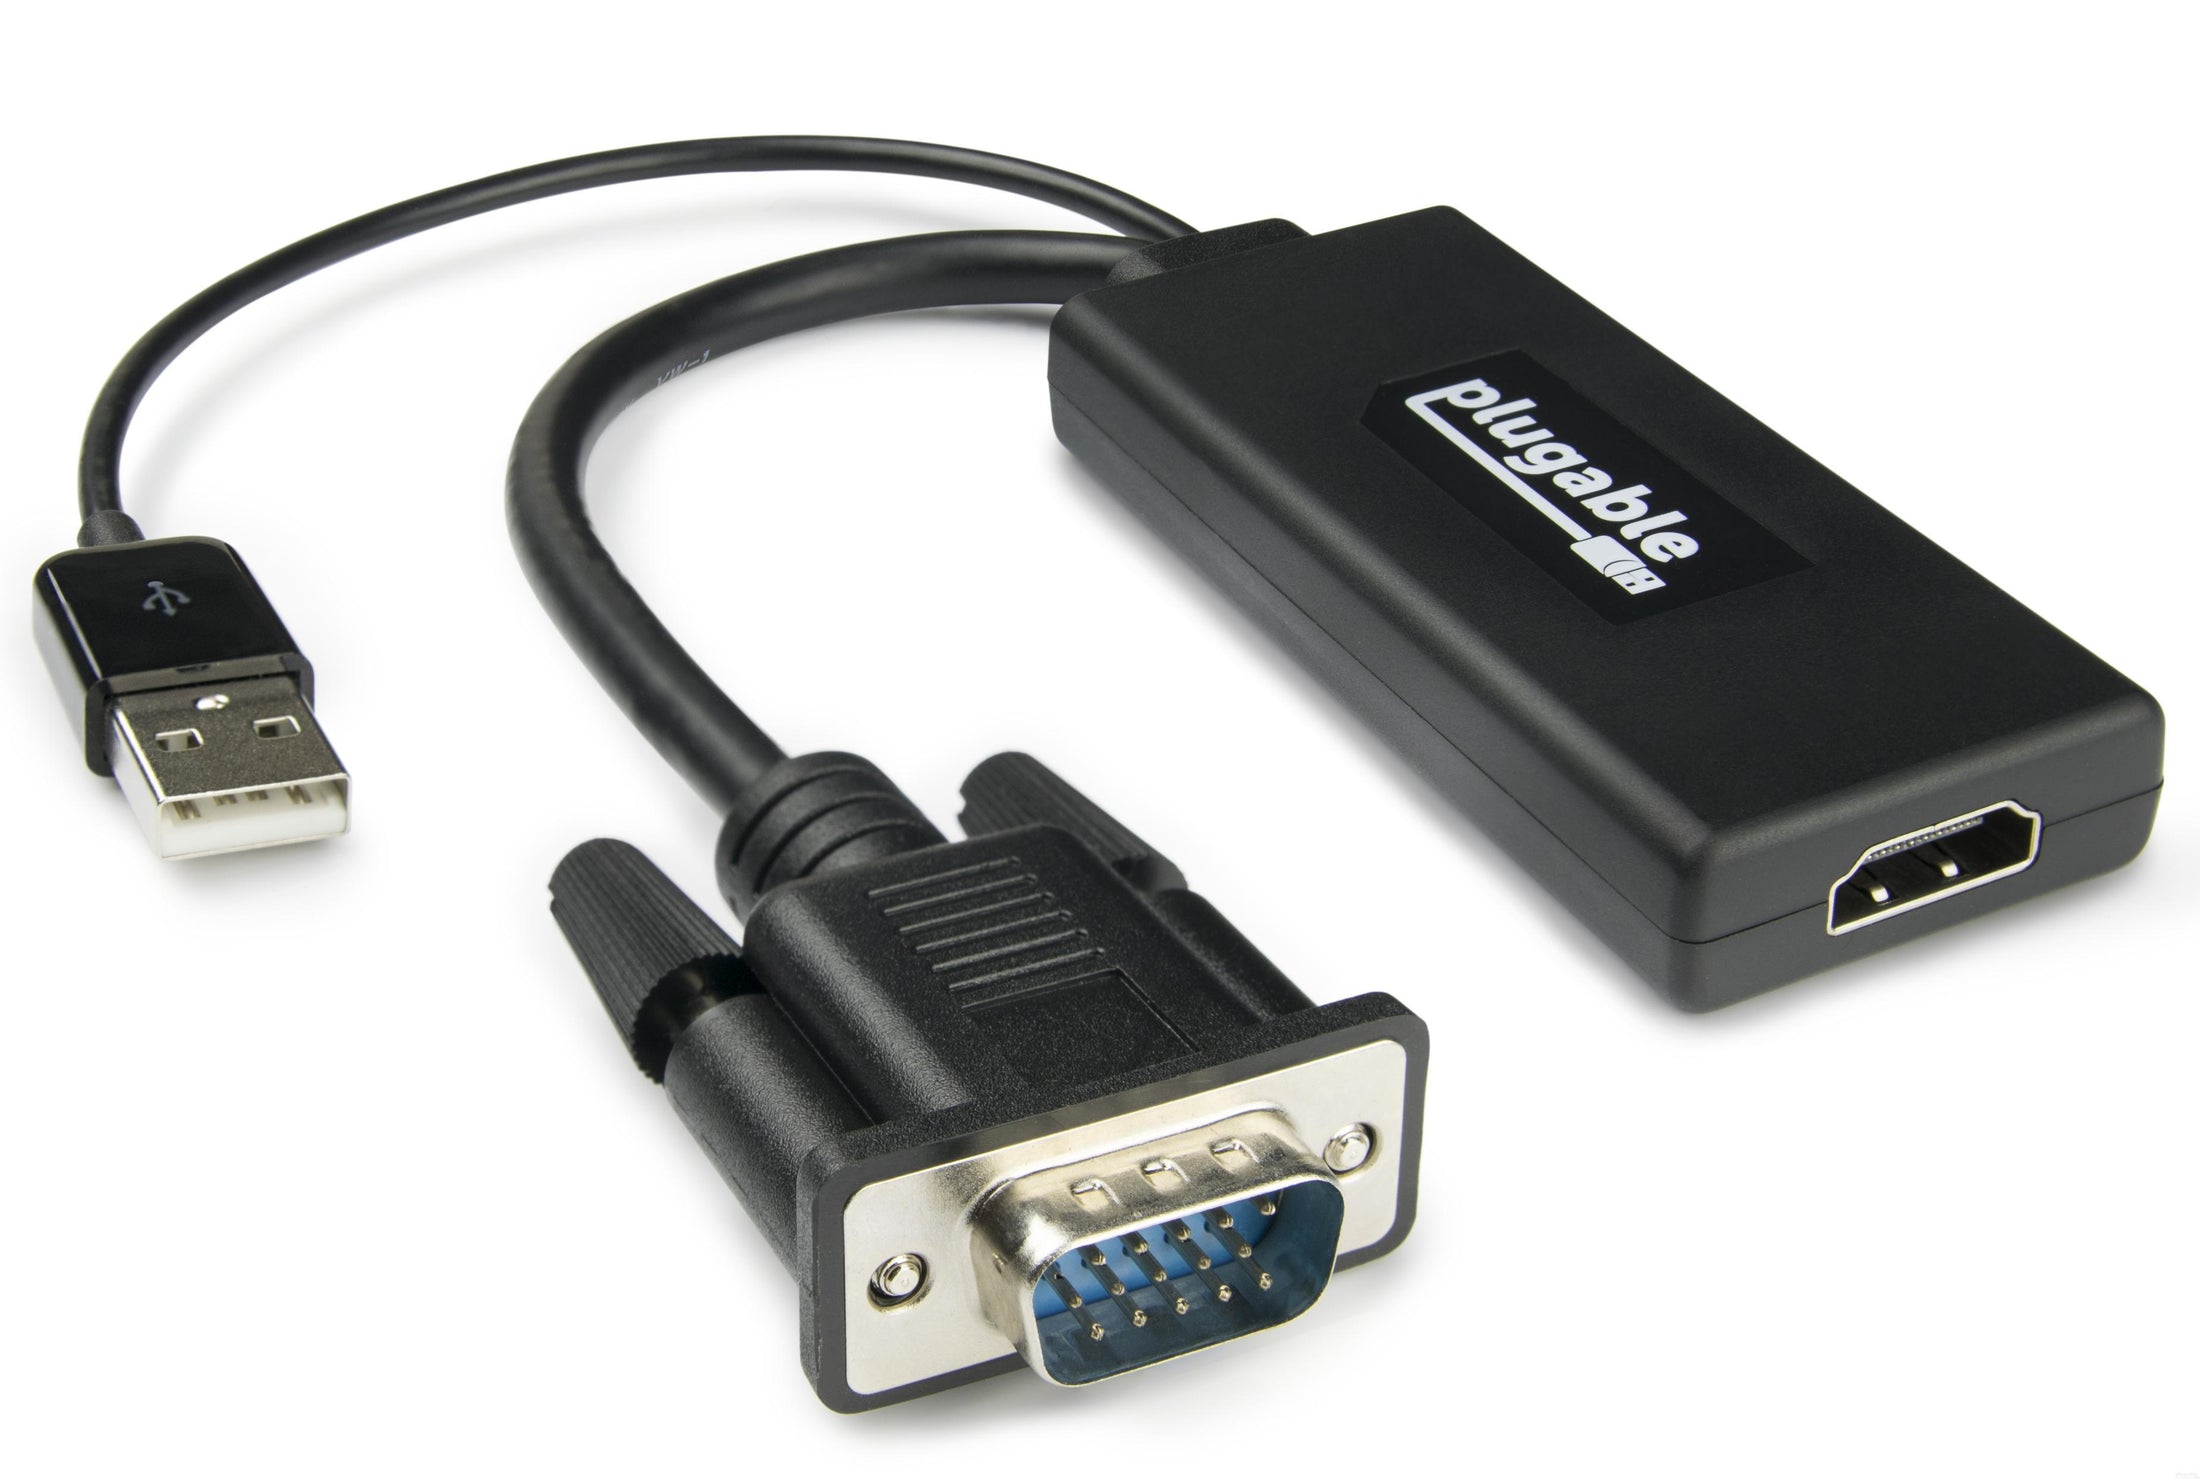
Plugable VGA to HDMI Active Adapter with Audio
$27.95 USD
SKU: VGAM-HDMIFAmazon Rating : (34 Reviews)
Features
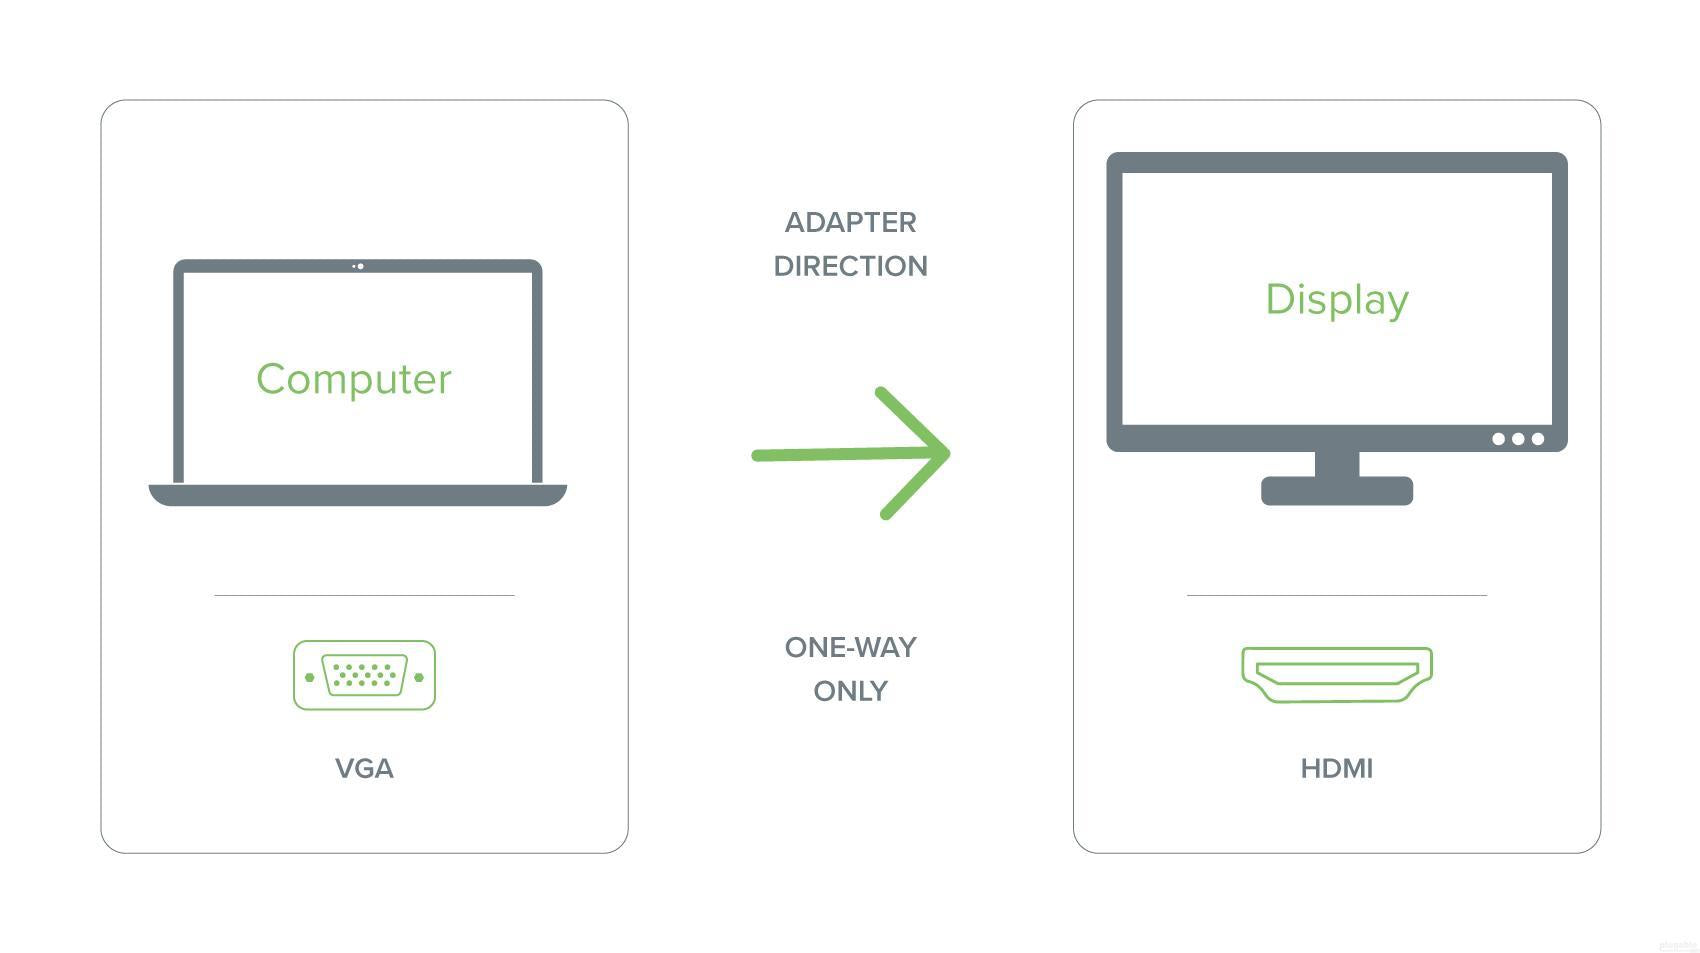
- VGA to HDMI—Connect a legacy VGA output on a laptop, or desktop to a modern HDMI monitor or television
- Supported Resolutions—Compatible with HDMI displays up to 1920x1080, and lower resolutions including 1600x900, 1366x768, and 1280x720 (720p)
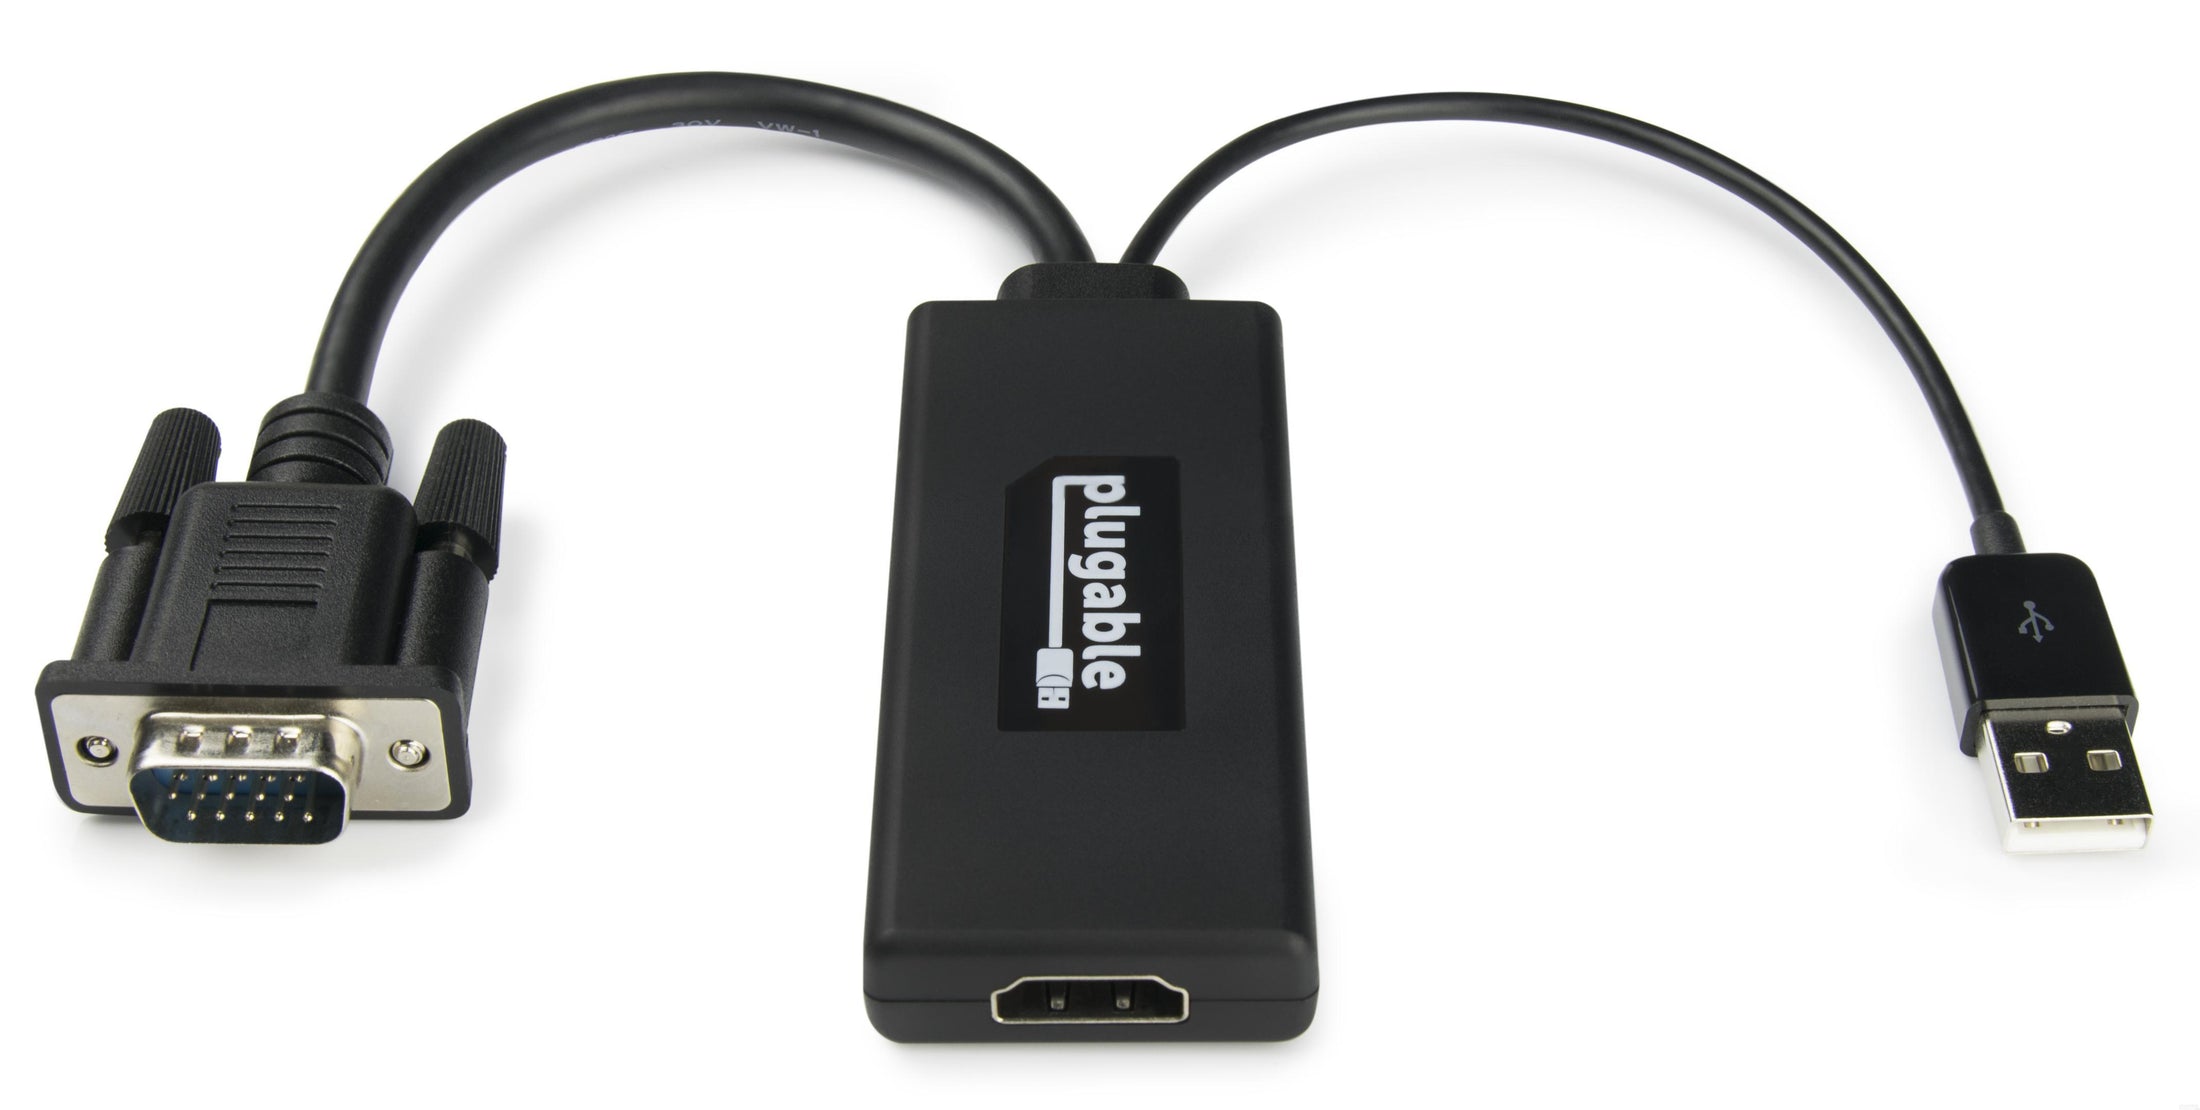
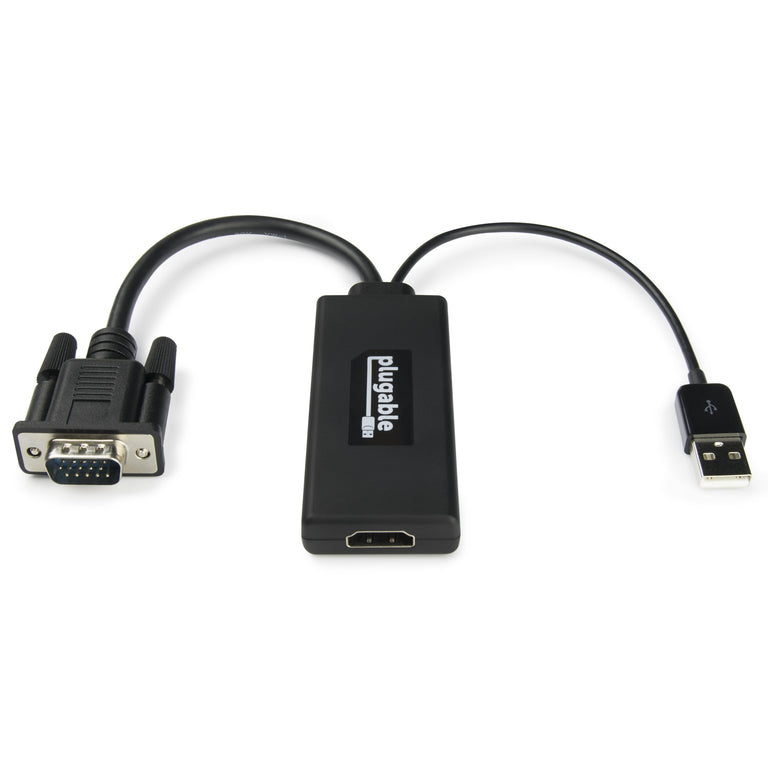
- Simple Installation—No installation software or drivers required; connect to the display's HDMI cable, then connect the VGA end to the computer, finally connect the USB Type-A end to the computer for power
- Compatibility—Compatible with desktop and laptop computers with D-Sub 9-pin VGA outputs, due to power requirements connecting the USB to the computer is required, and for audio to the HDMI display
- 2-Year Coverage, Lifetime Support—Every Plugable product, including this VGA to HDMI adapter, is covered against defects for 2 years and comes with lifetime support. If you ever have questions, contact our North American-based team - even before purchase
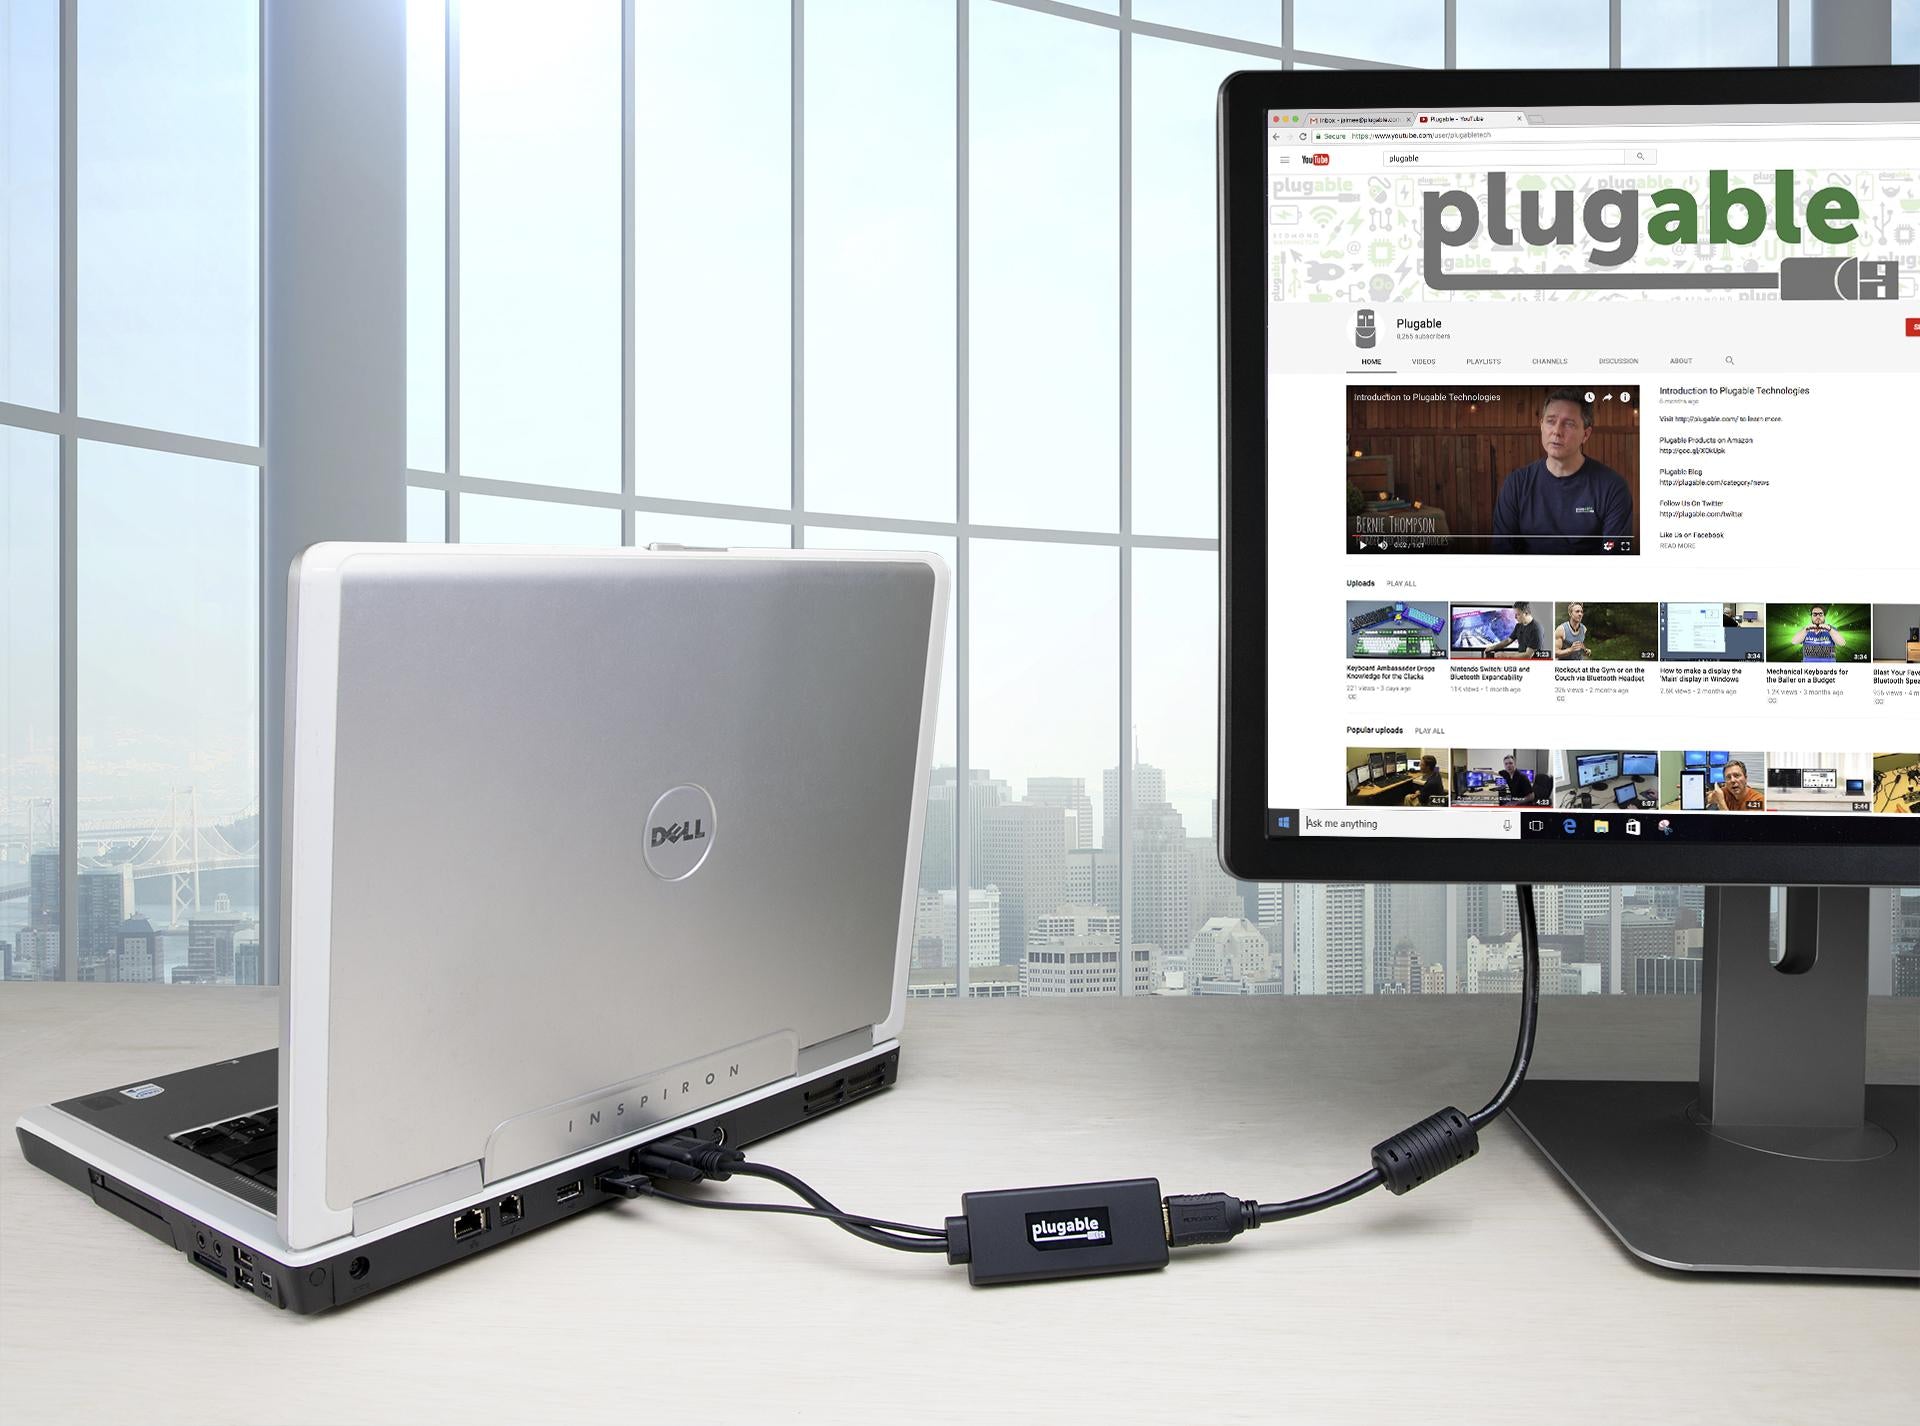
Revitalize a Laptop’s or Older Graphics Card With VGA Output
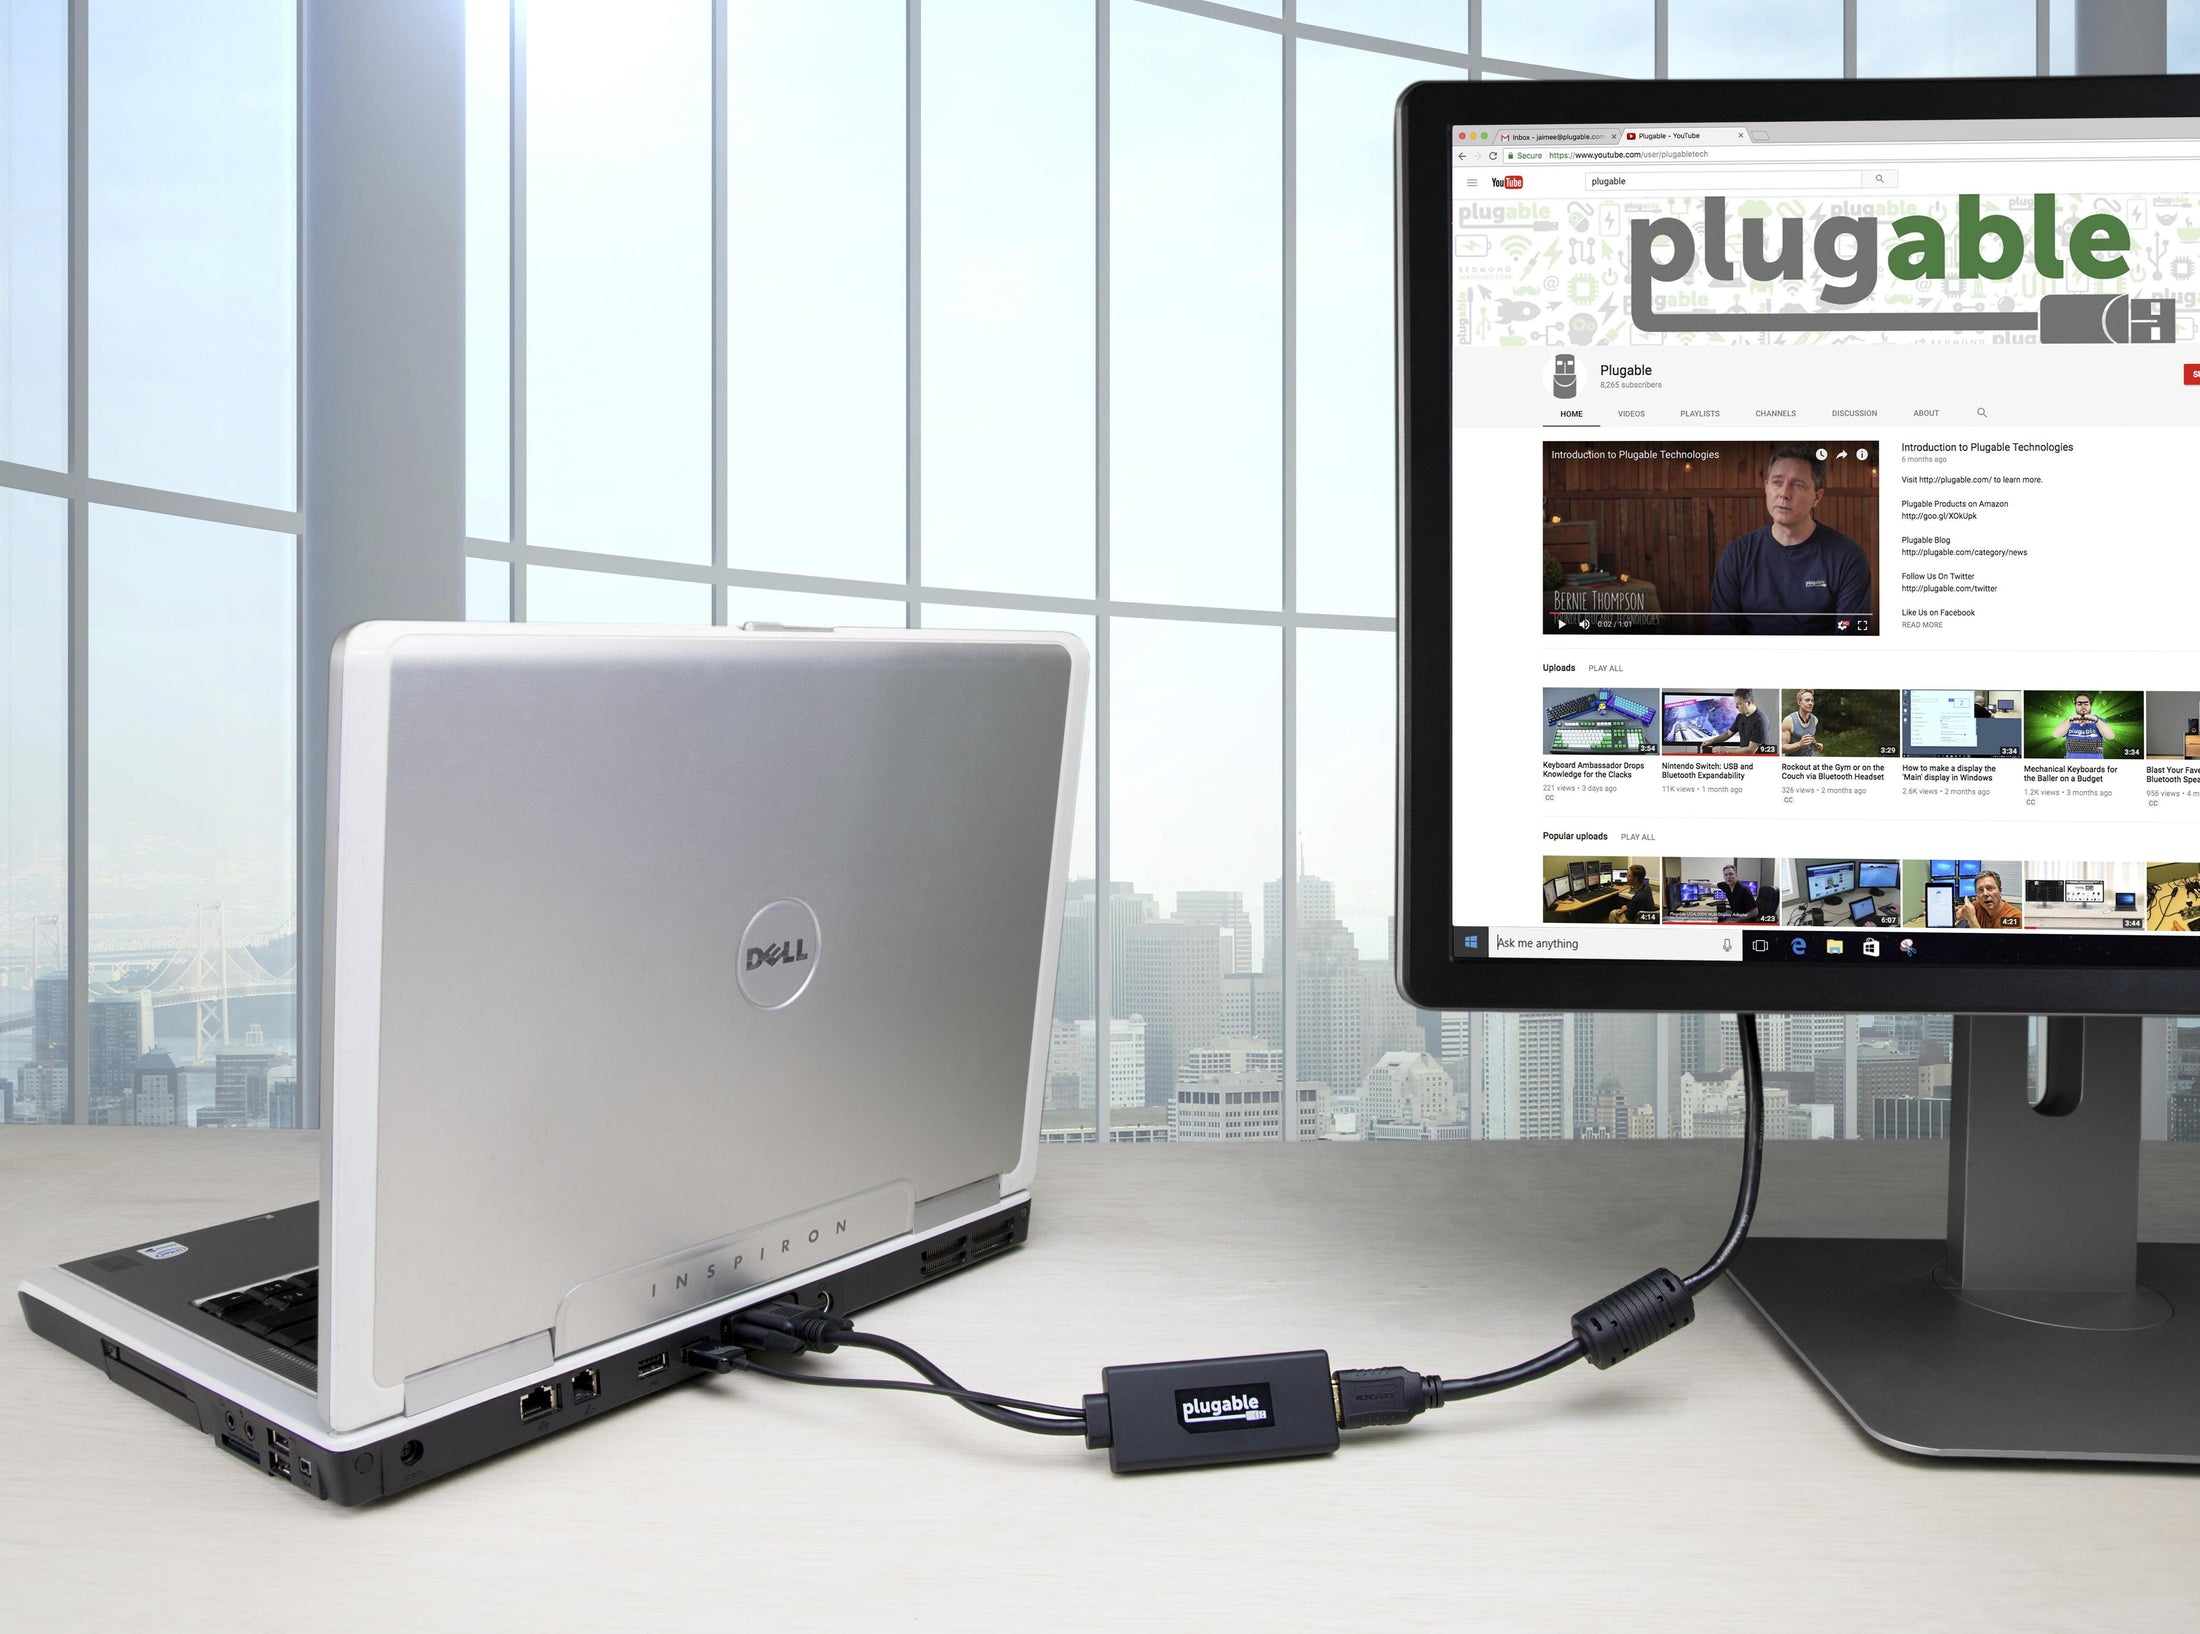
Plugable's VGA to HDMI adapter (VGAM-HDMIF) allows you to connect from a 15-pin VGA output on your laptop, or desktop computer to a modern HDMI display.
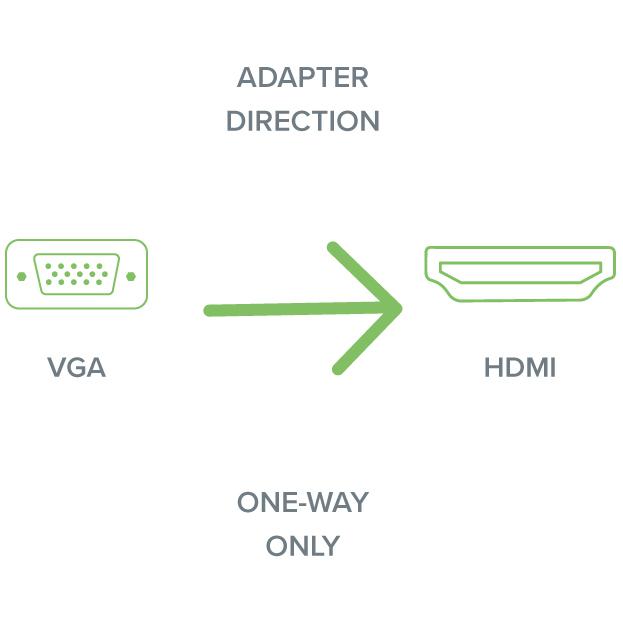
This one-way adapter supports resolutions from a D-SUB VGA source to a HDMI display up to 1920x1080 at 60Hz refresh rate, lower resolutions such as 1600x900, and 1366x768 (720p) are also supported.
The adapter connects to the host computer's D-SUB VGA port and requires a USB 2.0 or USB 3.0 port to power the analog to digital adapter.
Compatibility
- Compatible with Laptops, Desktops, and Servers with VGA output
- Compatible with HDMI monitors, televisions, or projectors
- Operating system agnostic—no drivers necessary
- Supports resolutions up to 1920x1080, or maximum supported resolution of computer
Getting Started
- Connect the adapter to the display's HDMI cable
- Connect the VGA adapter to the computer's VGA output and secure with the two thumbscrews
- Connect the USB power connection to the computer's USB port
- Configure the external display through the computer's display settings

FAQ
Q: Why is the display not detected in Windows when I connect to the VGA output on my desktop?
A: If the desktop computer has a discrete graphics card the VGA output on the motherboard may be disabled. Some systems have an option to enable the onboard graphics with a discrete graphics card.
Q: Does this adapter support audio to my monitor/TV?
A: Yes, this adapter supports audio through the USB connection. This may require setting the audio output device in Window or macOS.
Filter Help Articles and Frequent Questions by Category
Choose one or more filters within each category to narrow down the articles. Each selection will result in only displaying articles that include all of your choices.
Articles
Well how about that, it looks like we don't have any articles matching your filters! Try removing one of your choices or clear the filters to show all articles.
You can always contact support if you need help too!
Can I Connect a DisplayPort (DP) Monitor to the HDMI Port on This Device Using an Adapter or Cable?
No. Most DisplayPort to HDMI cables and adapters are one-way adapters from a DisplayPort Source (computer or docking station) to a HDMI Sink (television, computer monitor, or projector). These cables do not work in reverse.
DisplayPort uses packet-based data transmission, breaking the video stream into individual packets of data allows for longer cable runs, use in both copper and fiber-optic cables, and allows for higher bandwidth than other video formats. It is relatively easy to convert from DisplayPort to HDMI (computers with HDMI output ports already do this internally) and dual-mode DisplayPort outputs have built-in adapters to output a HDMI signal for use with passive DisplayPort to HDMI adapters.
HDMI uses a video signal, similar to DVI, this requires more power to operate at the same cable lengths as DisplayPort and requires significantly more processing power to create DisplayPort packet-based data.
Externally powered HDMI to DisplayPort adapters do exist, these generally have a USB or small barrel plug for power, and can convert from a HDMI Source to DisplayPort Sink. In most cases they have reduced resolution or refresh rates compared to modern signal sources and can introduce delay in the data connection between the display and computer potentially causing reduced connectivity or display performance problems.
We do not currently recommend using HDMI to DisplayPort adapter with our docking stations. In our testing they have been unreliable compared to a native DisplayPort connection. Many of our newer docking stations include both HDMI and DisplayPort outputs to reduce the need for additional adapters or adapter cables.
My Docking Station/Adapter Works Well With My Windows Laptop, but When I Close the Lid the Displays and Laptop Turn Off or Sleep. How Do I Fix This?
Most Windows notebook computers power management settings will default to putting the computer to sleep with the lid closed, regardless of any external displays, keyboard, or mouse connected to the computer. If this is happening but you would prefer the system to remain active with the lid closed utilizing the external display or displays, these settings can be changed by performing the following:
For Windows 10:
- Start by right-clicking on the Start button and select Power Options from the menu.
- From the right side of the Power Options settings page, select the blue link for Additional power settings
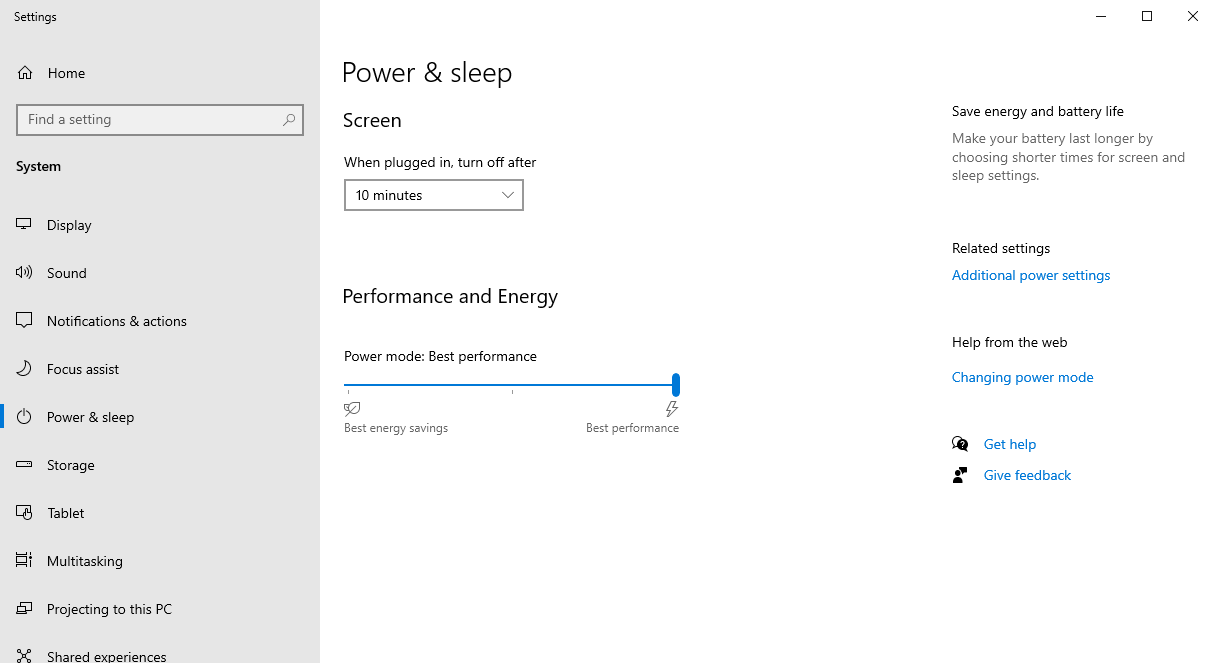
- From the choices present on the left-hand side of the Power Options window, please click on Choose what closing the lid does
- Make sure the setting for When I close the lid under the Plugged In column is set to Do Nothing
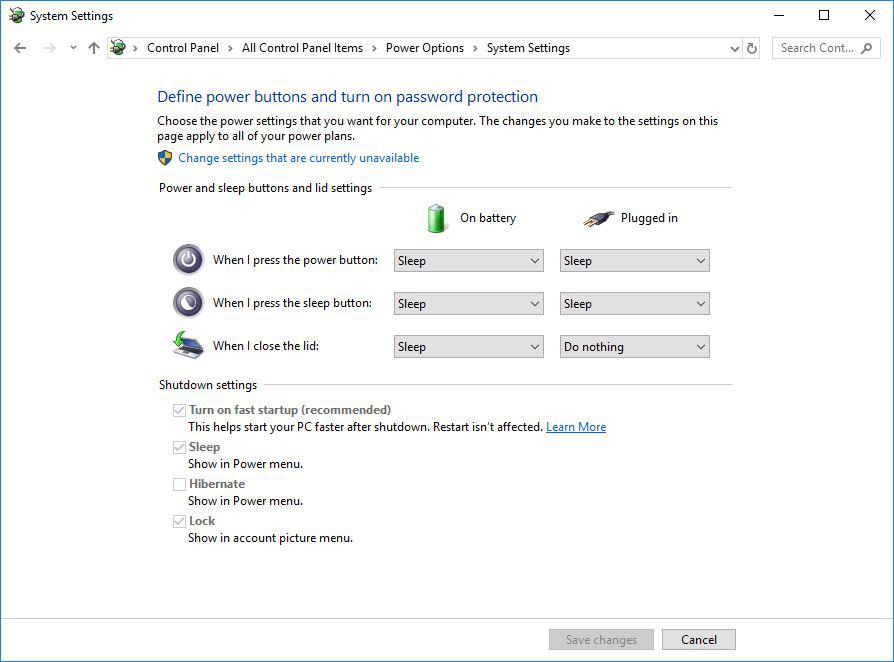
- Click the Save Changes button and restart the system (making sure that the laptop’s power adapter is also connected) and test the behavior again.
For Windows 11:
- Start by right-clicking on the Start button and select Power Options from the menu.
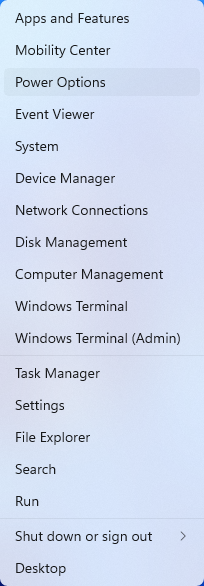
- In the upper left corner of the settings window, in the search box, type "lid" then select Change what closing the lid does from the search results
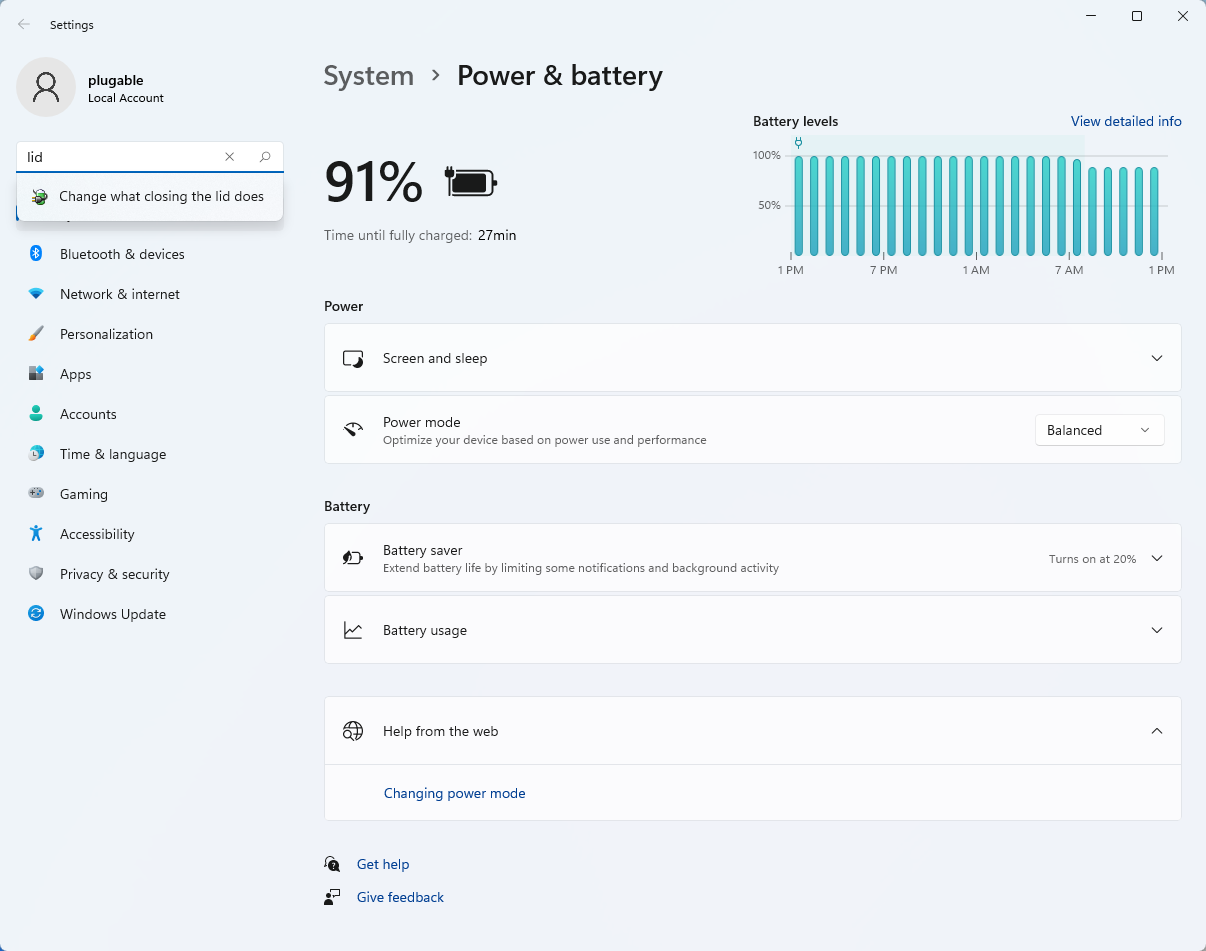
- Make sure the setting for When I close the lid under the Plugged In column is set to Do Nothing
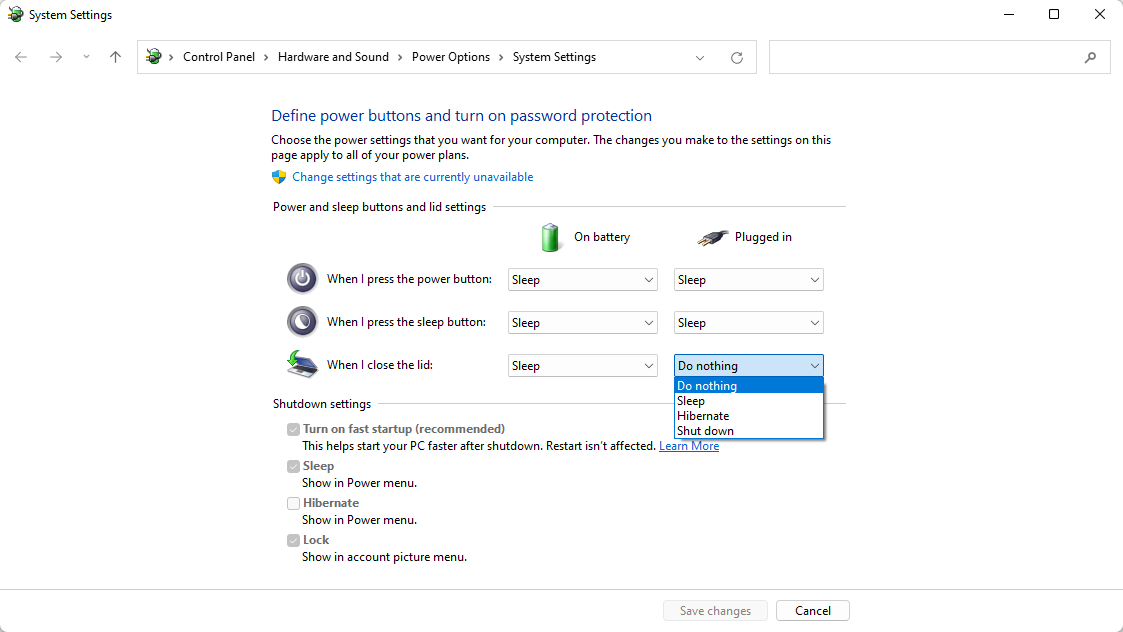
- Click the Save Changes button to apply the new settings.
Closing the lid should no longer put the computer into sleep mode when an external display and power source is connected, instead one of the external displays should now become the Primary display with the desktop icons instead of the laptop's built-in display.
The lid may still need to be opened to perform the following tasks:
- To power on the computer from a fully powered off state
- To log into the computer if logged out or if the computer is restarted with the lid closed
- To wake the computer from a deep sleep state ( hibernation, or Windows hybrid sleep states )
Understanding Heat Generation in Electronics
It's not uncommon for users to notice a certain level of heat generation from electronics and by extension, Plugable products during operation. In this knowledge base article, we'll explore the reasons behind this heat generation and why it is considered a normal experience within reasonable limits.
Electronics, by their nature, generate heat during operation. This is primarily a result of the electrical current flowing through various components, such as integrated circuits, transistors, and other electronic elements. As Plugable products are designed to efficiently process and transfer data (among other functionality), some level of heat generation is inherent.
Factors Influencing Heat Generation:
- Power Consumption: The power consumption of a device directly influences the amount of heat it generates. Higher power usage, especially during data transfer or charging processes, can lead to increased heat.
- Enclosure Design: The design of the product's enclosure and its ability to dissipate heat play a crucial role. Adequate ventilation and heat sinks are often incorporated to manage and disperse generated heat effectively. This is evident in our TBT3-UDZ and TBT4-UDZ designs. The metal case in these docks are designed to function as a heatsink with thermal pads placed throughout the enclosure. This allows heat dissipation from inside to the outside, but will also make it feel as if the device is “too hot”.
- Ambient Temperature: The external environment may also play a role. Higher ambient temperatures can contribute to increased perceived heat from the product. This means that summer temperatures may increase the heat generation of not just Plugable products, but many other electronic devices.
Normal Heat Levels: While it is normal for electronic devices to generate heat, Plugable products are engineered to operate within safe temperature ranges. We conduct rigorous testing to ensure that the heat generated during normal operation falls within industry-standard safety parameters. While not all products are or need to be UL certified, we try to go by UL guidelines for thermal readings. The UL threshold is 77C/170.6F, and we aim for around 71C/160F.
Tips for Users:
- Ventilation: Ensure that Plugable products have sufficient ventilation around them. Avoid placing them in enclosed spaces where heat dissipation may be impeded.
- Usage Patterns: Intensive tasks such as high-speed data transfer or charging multiple devices simultaneously may result in increased heat generation. This is generally normal but may be more noticeable in such scenarios.
- Accessories: A number of our devices will allow for the connection of USB accessories and as such, these will require power. If too many “power-hungry” devices are connected, this will cause the device to run much hotter than expected. Be sure to keep in mind the power limits of your dock/device.
In conclusion, experiencing heat from Plugable products is a normal aspect of their operation. Users can rest assured that we prioritize the safety and efficiency of our devices. By understanding the factors influencing heat generation and following simple usage guidelines, users can make the most of their Plugable products while ensuring a reliable and efficient user experience.
How To: Set the Display Refresh Rate in Windows 11
Many modern displays can support above the default 60Hz refresh rate, however this may need to be manually set within Windows 11. Please note, not all computers, graphics adapters, and docking stations can support all resolutions and refresh rates.
Setting the Display Refresh Rate in Windows 11
1. Right-click on the desktop and select Display Settings from the drop-down menu
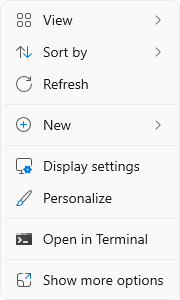
2. Scroll down to the Related settings subsection and select Advanced display

3. At the top of the Advanced display window, select the external display from the drop-down menu

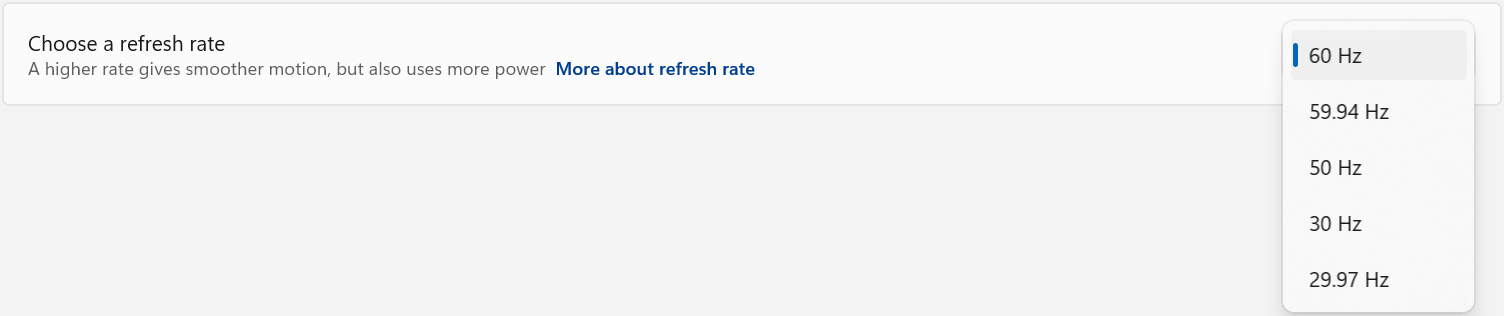
4. From the Choose a refresh rate drop-down menu select the desired refresh rate
Refresh Rate Limitations
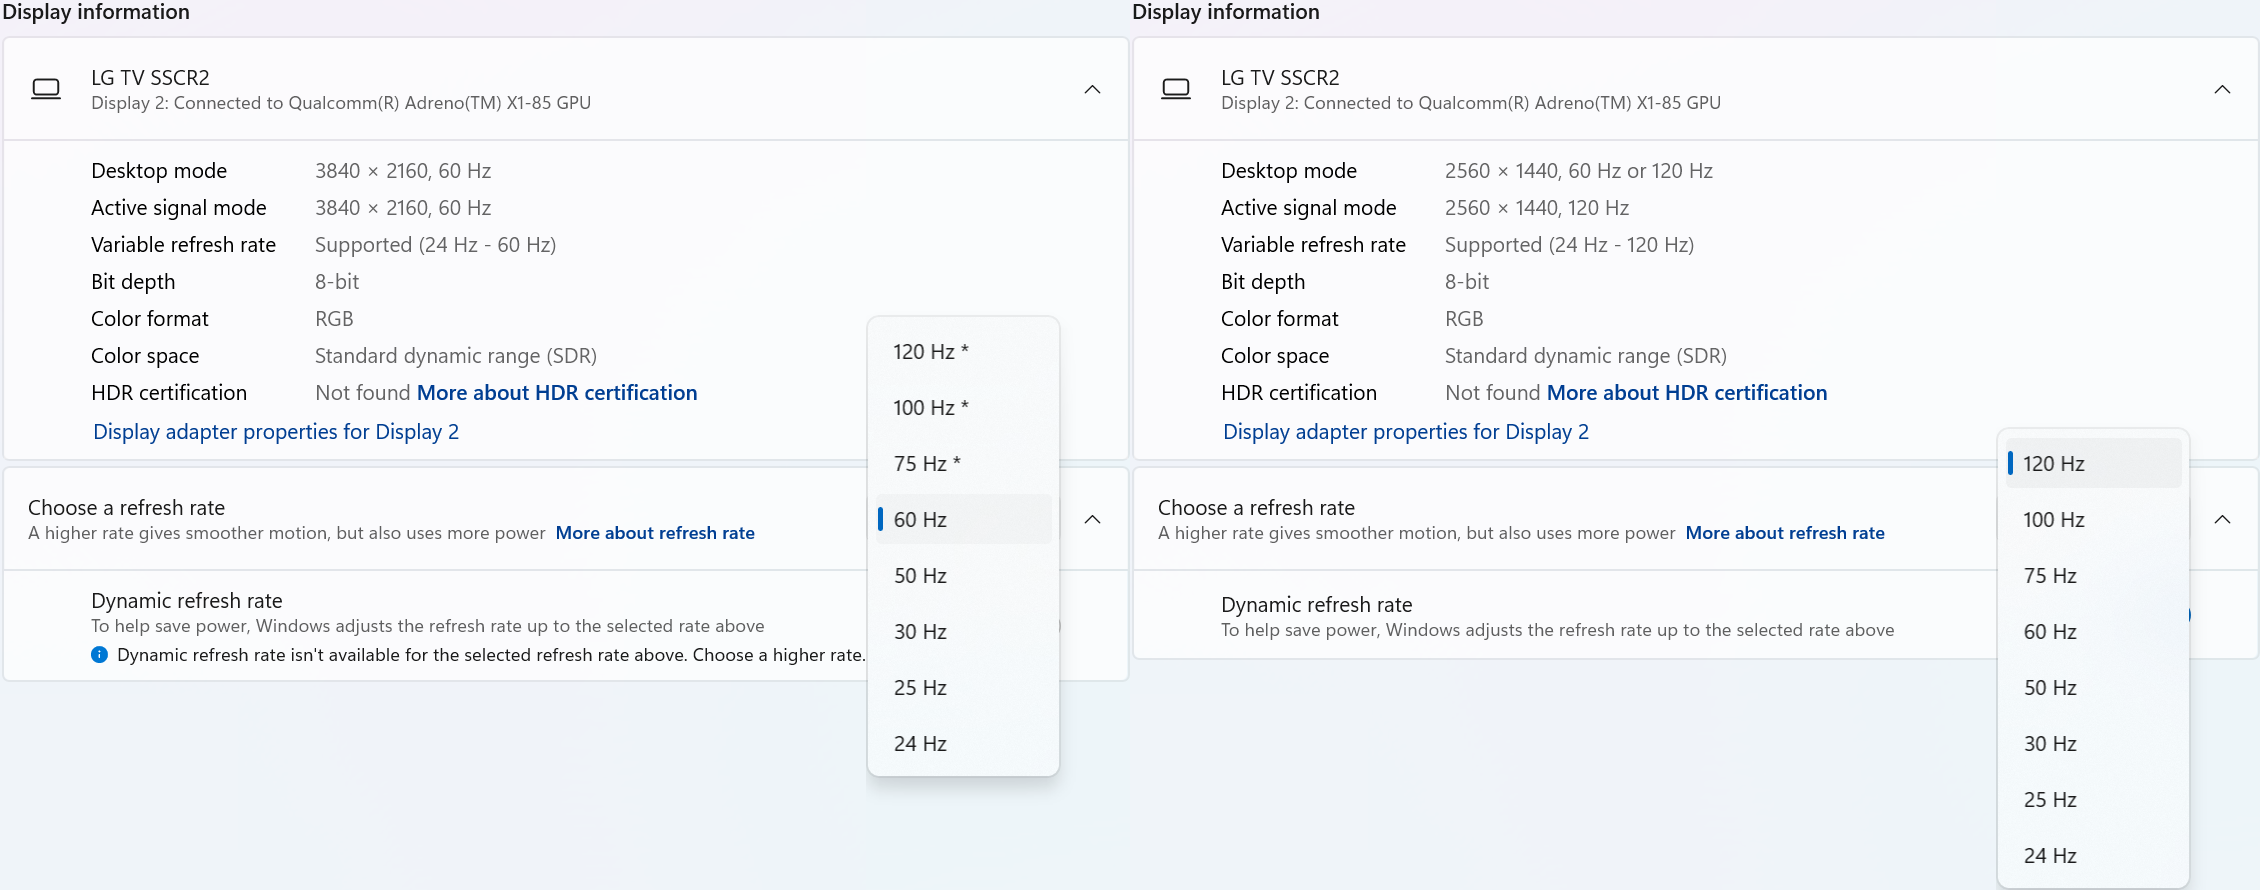
With Windows 24H2 and newer, dynamic refresh rates are supported, this allows the system to adjust the display refresh rate to save power, up to the selected refresh rate. As a consequence of this new mode, when selecting the display refresh rate you may see an asterisk. This indicates that selecting the specific refresh rate may reduce the display resolution or image quality in order to prioritize the refresh rate. This exposes the refresh rate option from the display even if the display cable or computer is incapable of supporting that refresh rate at the native resolution and is the intended behavior per Microsoft. [1]
In the screenshot below the left side shows the 4K 120Hz capable display limited to 60Hz refresh rate without asterisks, and on the right the same display after setting the refresh rate to “120 Hz*”, the “Desktop mode” resolution has been reduced to 2560 x 1440 (1440p) instead of 3840 x 2160 (4K UHD). Unlike when using the display scaling option this also causes a reduction in image quality. On the right side asterisks are no longer shown in the refresh rate list. Setting the refresh rate back to 60Hz does not change the resolution, you will have to go back one page and set the resolution manually.
References
[1] Windows Insider description of new behavior (https://blogs.windows.com/windows-insider/2023/08/31/announcing-windows-11-insider-preview-build-25941-canary-channel/)
How to Determine Your USB-C Port Video Capabilities
Understanding your laptop's video output capabilities is essential when connecting to external displays. This guide will help you identify what video technologies your laptop supports and how to find the relevant information.
Common Video Output Technologies
Modern laptops commonly use one or more of the following technologies to transmit video to external monitors:
1. Thunderbolt 3
- Supports video output using the DisplayPort protocol.
- Capable of driving up to two 4K displays at 60Hz or one 5K display at 60Hz.
- Uses a USB-C connector and features a lightning bolt symbol next to the port.

Note: An example of Thunderbolt 3 ports
2. Thunderbolt 4
- Provides improved performance over Thunderbolt 3.
- Supports up to two 4K displays at 60Hz or one 8K display.
- Uses a USB-C connector with the same lightning bolt symbol but may also include the number "4" for identification.
Note: Thunderbolt 4 has the same physical connection and “lightning” bolt icon as Thunderbolt 3
3. USB-C DisplayPort "Alt Mode"
- Allows video output directly through the USB-C port using DisplayPort technology.
- Commonly supports one 4K display at 60Hz, but capabilities may vary.
- Often marked with a DisplayPort ("DP") symbol, but this feature may also be specified in your system's documentation.

Note: An example of a USB-C port with DisplayPort capabilities
How to Identify Your Laptop's Video Capabilities
To determine what video technologies your laptop supports, follow these steps:
1. Check Your Laptop's User Manual:
- Locate your laptop's user manual (often available online from the manufacturer's support site).
- Search for keywords like "Thunderbolt," "DisplayPort Alt Mode," or "video output capabilities."

2. Visit the Manufacturer's Website:
- Go to the support page for your laptop model and find the technical specifications section.
- Look for details on Thunderbolt or USB-C video capabilities.

3. Inspect Your Laptop's Ports:
-
Check for identifying symbols next to USB-C ports:
- Thunderbolt 3/4 ports may have a lightning bolt symbol.
- DisplayPort Alt Mode may be marked with a "DP" icon.
“What if I do not have the above technologies?”: USB 3.0 (Type-A) and Display Expansion
While USB 3.0 (Type-A) ports do not support native video output, they can still be used to extend to two or more displays using software-based solutions like DisplayLink or Silicon Motion's InstantView. These technologies enable video through USB-A ports by utilizing dedicated drivers and software.
If your laptop lacks Thunderbolt or USB-C video capabilities, DisplayLink or InstantView may be a viable alternative for expanding your display setup. A few other things to consider:
- Not all USB-C ports support video output. Checking your laptop's documentation is crucial to confirm this capability.
- Thunderbolt ports are backward compatible with USB-C DisplayPort Alt Mode but provide enhanced performance and flexibility.
If you have further questions about connecting your Plugable docking station or adapter to your laptop, please reach out to our support team for guidance.

