


Hassle free, 2-Year Warranty
Fast, Free Shipping on Orders $35+
Lifetime Technical Support
30-Day Money Back Guarantee
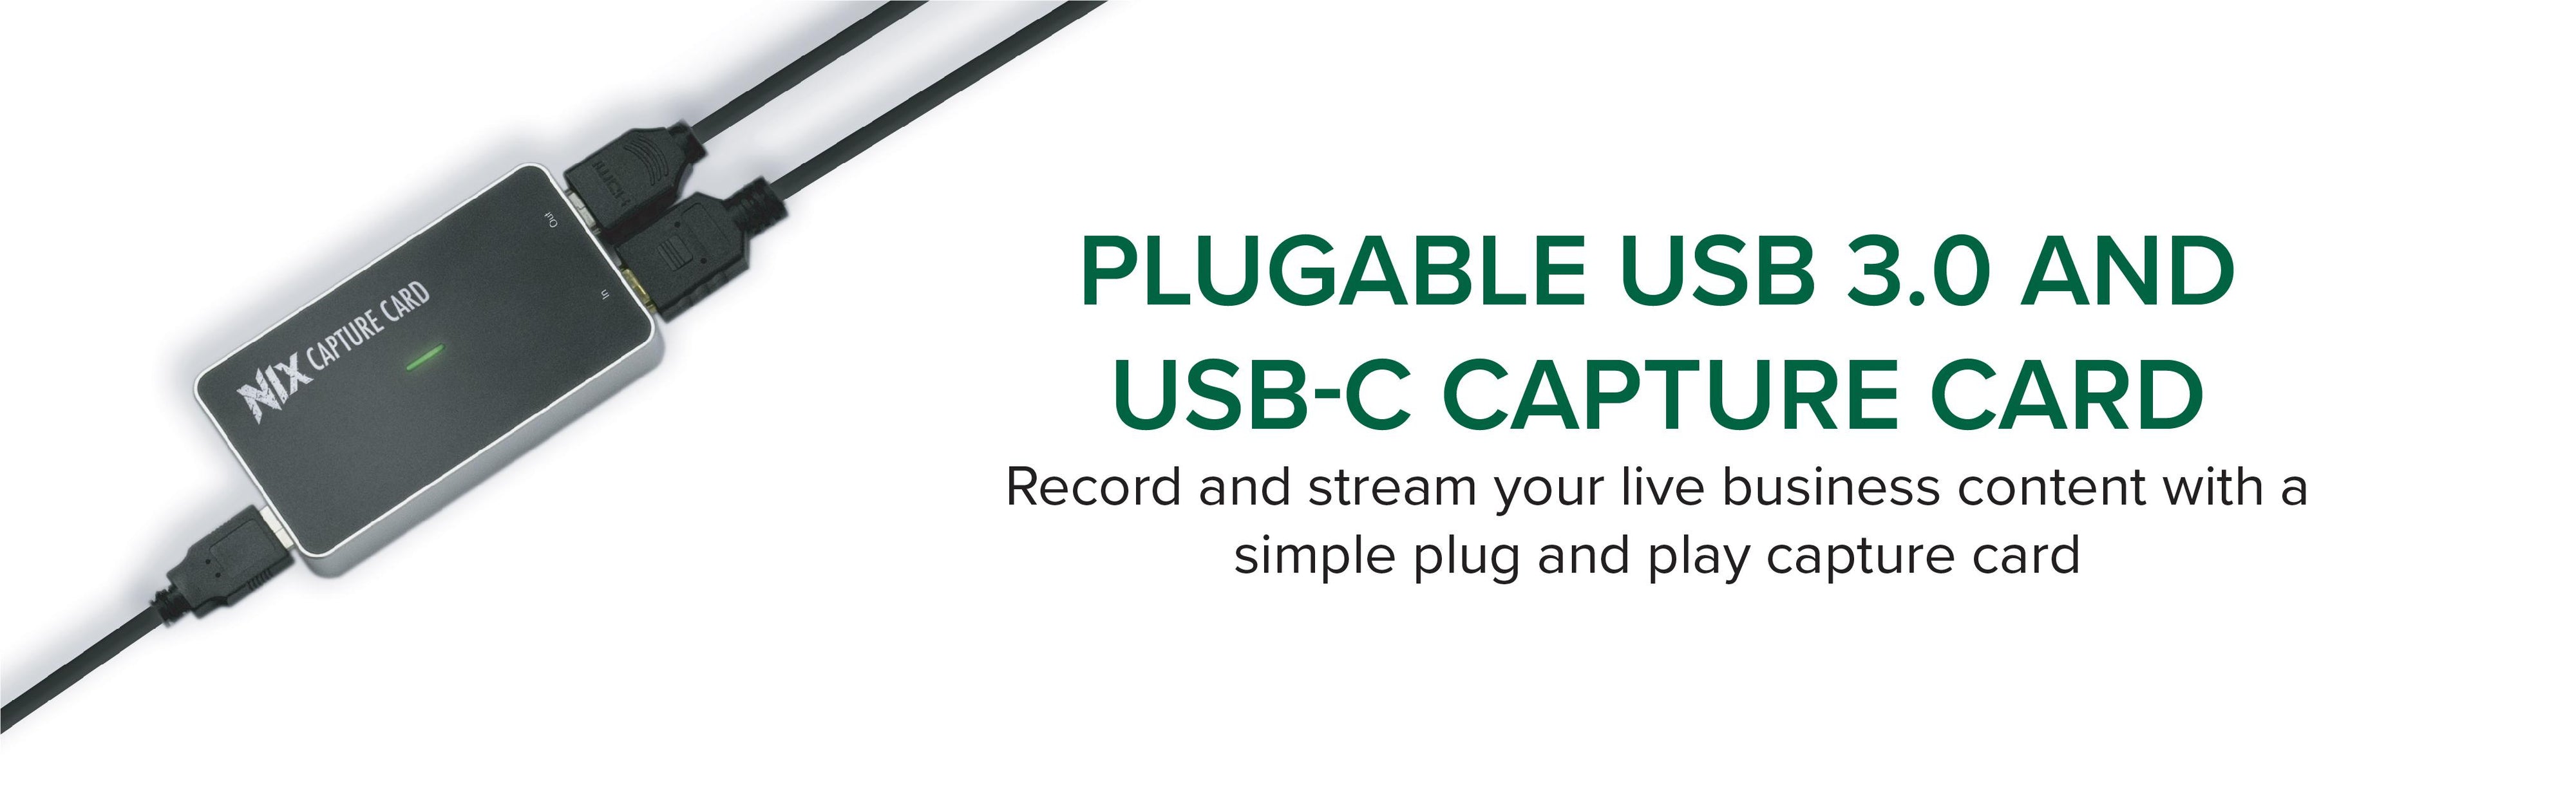
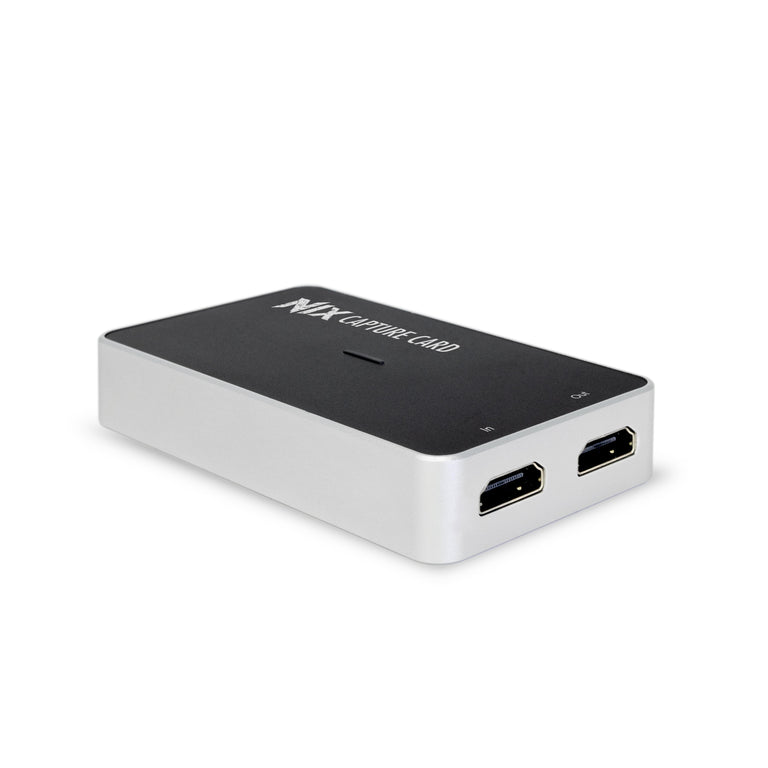
Plugable Performance NIX USB 3.0/USB-C HDMI Streaming and Capture Card
$29.00 USD
SKU: USBC-CAP60Amazon Rating : (306 Reviews)
Features
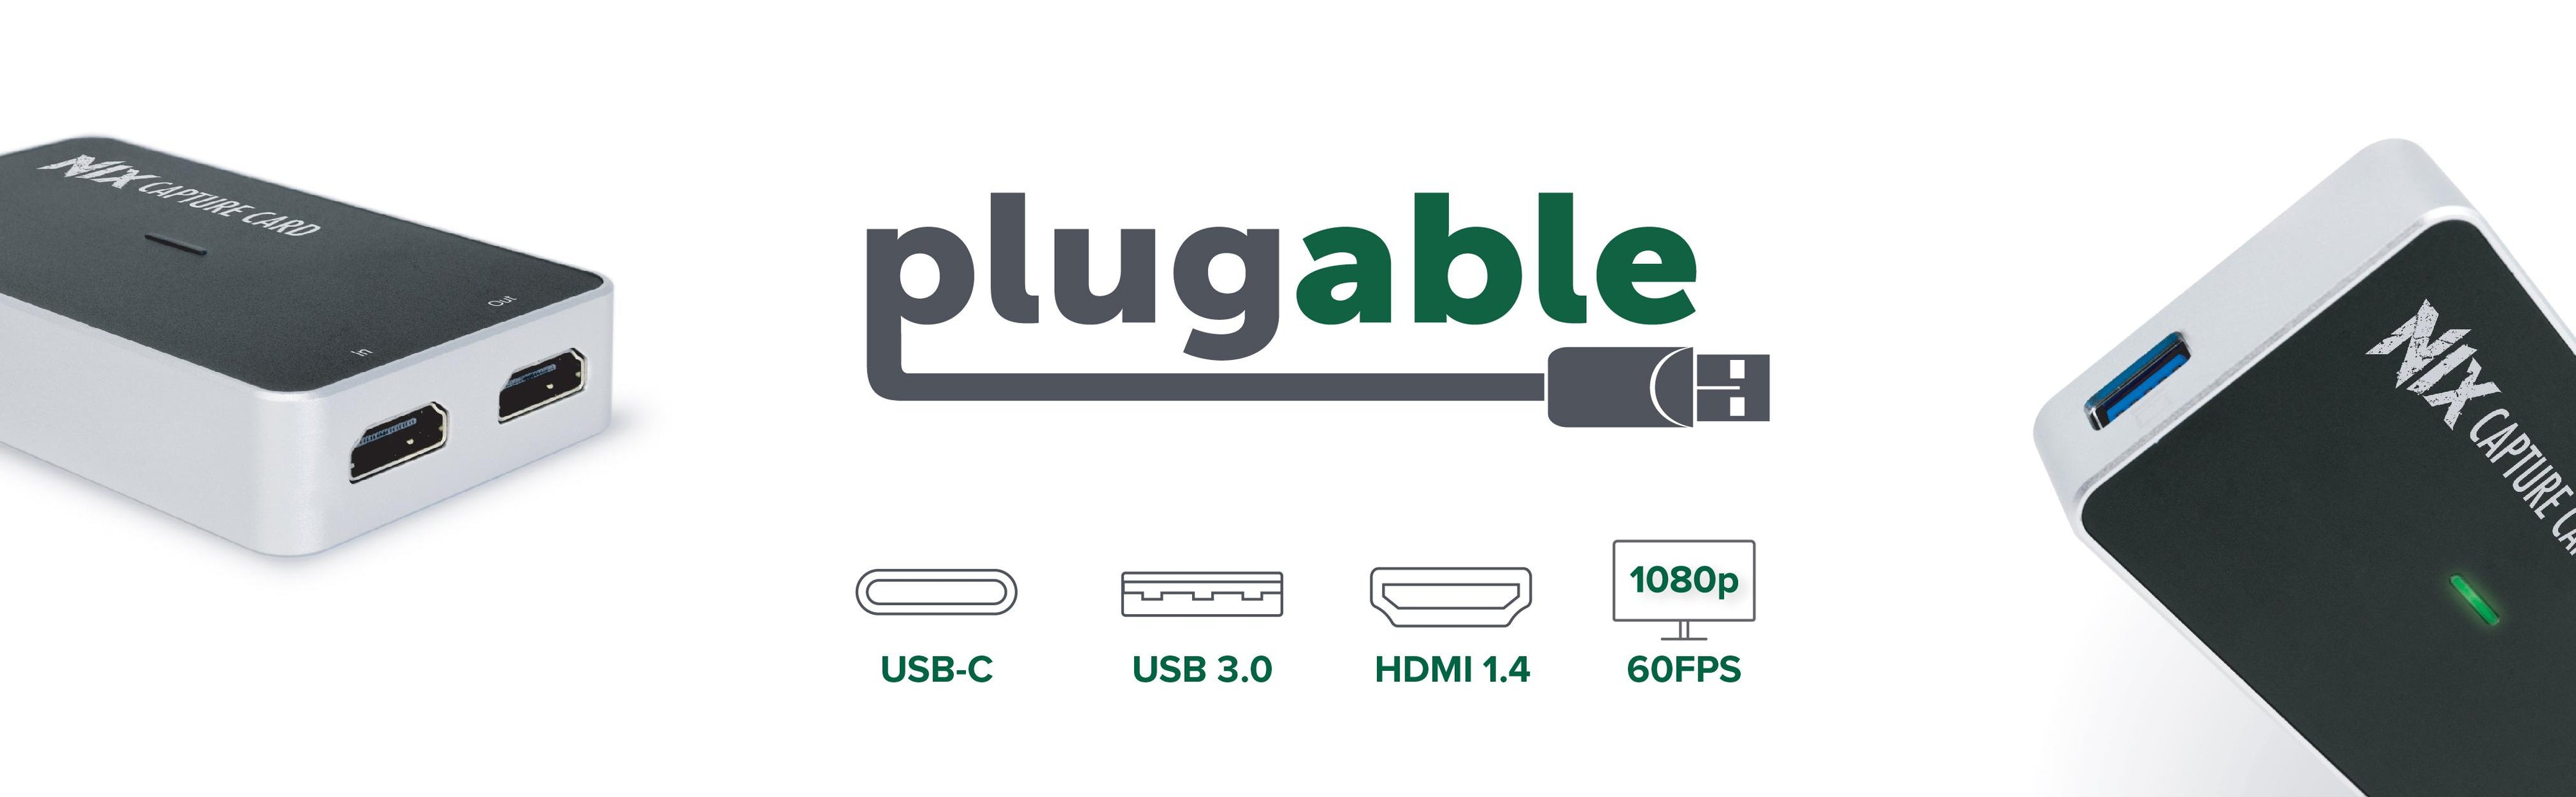
- Nix the Lag— The NIX capture card records and streams your meetings or presentations without adding lag. Capture crisp, raw footage in full 1080P HD at 60FPS. This PC capture card for streaming ensures smooth and seamless video capture, making it an essential tool for video capture Linux and Windows platforms.
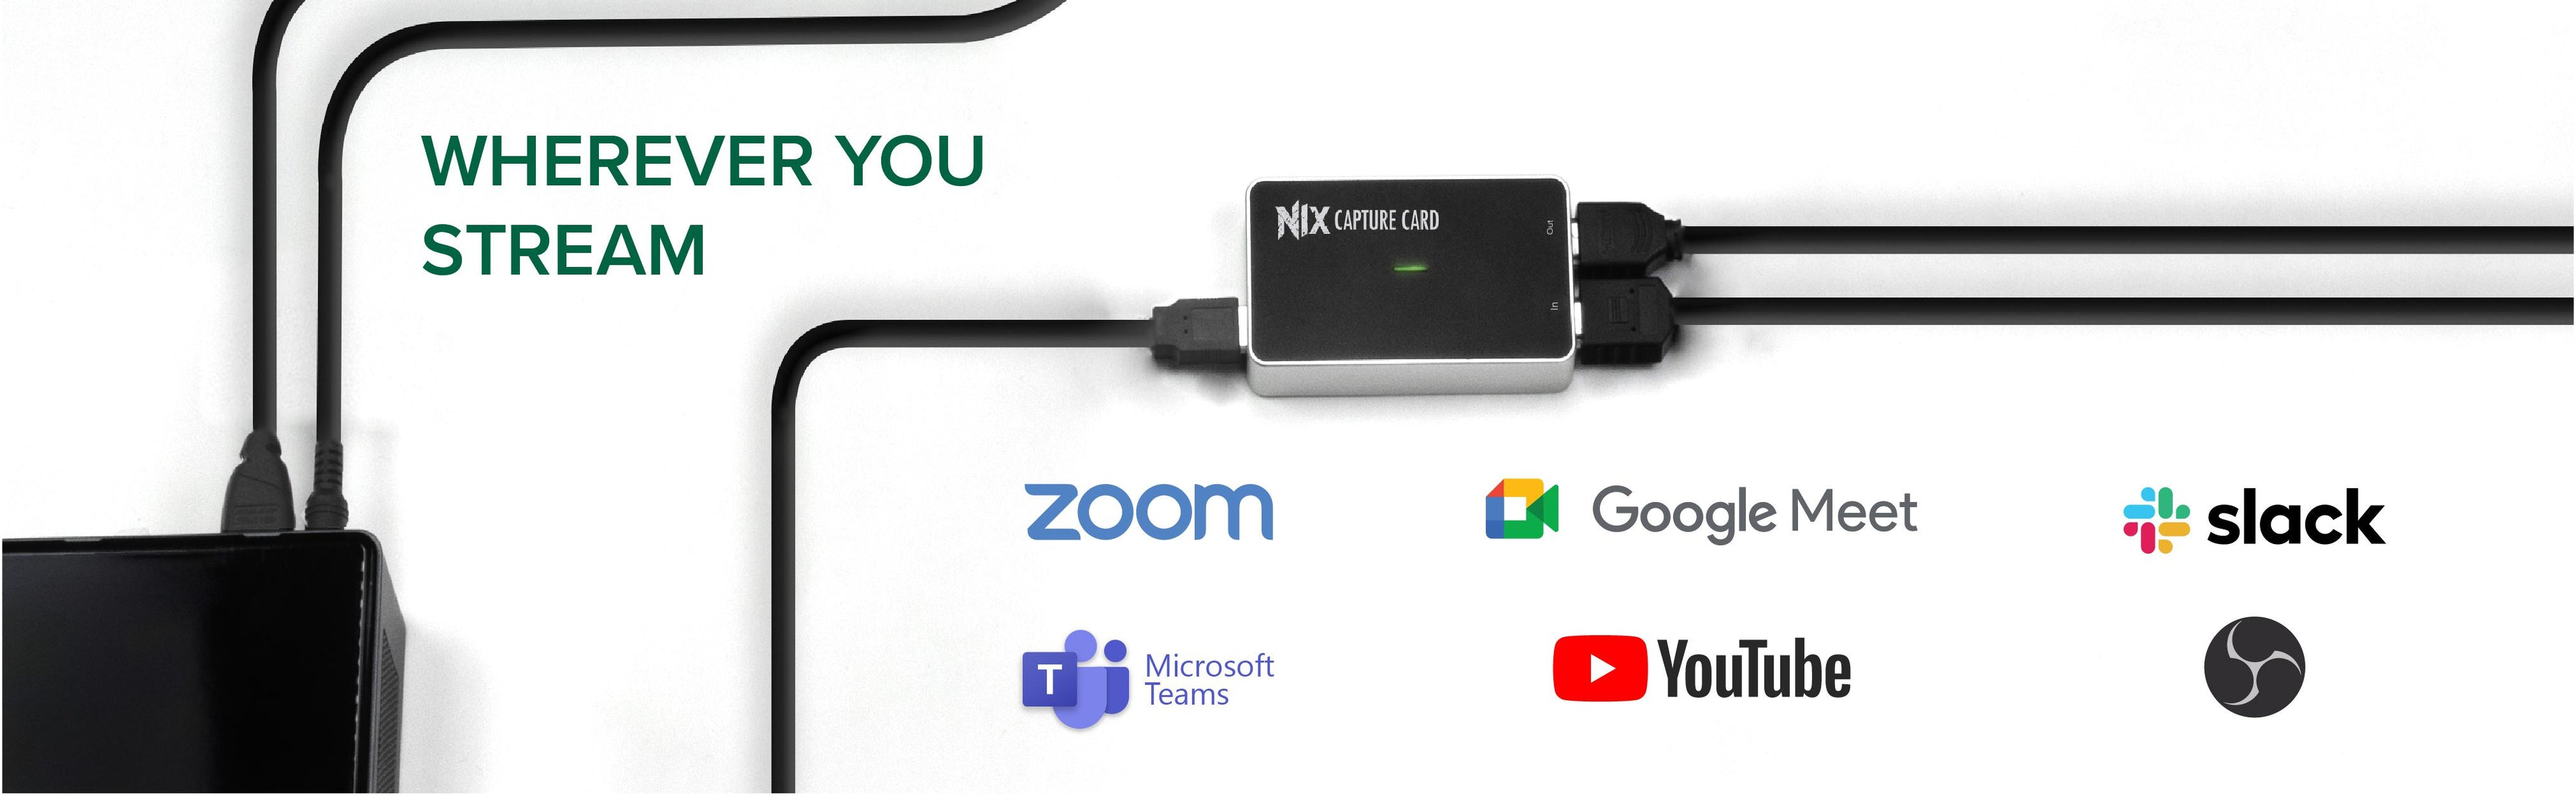
- Control your content— Capture, stream, and control your content without restrictions. The video capture card works seamlessly with platforms like Zoom and Google Meet, ensuring high-quality video for your virtual meetings or presentations.
- Wide Compatibility— The NIX capture card is compatible with most modern Windows, macOS, and Linux systems. Also compatible with popular streaming software such as OBS, Streamlabs OBS, Xsplit, and more.
- Connectivity & Control— Includes USB 3.0 and USB C cables for wide system compatibility and minimal impact on your existing setup with a compact HDMI capture card.
- Enhance Your Setup— Elevate your live broadcast or gaming experience with seamless, high-quality video capture and streaming capabilities
For volume orders or business inquiries contact sales@plugable.com


Capture your most important moments and presentations with the Plugable NIX Capture Card, designed for professionals and content creators who need reliable, high-quality video capture at 1080p and 60 frames per second. With no-latency HDMI display pass-through and minimal system resource usage, this capture card is perfect for recording webinars, tutorials, and live streams on platforms like Twitch, YouTube, and Facebook. Whether you’re working with modern operating systems like Windows, macOS, or Linux, the Plugable NIX Capture Card integrates seamlessly, utilizing built-in drivers and offering broad compatibility with popular software solutions such as OBS and XSplit. This video capture card is ideal for use with a wide variety of devices, including popular consoles like the Xbox One, PlayStation 4/5, and Nintendo Switch, as well as desktop PCs and laptops. The Plugable NIX Capture Card is versatile enough to handle professional and personal projects. Whether you're capturing a live business event or streaming a gameplay session, this capture card gives you the tools you need to produce polished, professional-quality content.
For step-by-step instructions on setting up the capture card with Windows, macOS, or Linux and a wide variety of popular supported cameras (Sony, Nikon, Canon, FujiFilm, Panasonic), and other important information, please see the 'Get Started' and 'FAQ' sections of this product page.
Note: The input does not allow recording from HDCP-enabled sources such as Blu-ray players, set-top boxes, older Cameras with Unencrypted HDMI output or streaming devices.
Capture Your Moment
Don't let important moments slip away, whether they're from a critical presentation, a live stream, or a key gameplay session. The NIX Capture Card is your tool for capturing crisp, clear footage at 1080p and 60Hz, ensuring that every detail is preserved for future reference or sharing.
Extensive Compatibility
Compatible with popular software like OBS, StreamLabs OBS, and XSplit across Windows, macOS, and Linux, this capture card is versatile enough for both professional and personal use. Whether you're streaming a webinar, recording a tutorial, or archiving a significant gaming achievement, the NIX Capture Card 1080p(1920x1080 @ 60Hz) supports seamless streaming and capturing on platforms like Twitch, YouTube, and more.
Built with 1080p 60Hz (1920x1080 @ 60Hz) HDMI pass through, a splitter is not required for capturing all of your exciting gaming moments.
Note: Monitor modes above 1920x1080 @ 60Hz are not supported via pass through.
Supports USB 3.0 and USB-C Connections
The NIX Capture Card comes equipped with both USB-C and USB 3.0 (USB-A) cables, ensuring compatibility with virtually any modern system running Windows, macOS*, or Linux with USB 3.0 or higher ports.
USB-A is the traditional rectangular USB port found on most computers, while USB-C is a newer standard with a compact, oval-shaped connector commonly seen on more recent devices. Thunderbolt or USB4 ports, often found on high-end systems, also function as USB-C ports.
It's important to note that while USB 3.0, offers optimal performance, using a USB 2.0 connection will limit the capture quality.
*Please note that while Mac systems can be used for recording from other platforms, they are not compatible as input sources.
Plug and Play, Not Proprietary
Compatible with OBS, Streamlabs OBS, XSplit, and platforms like Twitch, YouTube, and Facebook, the NIX Capture Card is designed for professionals and content creators who need to capture high-quality video and audio without the hassle of complex setups. Whether you're recording a live presentation or team meeting, this capture card delivers crisp and clear recordings at 1080p.
By leveraging built-in drivers in your operating system, the PC capture card for streaming minimizes the need for additional software, ensuring that your system resources remain focused on what matters most—your work.
Import into your editing software
With the NIX Capture Card, you can easily capture HDMI output from popular cameras such as Sony, Canon, and Nikon, making it an ideal tool for professionals who need to record high-quality video content for presentations, or to use a camera for Microsoft Teams, Zoom or Google Meet.
The video capture card also uses Frame Rate Up-Conversion (FRUC) to upscale input video to 1920x1080 at 60 frames per second, ensuring smooth and professional-quality output. However, in some instances, please be aware that streamed text may appear smaller compared to the pass-through display.
Please note that macOS and platforms requiring High-bandwidth Digital Content Protection (HDCP), such as Blu-ray/DVD players, Roku, and streaming services like Netflix, are not supported as sources.
In the Box
The Plugable NIX HDMI Streaming & Capture Card includes:
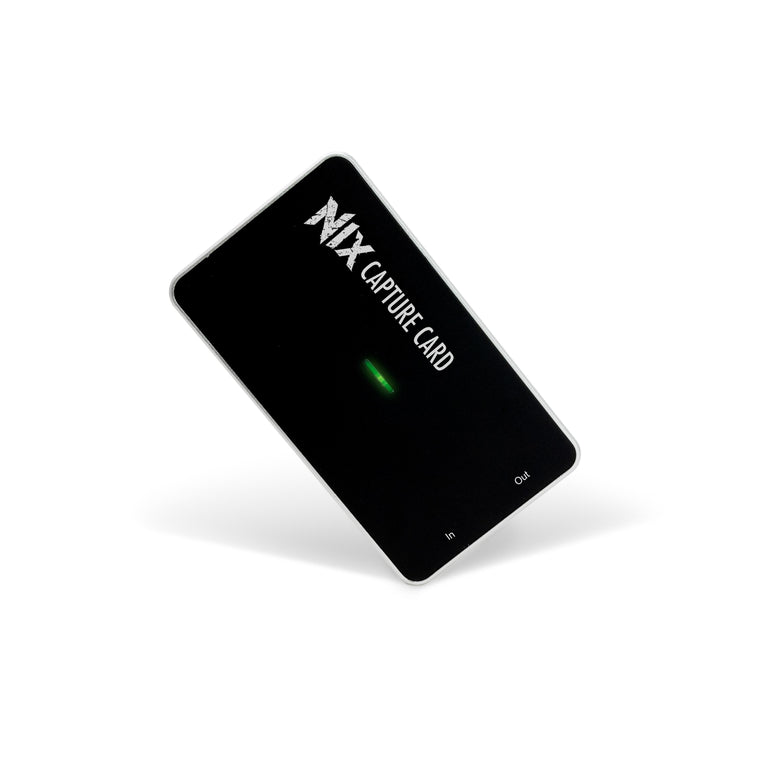
- 1x Plugable Performance NIX Capture Card
- 1x USB-A 3.0 to USB-A 3.0 Cable
- 1x USB-C 3.0 to USB-C 3.0 Cable
- Quick Start Guide
Note: Pass through requires two HDMI cables (no HDMI cables are included).
Quick Start
For experienced streamers, or those who just want the gist of how to configure the capture card. Here are the key steps to getting ready to capture.
If you need more detailed guidance with screenshots of various processes, try our detailed guides for Windows, macOS and Linux.
- Prepare your capture source
- Ensure HDCP is off
- Ensure video output is configured to 1080p, 720p, or automatic configuration
- Set audio to use a 48KHz sample rate
- Make sure your capture source is turned on
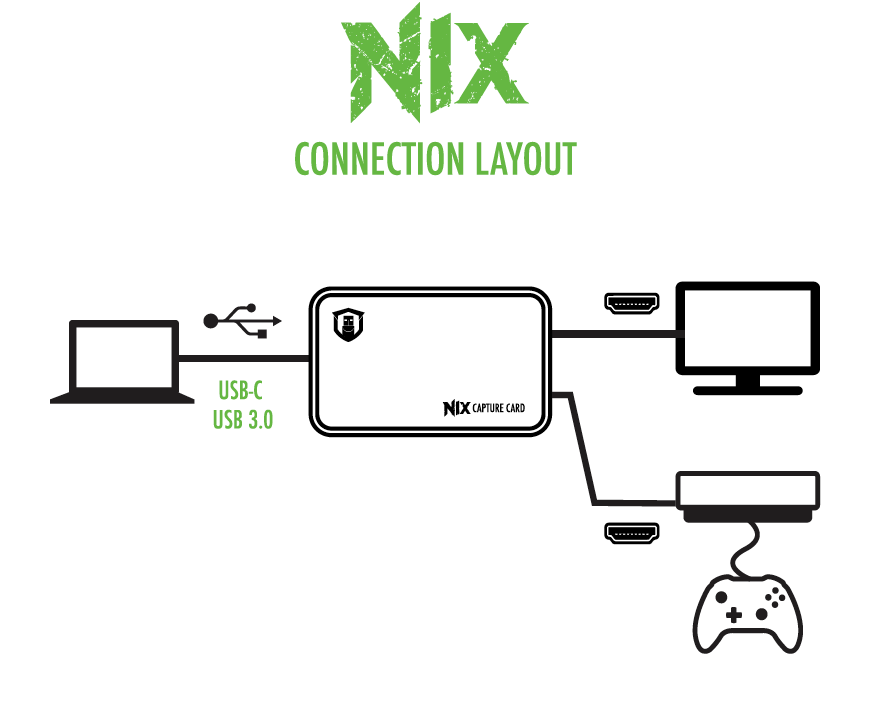
- Connect the HDMI output of your capture source to the capture card's In port
- If using the passthrough feature of the capture card, connect the display you intend to game on to the Out port of the capture card
- Ensure that the display is turned on, and that the video input is set to the HDMI port you've connected the capture card to
- Use one of the included USB cables to connect the capture card to the Windows, Linux, or macOS system you intend to capture or stream with
- In the sound settngs for your computer's operating system, ensure that the capture card's audio input is configured to use 48KHz audio
- Set the capture card as a video source device in your recording or streaming software
- Typically shows as 'FHD Capture'
- Configure settings for the capture card in your recording or streaming software
- Audio input should be configured with a 48KHz sample rate
- Adjust RGB range and/or color space settings in your recording or streaming software. Incorrect settings will result in discoloration.
- You may also need to adjust the color settings on your HDMI source. Sometimes these settings are referred to as 'HDMI Black Level', 'Color Space', or another name
- Configure the output settings in your recording or streaming software
- If applicable, set audio to use 48KHz sample rate
- If you are streaming, be sure to set your video bitrate to a value less than the max upload rate for your Internet connection. Most home Internet services only offer 10Mbps of upload (10000Kbps)
Bitrate Value Best Use/Notes 2,500 Kbps OBS Default 8,000 Kbps 1080p at 24, 25, or 30 frames per second 10,000 Kbps Max upload for most cable Internet providers 12,000 Kbps 1080p at 50 or 60 frames per second
If you experience issues with the capture card, please check the FAQ tab. If you are still experiencing issues after evaluating our FAQ material, please contact support@plugable.com so we can help!
Filter Help Articles and Frequent Questions by Category
Choose one or more filters within each category to narrow down the articles. Each selection will result in only displaying articles that include all of your choices.
Articles
Well how about that, it looks like we don't have any articles matching your filters! Try removing one of your choices or clear the filters to show all articles.
You can always contact support if you need help too!
Does the HDMI Port Support 4K Resolution at 60Hz?
Yes, the USBC-MD103's HDMI port will support 4K at 60Hz if your host device supports DisplayPort 1.4.
Can I Connect a DisplayPort (DP) Monitor to the HDMI Port on This Device Using an Adapter or Cable?
No. Most DisplayPort to HDMI cables and adapters are one-way adapters from a DisplayPort Source (computer or docking station) to a HDMI Sink (television, computer monitor, or projector). These cables do not work in reverse.
Why is DisplayPort to HDMI often a one-way conversion?
DisplayPort uses packet-based data transmission, breaking the video stream into individual packets of data allows for longer cable runs, use in both copper and fiber-optic cables, and allows for higher bandwidth than other video formats. It is relatively easy to convert from DisplayPort to HDMI (computers with HDMI output ports already do this internally) and dual-mode DisplayPort outputs (DP++) have built-in adapters to output a HDMI signal for use with passive DisplayPort to HDMI adapters.
HDMI historically uses a Transmission-Minimized Differential Signaling (TDMS) video signal originally based on DVI's signal, this requires more power to operate at the same cable lengths as DisplayPort and requires significantly more processing power to convert from HDMI to DisplayPort packet-based data. The latest HDMI specifications enable the new Fixed Rate Link (FRL) which is packet based similar to but not directly compatible with DisplayPort.
Externally powered HDMI to DisplayPort adapters do exist, these generally have a USB or small barrel plug for power, and can convert from a HDMI Source to DisplayPort Sink. In most cases they have reduced resolution or refresh rates compared to modern signal sources and can introduce delay in the data connection between the display and computer potentially causing reduced connectivity or display performance problems.
We do not currently recommend using HDMI to DisplayPort adapter with our docking stations. In our testing they have been unreliable compared to a native DisplayPort connection. Many of our newer docking stations include both HDMI and DisplayPort outputs to reduce the need for additional adapters or adapter cables.
If you have any questions please feel free to contact us at support@plugable.com and we'll be happy to help!
What Streaming Software Can I Utilize With the NIX Capture Card?
Since the NIX Capture Card utilizes drivers that are baked or already present inside of Windows, macOS, and Linux—essentially appearing as a webcam—it will work with most major streaming software such as OBS, StreamLabs OBS, XSplit, Wirexast, and vMix.
For additional information regarding the streaming software you utilize, if not present in this list, please reach out to us directly at support@plugable.com
Which Port on the NIX Capture Card Do I Connect My PC/Console To?
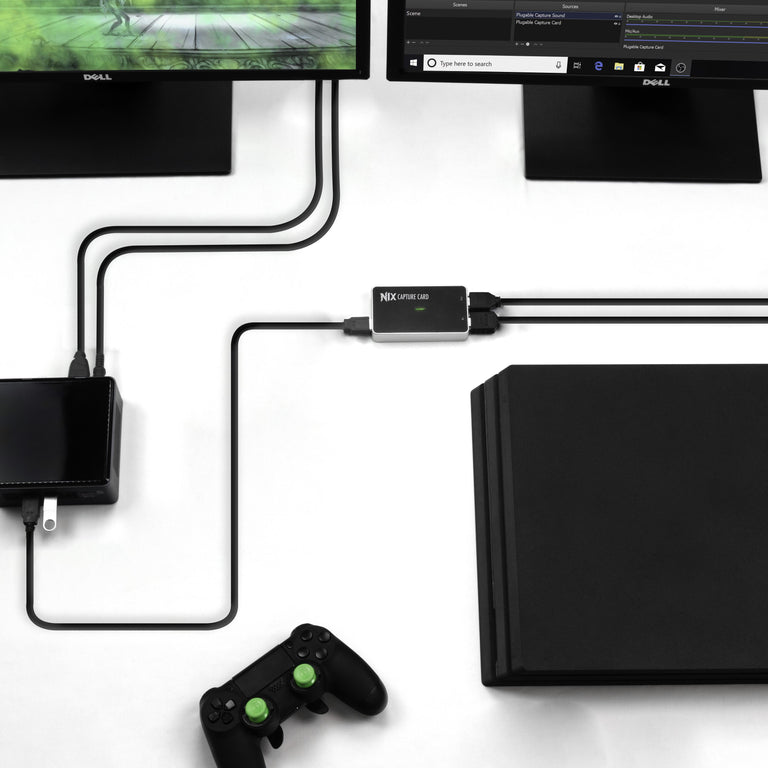
The NIX Capture Card has two individual HDMI ports: One for "In" and one for "Out".
The "IN" port should be where you connect an HDMI cable from the source (Xbox® One, PlayStation® 4, etc) to this port.
What Is the "Out" Port For?
The "OUT" port can be connected to a display so that you can see a live feed of what is being sent to the "IN" port.
This way you can still view the output from your HDMI source at the same latency as it would be when directly connected to the display without dropped frames or lag.
Which cable inside the box do I use to connect the NIX Capture Card to my computer?
There are three total cables/adapters included inside of the box with the NIX Capture Card. One is a standard USB 3.0 to USB 3.0 cable. This can be utilized on most modern systems, and will allow you to connect the capture card, and communicate with your capture software.
The second cable is unique, as it allows a USB Type-C (USB-C) based system (such as a laptop) with a native USB-C port to connect to the NIX Capture Card. One end is USB-A (which connects to the Capture Card) and the other is USB-C, that you connect to a compatible USB-C based system.
We also include a small USB-C male to USB-A 3.0 female adapter. This can be utilized to combine both the USB 3.0 to USB 3.0 cable, on a system that a USB-C port.
When disconnecting the source HDMI cable from the capture card, and then inserting another new source, the NIX Capture Card doesn't show anything in OBS. How do I fix this?
A bug in OBS can cause this to sometimes occur. The best way to resolve the issue is to right click the "Video Capture Device" source (or the unique name it was given) and select properties.
Inside of properties, just below the "Device" drop down box, you should see a "Deactivate button". Click the Deactivate button, and remove the HDMI cable that is connected to the "IN" port on the capture card.
Wait 5 seconds, and then reconnect the HDMI cable from the source system to the "in" port on the capture card. Once reconnected, right click the "Video Capture Device" source (or the unique name it was given) and select properties. Once inside properties, click the "Activate" button and you should be back up and capturing!
Can I Output 2560x1440 (1440p) or 3840x2160 (4K) content?
No. The NIX Capture Card only supports a maximum resolution for input and output of 1920x1080 @ 60Hz.
Does the capture card support higher refresh rates for pass-through to my 75Hz, 100Hz, 120Hz, or 144Hz monitor?
No. The NIX Capture Card only supports a maximum resolution for input and output of 1920x1080 @ 60Hz. Even if your display and devices support higher refresh rates, they will not function through the NIX.
With the PlayStation® 4/PlayStation® 4 Pro connected, an image appears on the display connected to the "out" port, but not inside of my streaming software. What should I do?
The PlayStation® 4/PlayStation® 4 Pro system utilizes HDCP protection by default when the console is turned on. To disable this feature, select (Settings) > [System] and then clear the checkbox for [Enable HDCP].
When using a macOS system to capture video/audio from my source device, the audio seems to sound incorrect or "choppy", How can I resolve this?
This is most likely a problem with the Hz rate the audio for the capture card has been configured as. Please follow these instructions:
- On your main macOS Desktop, at the top left, look for the finder bar and click Go
- Click an empty space on your Mac desktop, or open a Finder window, if you do not see the Go menu
- Locate and select Utilities
- With the Utilities menu now open, locate Audio MIDI Setup and double click the icon
- Once inside of the main Audio MIDI Setup menu, locate the FHD Capture device, and click to highlight it
- Once highlighted, look for the drop down box next to Format and ensure that a 48,000Hz sample rate has been selected
- Once the correct sample rate rate has been selected, close out of Audio MIDI Setup and head into OBS
- With OBS open, locate the OBS listing on the top left of your macOS Desktop. Click it, and select Preferences
- Once the Preferences menu has been opened, on the left side locate and select the Audio option
- Inside of the Audio menu, please ensure that the drop down box next to Sample Rate has been properly set to 48KHz
- Once the drop down box is correct, click OK on the bottom right hand side of the menu, and restart OBS
Audio Sync Issues in OBS
To address audio sync issues, try the following.
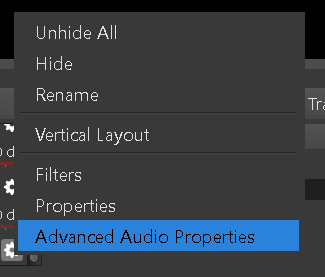
In the bottom of your OBS Window, there is a frame/section called “Mixer". Scroll through the list and look for the audio input capture line item (usually a unique name you added when adding the Audio Input Capture Source) and click on the “COG Wheel, or Settings Wheel” on the right. Select “Advanced Audio Settings”.
A window should appear showing you the name of the device, the volume bar, and other various settings. Look for the Audio Input Capture item name you configured, and in the column that says “Sync Offset” input 470ms (for some devices the magic number will be between 470-480).
The video should now be synced to the audio being captured.
Plugable Performance NIX HDMI Capture Card Advanced Setup Guide
This document will cover the basic configuration steps for using the Plugable Performance NIX HDMI Capture Card in OBS.
Windows
OBS Configuration
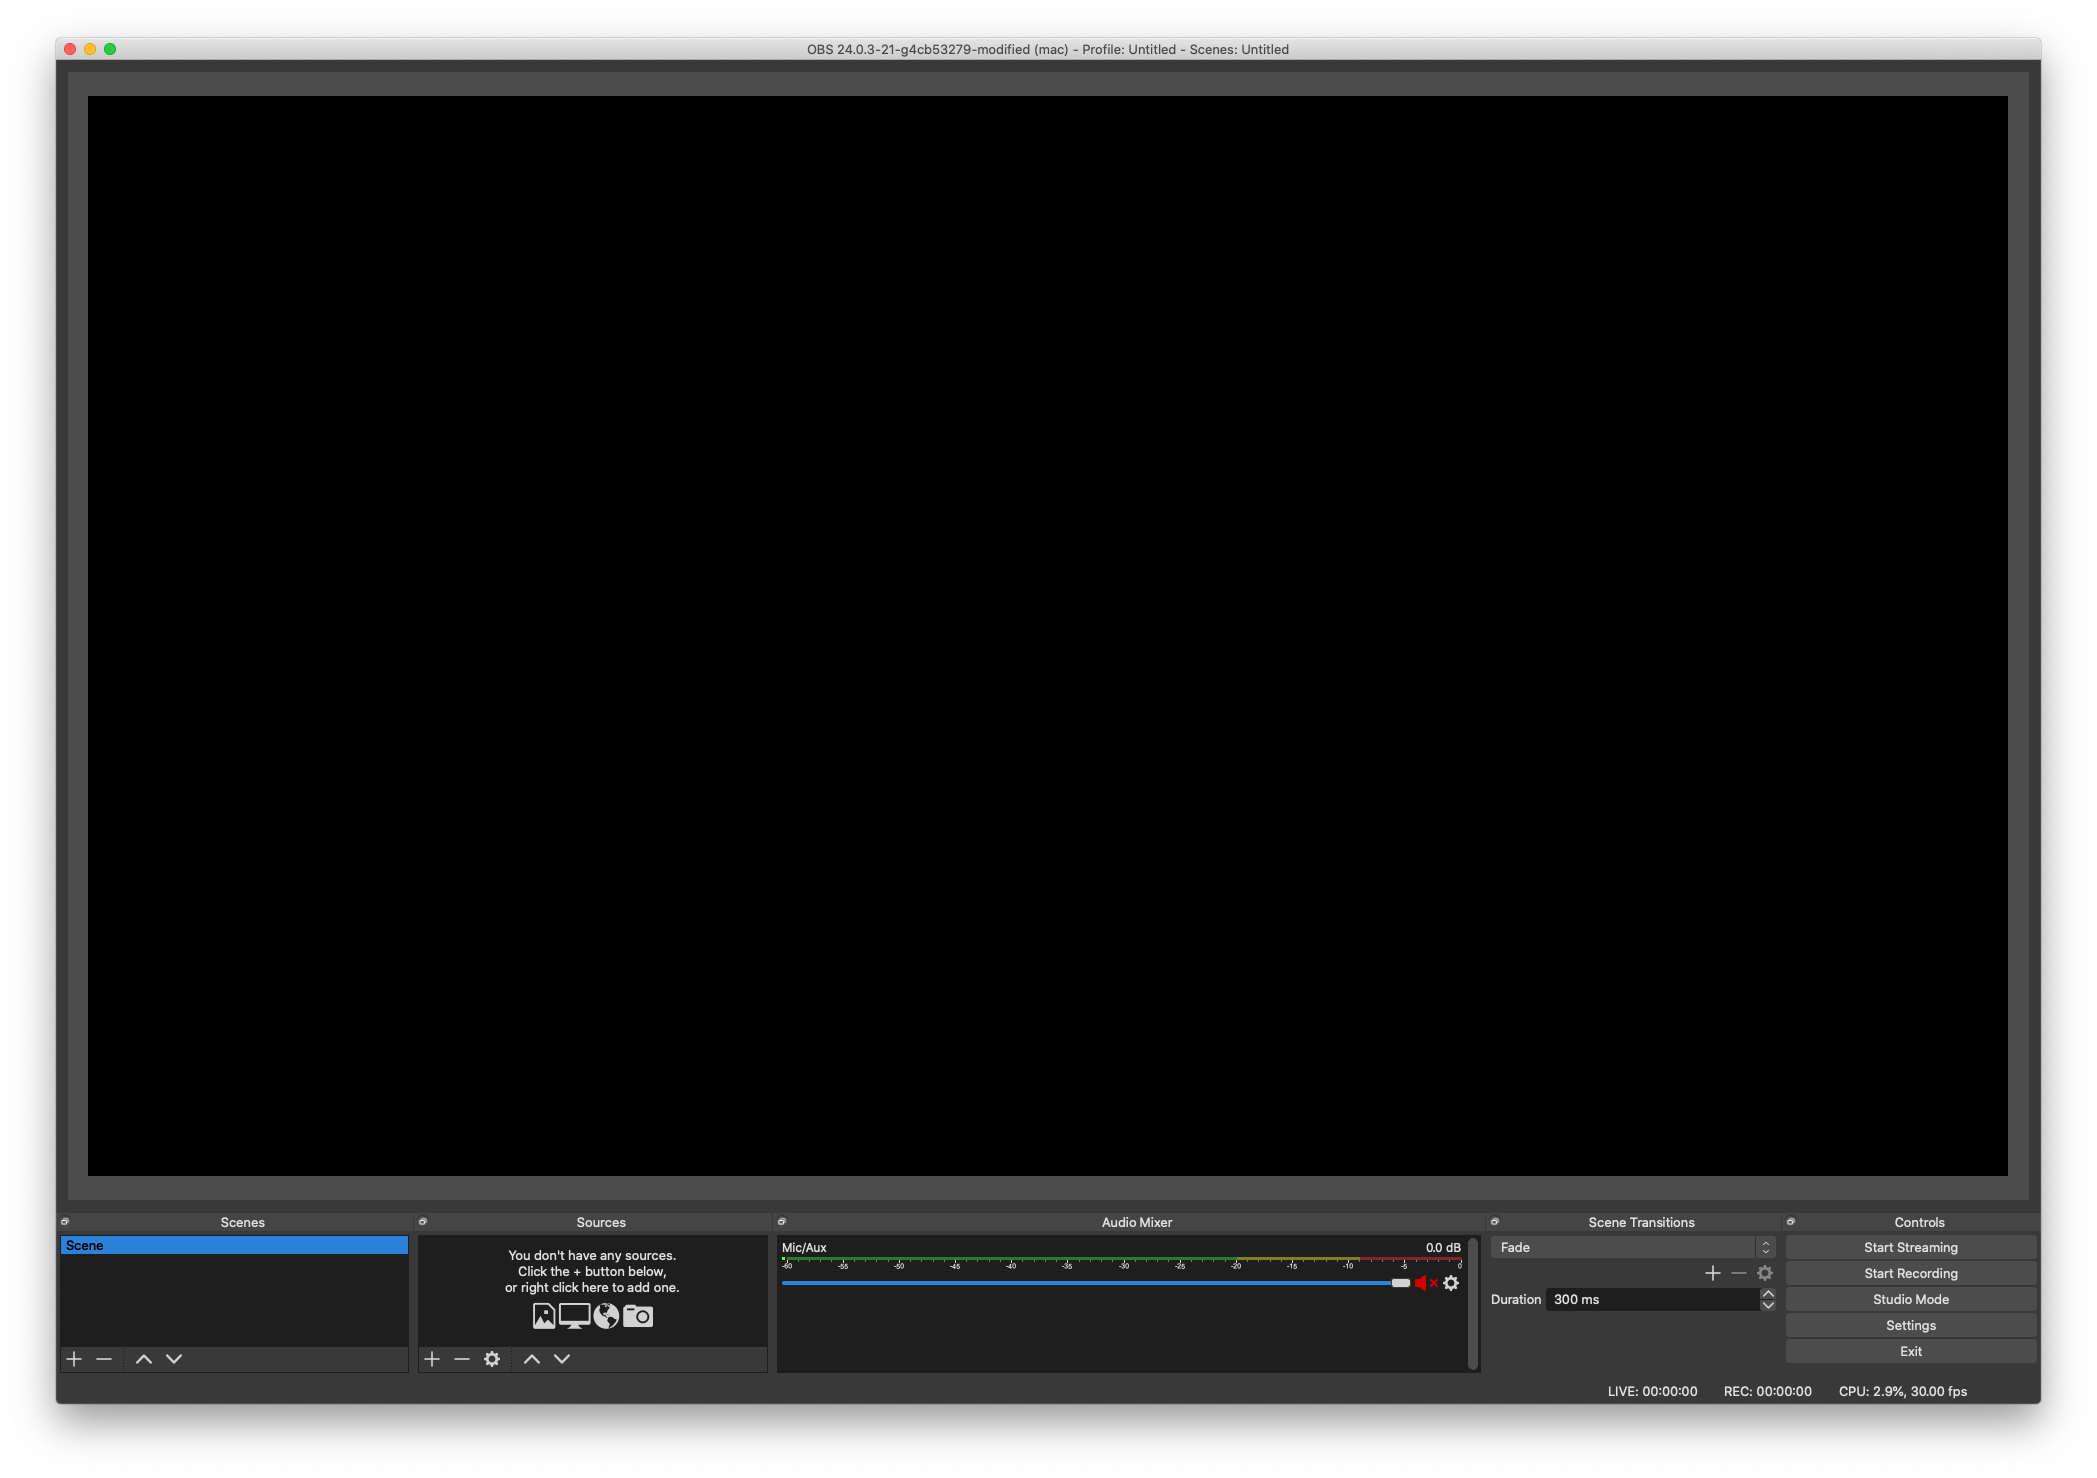
- With the device already connected, open OBS on the PC you are planning on streaming from
- Once OBS is open, look for the Sources frame in the bottom left of OBS
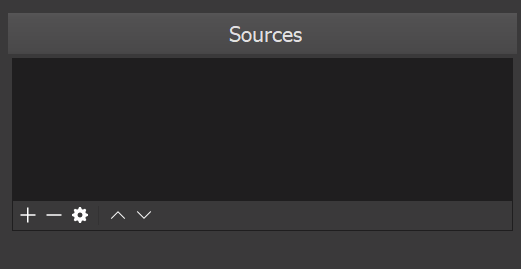
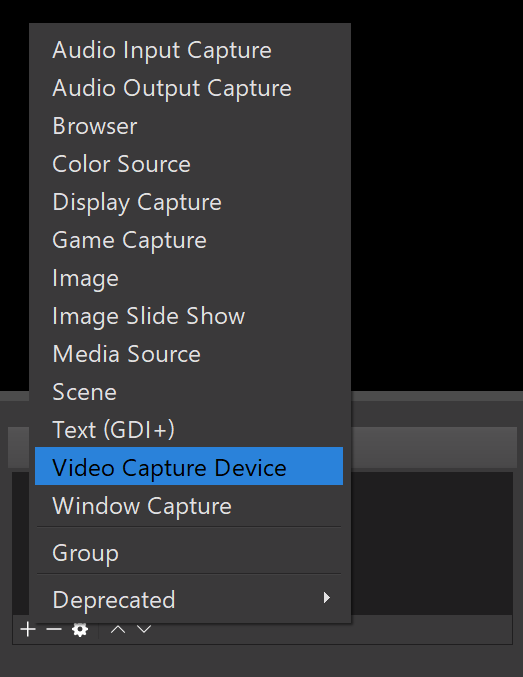
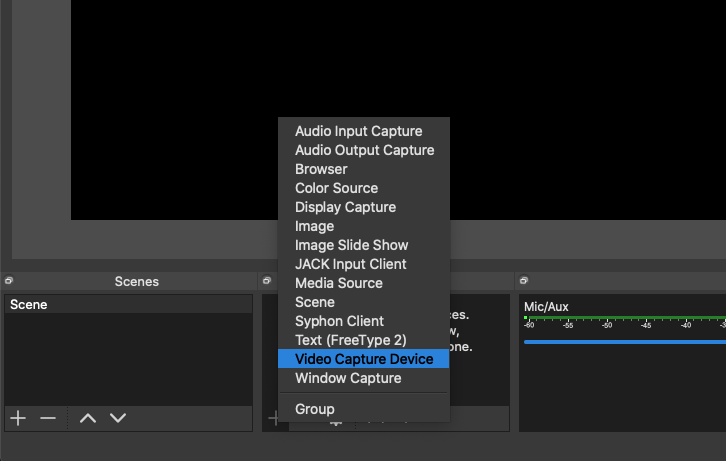
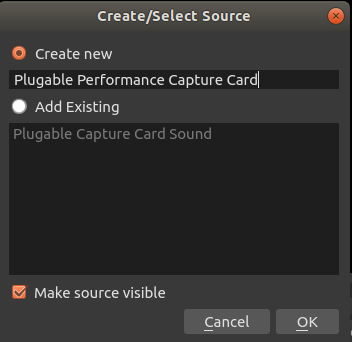
- Click the + button under the 'Sources' section in the bottom left of OBS and select Video Capture Device
- In the window that appears, input any name you would like to represent the capture card, then click OK
- Another window will appear, this shows detailed video settings for video capture characteristics of the NIX Capture Card and basic audio settings
- If you have already connected HDMI from your capture source (Xbox One, PS4, etc) you should now see an image
- If you have already connected HDMI from your capture source (Xbox One, PS4, etc) you should now see an image
- You may need to tweak these settings, but start with the settings depicted below
If the image looks incorrect, such as washed out dark areas, blown out lighter areas, and/or if there are issues with the colors in the captured image, you may need to do some additional tweaking. Check this article for details.
Audio Configuration
It is important for all aspects of your audio chan to use the same sampling rate for audio. If you have a misconfiguration in those settings, you may get audio that breaks, cracks, or is otherwise distorted in some fashion.
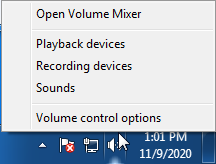
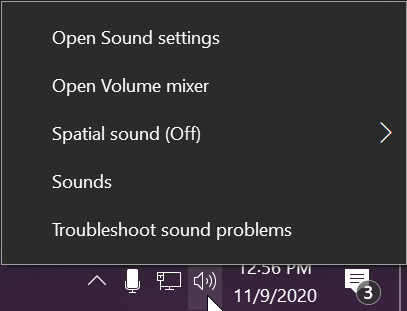
- Right-click on the speaker symbol in the Windows taskbar/system tray
-
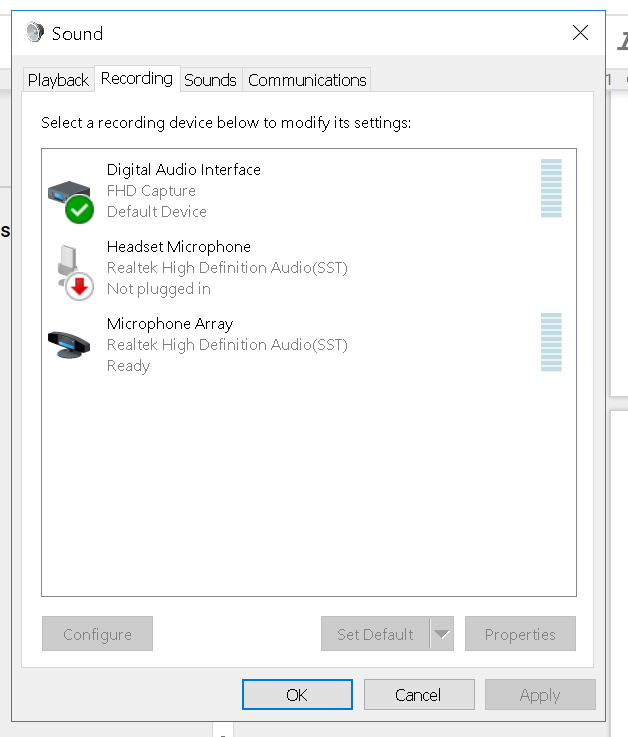
Windows 7/8.x—Select Recording Devices. The Sound window will open with the Recording tab highlighted
-
Windows 10—Select Open Sound Settings then click the link under 'Related Settings' for Sound Control Panel, then click the Recording tab
-
Windows 7/8.x—Select Recording Devices. The Sound window will open with the Recording tab highlighted
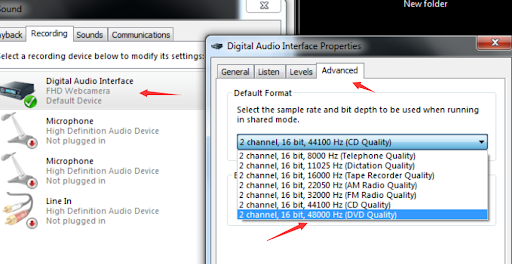
- In the Recording tab, double-click the Digital Audio Interface—FHD Capture device
- In the Advanced tab, change the sample rate to 2 channel, 15 bit, 48000Hz (DVD Quality)
- Back in OBS, go to the Sources frame and click the + icon
- Select Audio Input Capture
- Name the entry whatever you would like, then click OK
- In the window that appears, change the Device dropdown to Digital Audio Interface (FHD Capture) and click OK
- You will now have two entries for the NIX Capture Card in OBS, one for audio and one for video
- In the main OBS window you'll now find audio settings (named whatever you chose in the last step) in the OBS mixer
- On the right side of the mixer, there will be a gear/cog icon , click it and select Advanced Audio Properties
- In the Advanced Audio Properties window, look for row for the NIX Caputure Card and set the Sync Offset value to 470
Provided everything was configured correctly, you should now have the NIX Capture Card ready for streaming via OBS. If you encounter issues, please contact us for help.
macOS
OBS Configuration
Before configuring the capture card, please have the latest version of OBS installed. Recent macOS updates may cause problems with OBS if you are not using the latest version.
This guide will walk through the steps to initially configure OBS's recording and preview settings.
- Enter the Settingsmenu of OBS
- Method 1—Settings button in the lower-right of OBS
- Method 2—In your Mac menu bar, open the Preferences menu and choose Settings
-
Method 3—Press ⌘ + ,
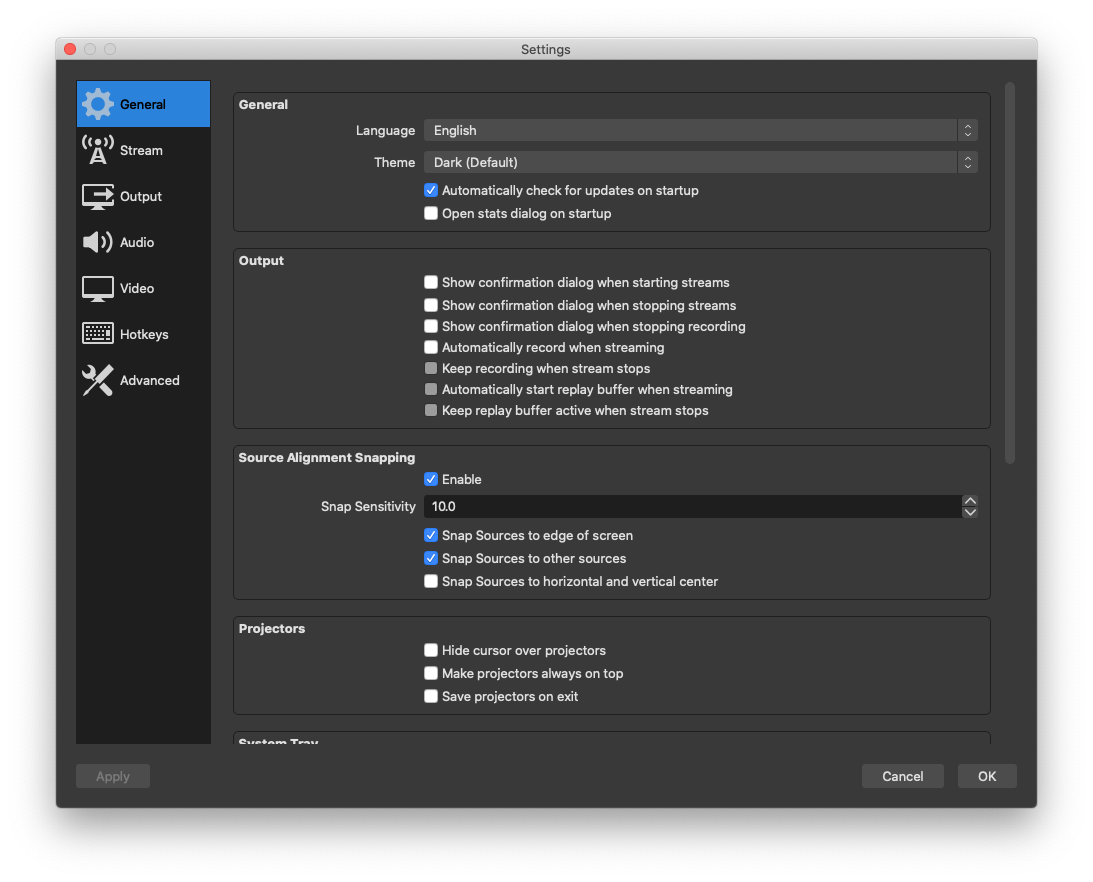
- Switch to the Output section of the Settings window
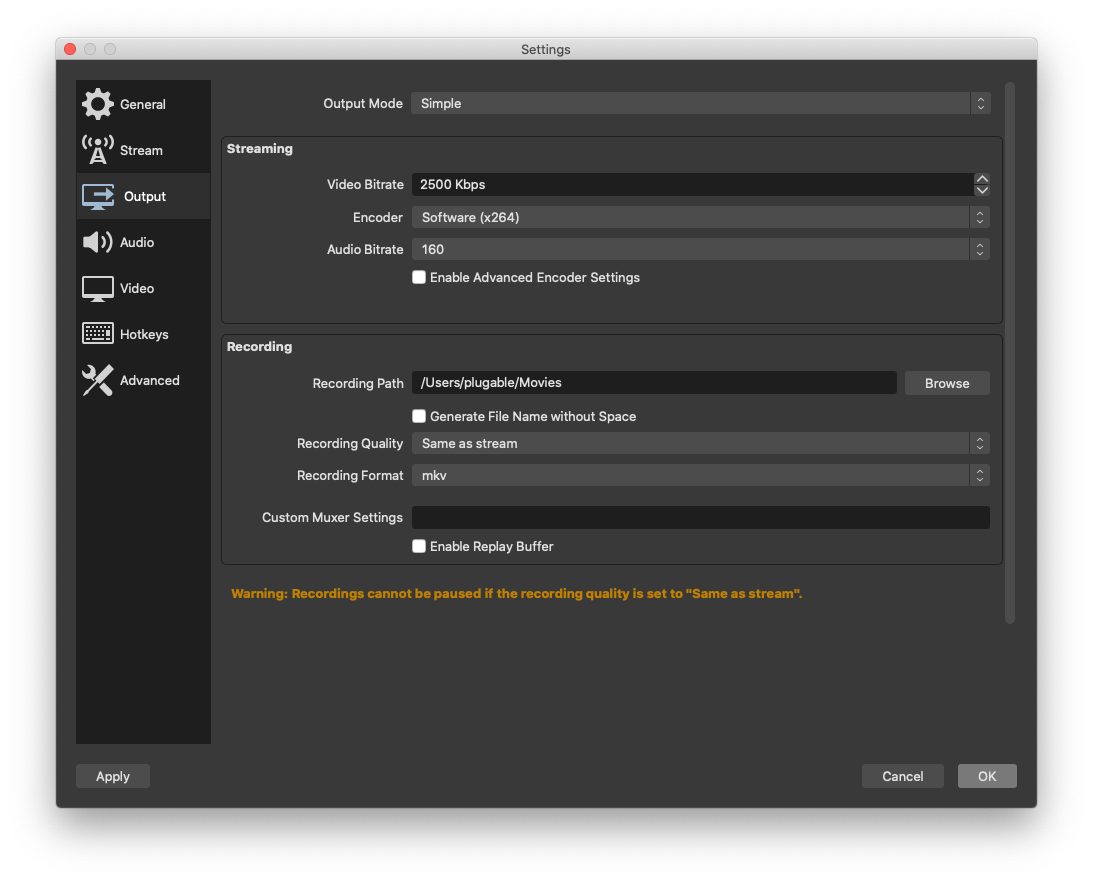
The Video Bitratevalue is one of the most important items to configureBitrate Value Best Use/Notes 2,500 Kbps OBS Default 8,000 Kbps 1080p at 24, 25, or 30 frames per second 10,000 Kbps Max upload for most cable Internet providers 12,000 Kbps 1080p at 50 or 60 frames per second
When streaming video, it is important to keep in mind what your max available upload bandwidth is for your Internet connection. If you are playing an online multiplayer game, maxing out your available upload bandwidth can lead to performance problems in your game.
It is also important to note that the Video Bitrate does not include the additional bitrate of carrying audio. By default, OBS is configured to use 160 Kbps for audio. For example, selecting 8,000 Kbps—with the default audio bitrate of 160—results in a total bitrate of 8,160 Kbps.
If Enable Advanced Encoder Settings is enabled, it is important to note that the Encoder Preset which ranges from ultrafast to slower mostly impacts how much processing work your computer has to do during the capture/streaming process.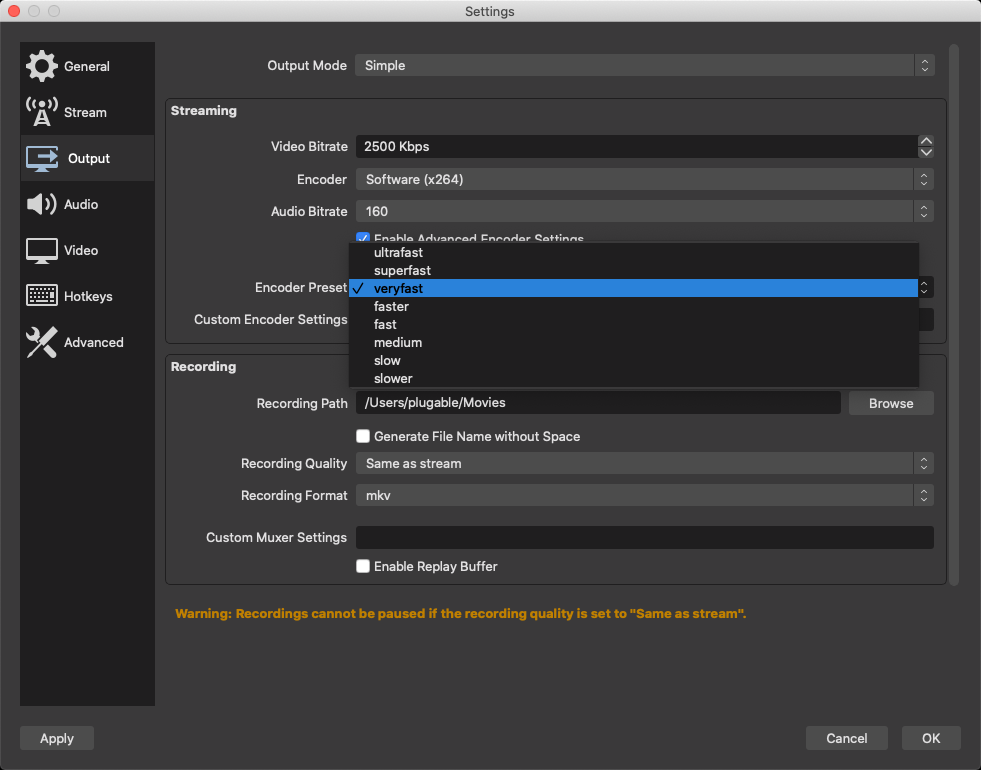
If you are on a high-performance computer, using the slower options may be feasible and will result in better video quality. However, if you are on a lower-performance system, you will likely want to choose one of the first three options. - Switch to the Audio section of the Settings window
- One of the most important settings regarding audio is the Sample Rate setting. If the sample rate between your console, the recording device (the capture card), and OBS are mismatched in any way, it can result in issues like audio popping, audio cutting out, and a variety of other audio issues.
Usually the best approach is to set everything manually to 48KHz, including this option in OBS. Please note, that you must restart OBS for this change to take effect.
Additionally, you will want to enter the Audio MIDI Setupmenu of macOS. This utility can be found by searching Launchpad on your Mac:- Select FHD Capture and make sure the Format is set to 48,000KHz
- On your computer, game console, or other HDMI source that you are capturing audio and video from, make sure to check the audio output properties on that device and manually set it to 16-Bit 48,000Hz audio
- In OBS, click Apply in the lower-left of the Settings window, then click OK
- In the Sources section of the main OBS window, click the + symbol to add a device
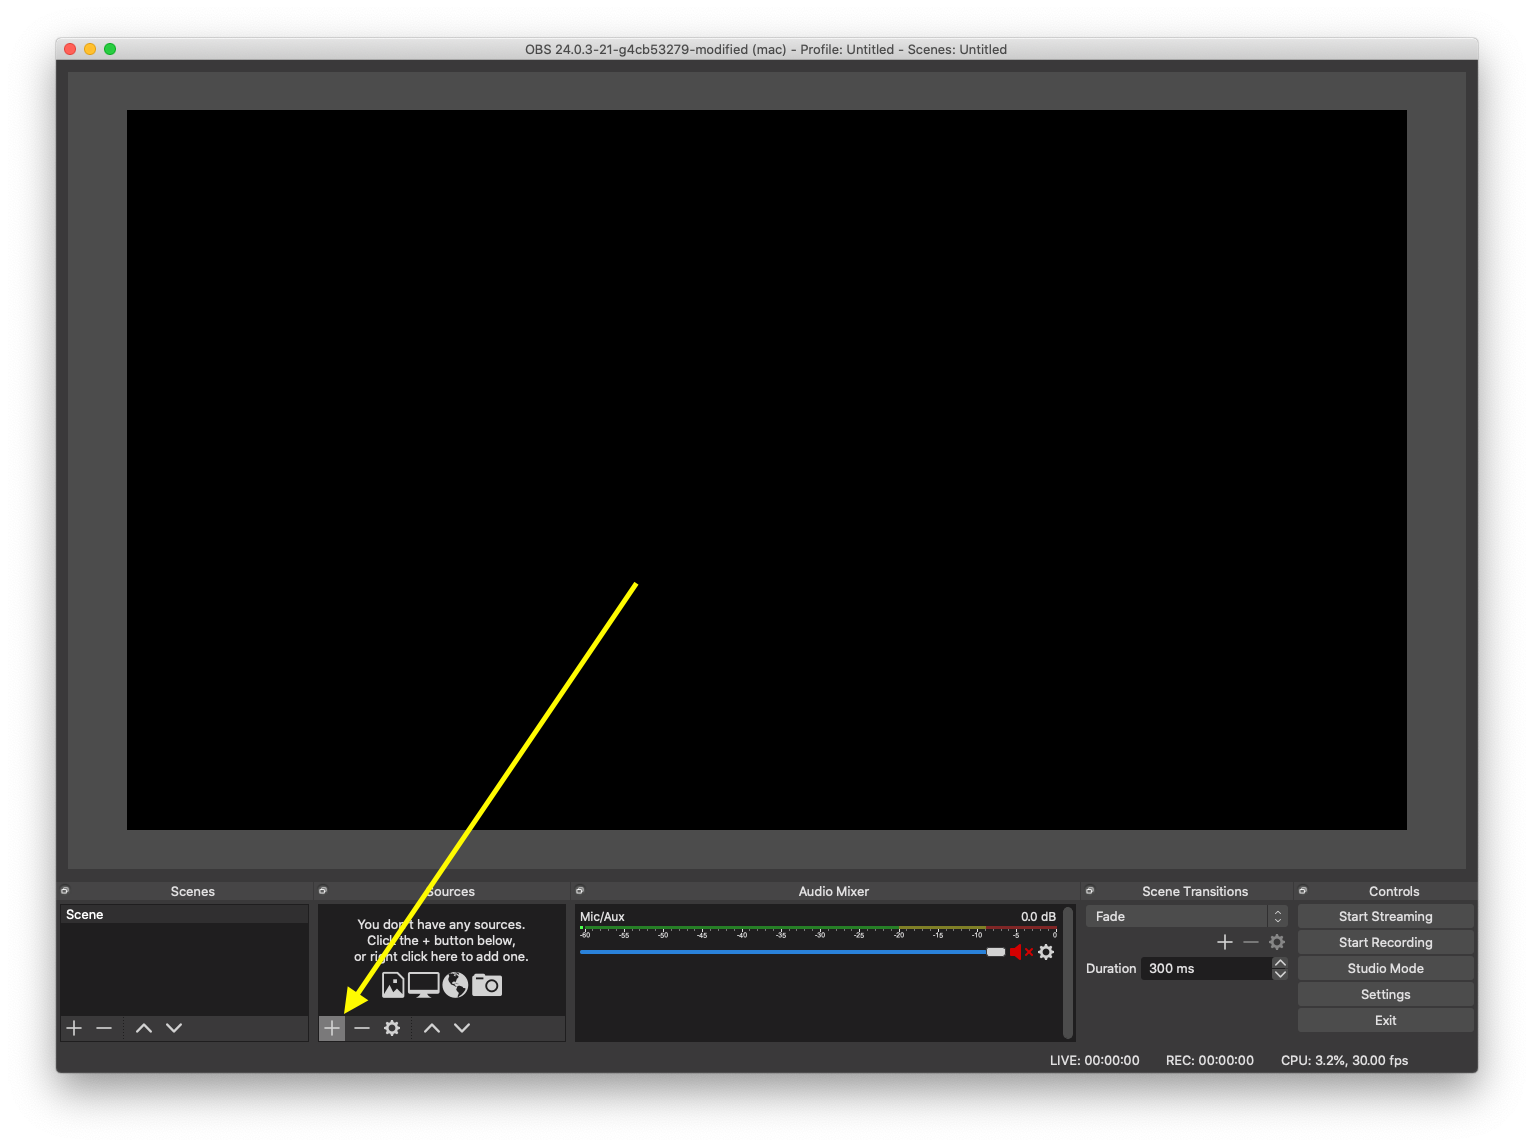
- In the menu that appears, choose Video Capture Device
- In the dialog that appears, you may rename Video Capture Device to whatever you want, such as 'Nix HDMI Capture Card'
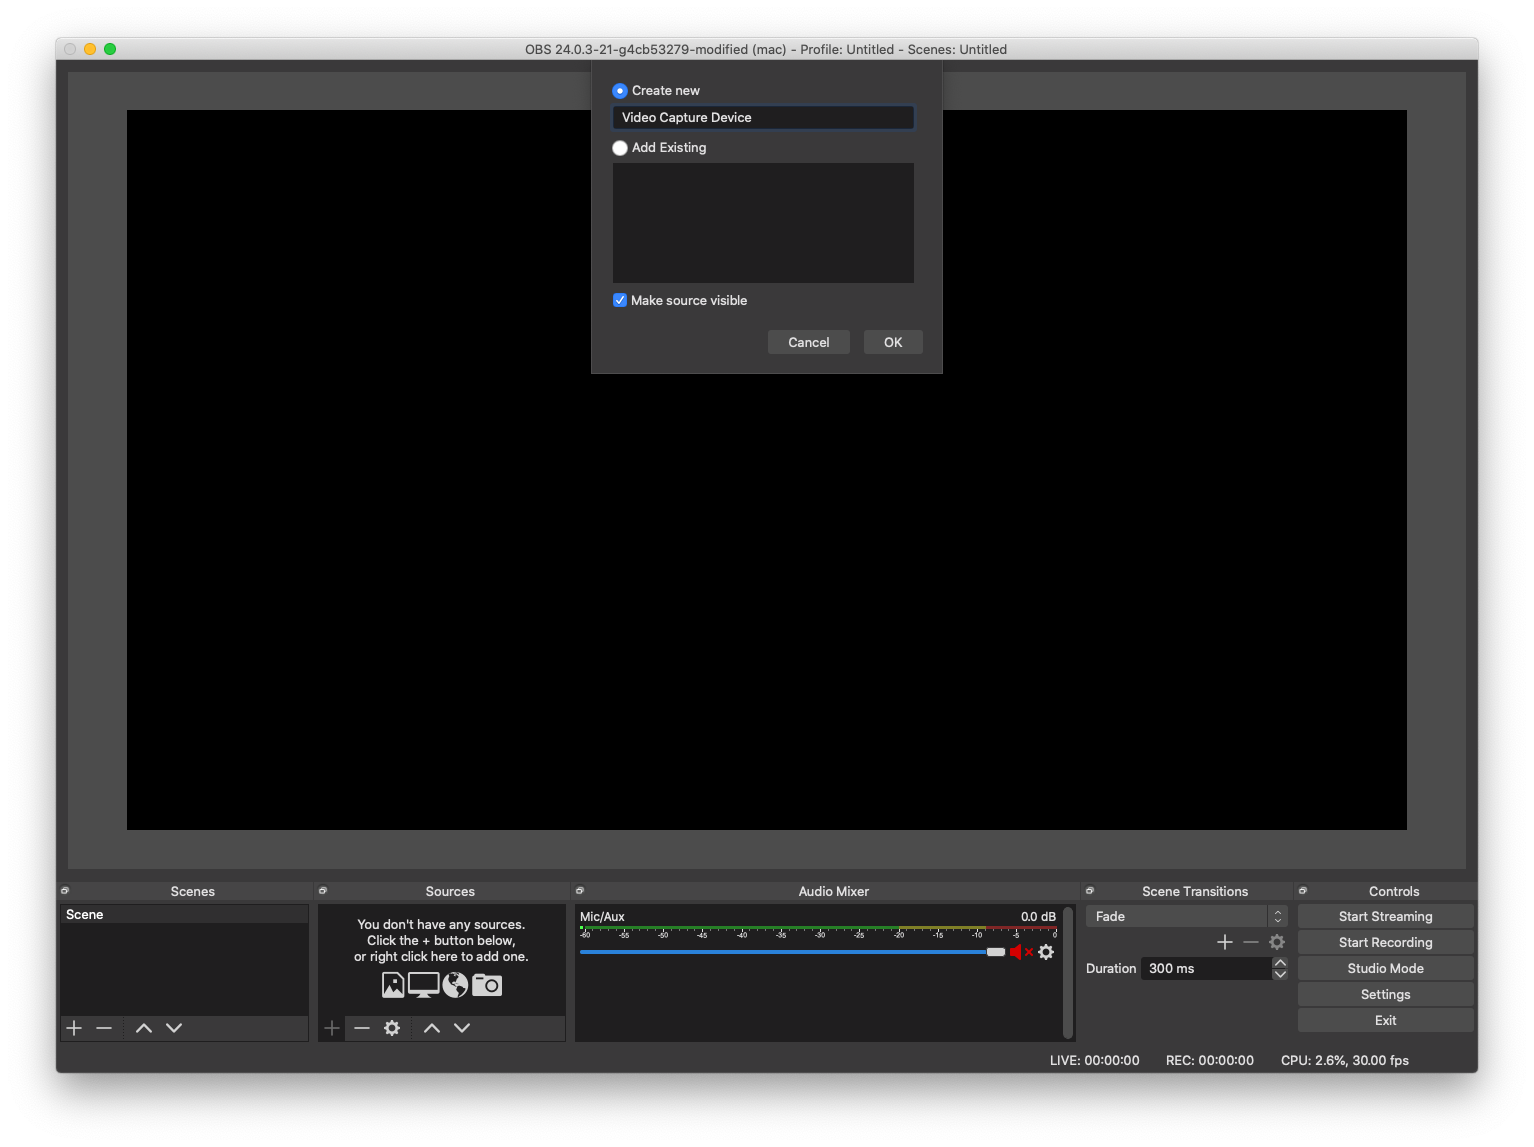
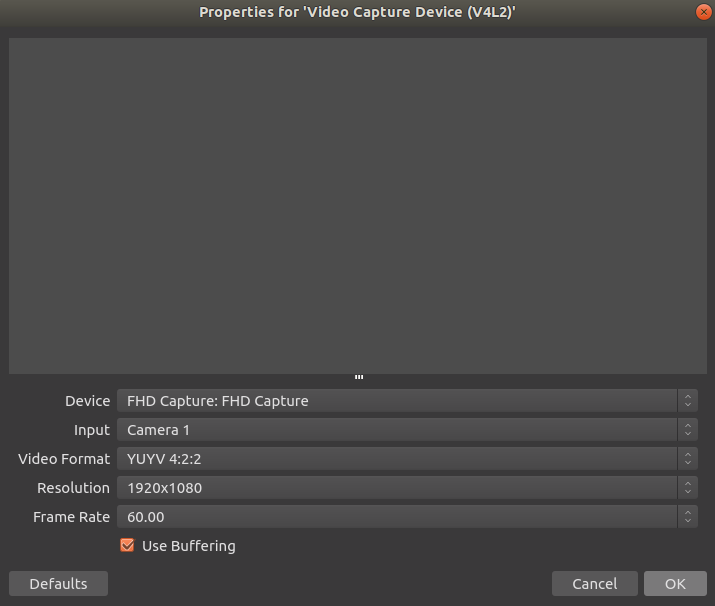
- After clicking OK a new window will appear for the properties of the newly-added video capture device
- Perform the following changes and checks in order:
- Ensure that the device you intend to capture from is plugged into the Inport of the NIX capture card
- Please Note—The NIX HDMI Capture Card does not support HDCP (High-bandwidth Digital Content Protection). Your source must not enforce HDCP. Last-generation game consoles such as the Nintendo Switch and Xbox One do not enforce HDCP for most gameplay and/or on the dashboard/home menu. However, most media playback apps such as YouTube, Hulu, Netflix, Amazon Prime Video, and other video/audio streaming services will cause HDCP to become active. On the PlayStation 4, there is a toggle to switch HDCP enforcement on and off
- Verify that the device you're capturing video from is not in a 'sleep' state, and has a video signal being sent to capture
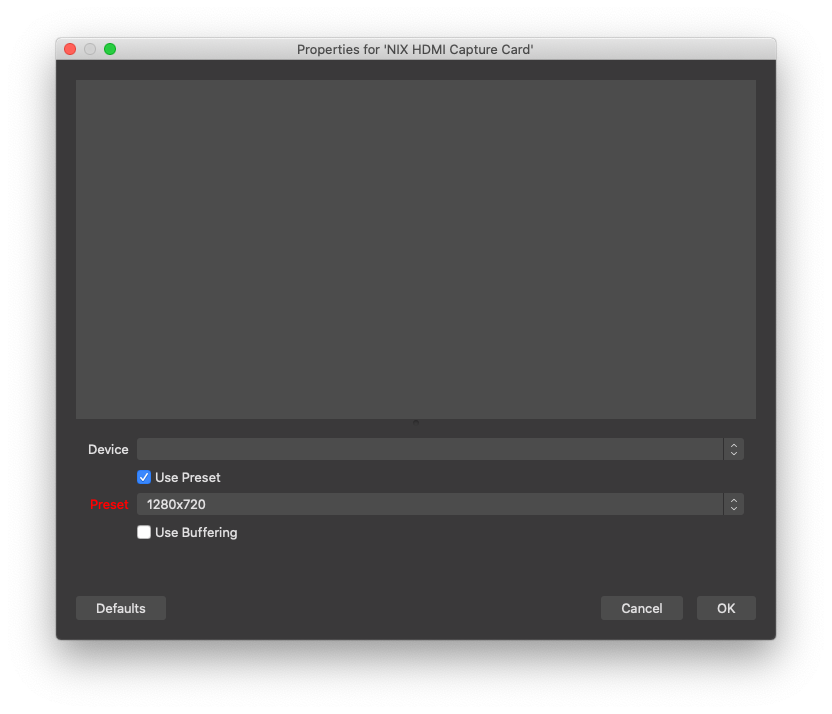
- Uncheck Use Preset
- In the Device dropdown menu, choose FHD Capture
- In the Resolution dropdown menu, choose 1920×1080
- In the right-most dropdown for Frame Rate choose 30 or 60. 30 is recommended for higher detail quality and 60 is recommended for smoother motion in fast-paced games

- After selecting the Frame Rate, video should appear in the current window
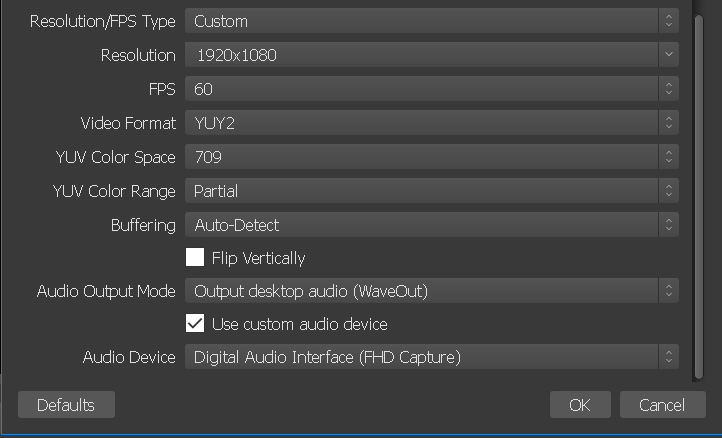
- Scroll down to the next options in the Properties window
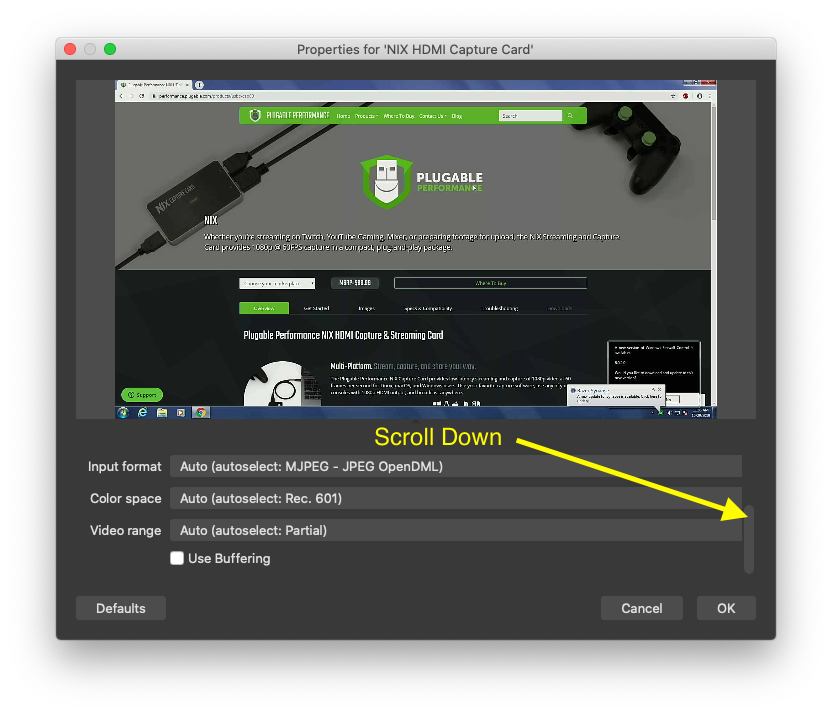
- Make these additional changes after scrolling down:
-
Input format
- By default MJPEG will be selected, this is a very low-quality recording option, and is the only one available if your NIX Capture Card is connected via a USB 2.0 port
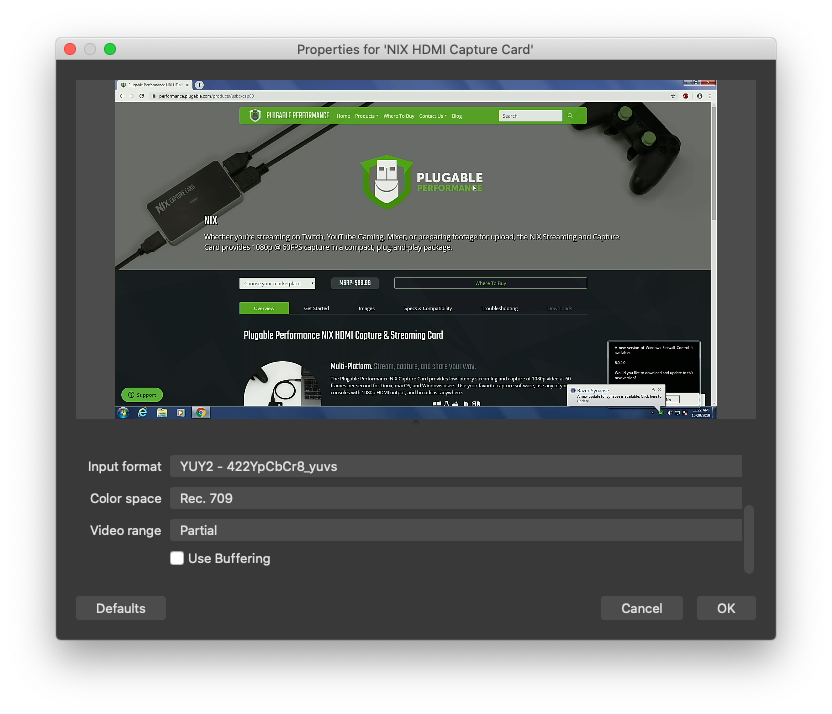
- In the dropdown, select YUY2 - 422YpCbCr8_yuvs. This is the highest quality input format, and is only available if your NIX Capture Card is properly connected to a USB 3.0 port
-
Color space and Video range
-
Color space and Video rangeare much more difficult to configure than the other options that have been selected so far. Televisions, and devices designed to connect to televisions, use a somewhat complex system to determine black levels, white levels, and color values when composing and displaying an image. These settings have a dramatic impact on color accuracy, and the brightness, of the image being captured
- On consoles and televisions, color spaceis often given as three options:
- Wide
- Limited
- Automatic
- On consoles and televisions video range is usually given as an HDMI Black Leveloption:
- Low
- High
- On consoles and televisions, color spaceis often given as three options:
- For the best quality in capturing video, previewing the capture, and viewing the passthrough from the HDMI Outport on your monitor or TV, it is very important to test which combination of these settings results in the best image quality. You may need to manually change settings on:
- Your game console or other capture source
- Here in OBS
- On your display connected to the Out port of the NIX Capture Card
- Here are some general tips regarding these settings in OBS
- Start with 'Rec. 709' for the color space
- If black portions of the captured image appear too 'light' or 'gray' select Partial for the Video range
- If black portions of the captured image appear too dark/lacking in detail, select Full
- If the image still seems very incorrect, check the video settings on the device you're capturing video from
-
Color space and Video rangeare much more difficult to configure than the other options that have been selected so far. Televisions, and devices designed to connect to televisions, use a somewhat complex system to determine black levels, white levels, and color values when composing and displaying an image. These settings have a dramatic impact on color accuracy, and the brightness, of the image being captured
-
Input format
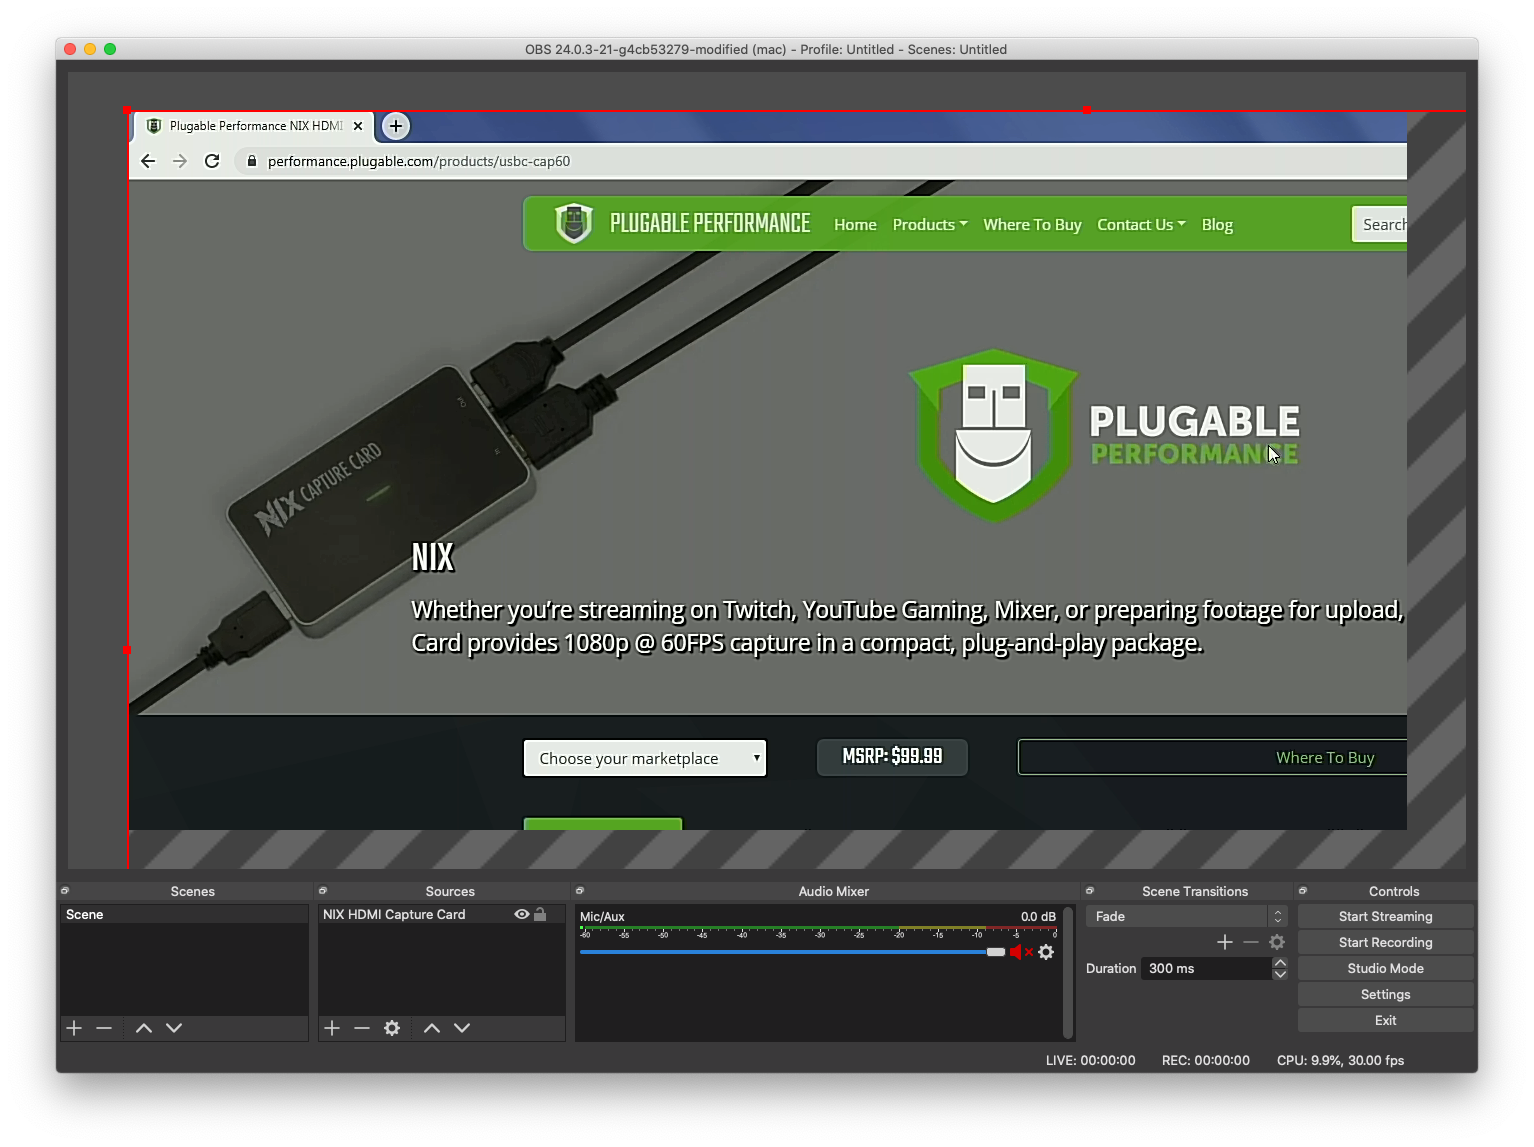
- Once the image color has been corrected, click OK
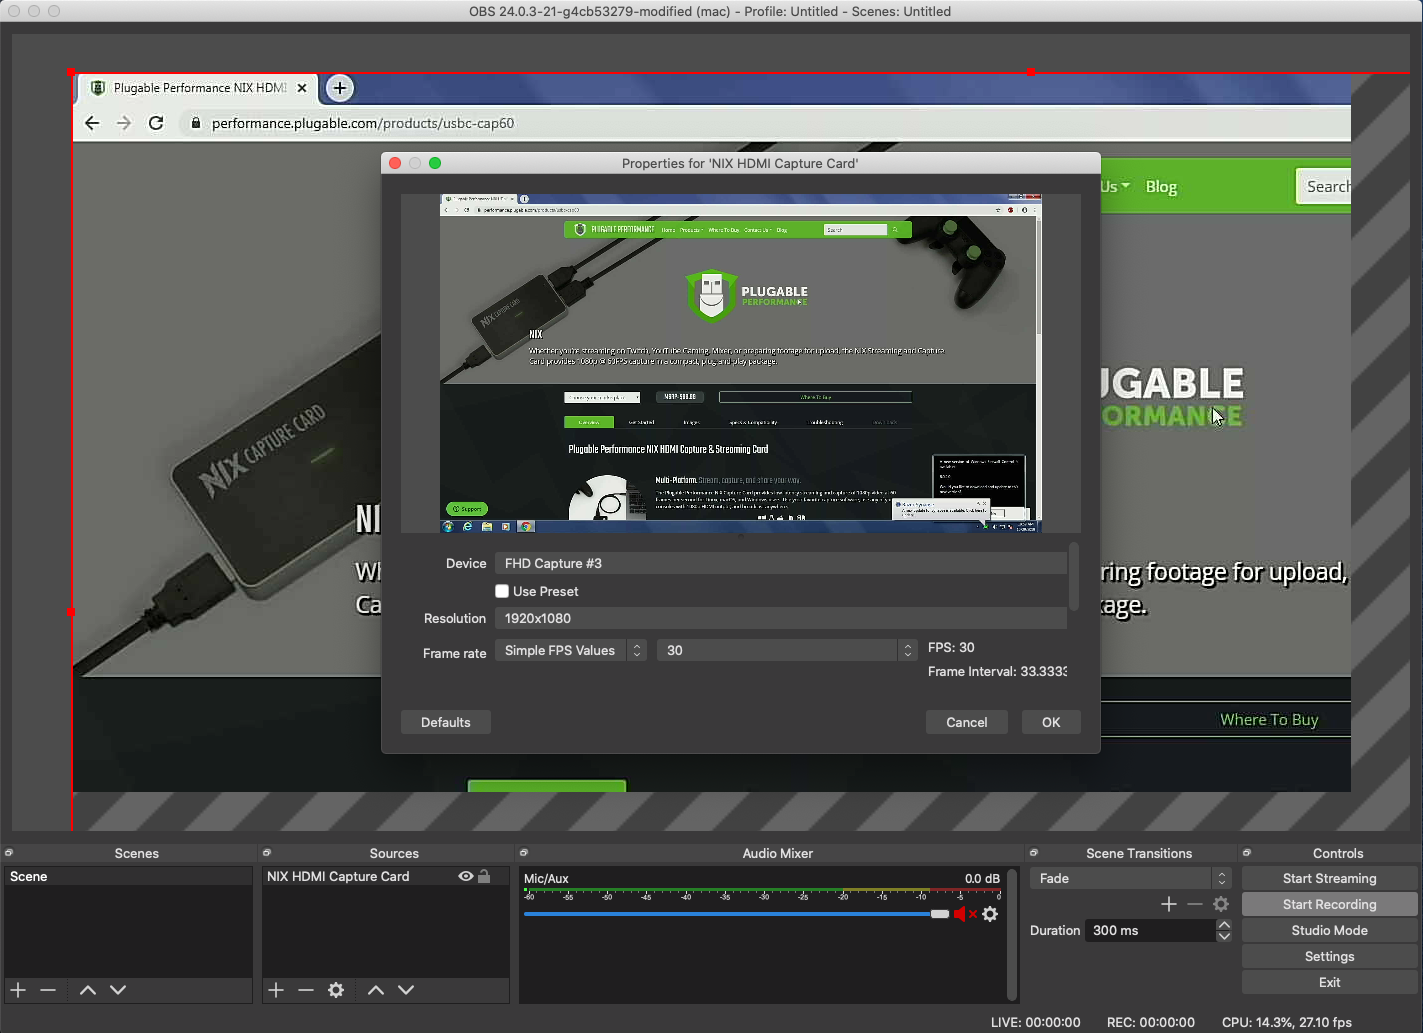
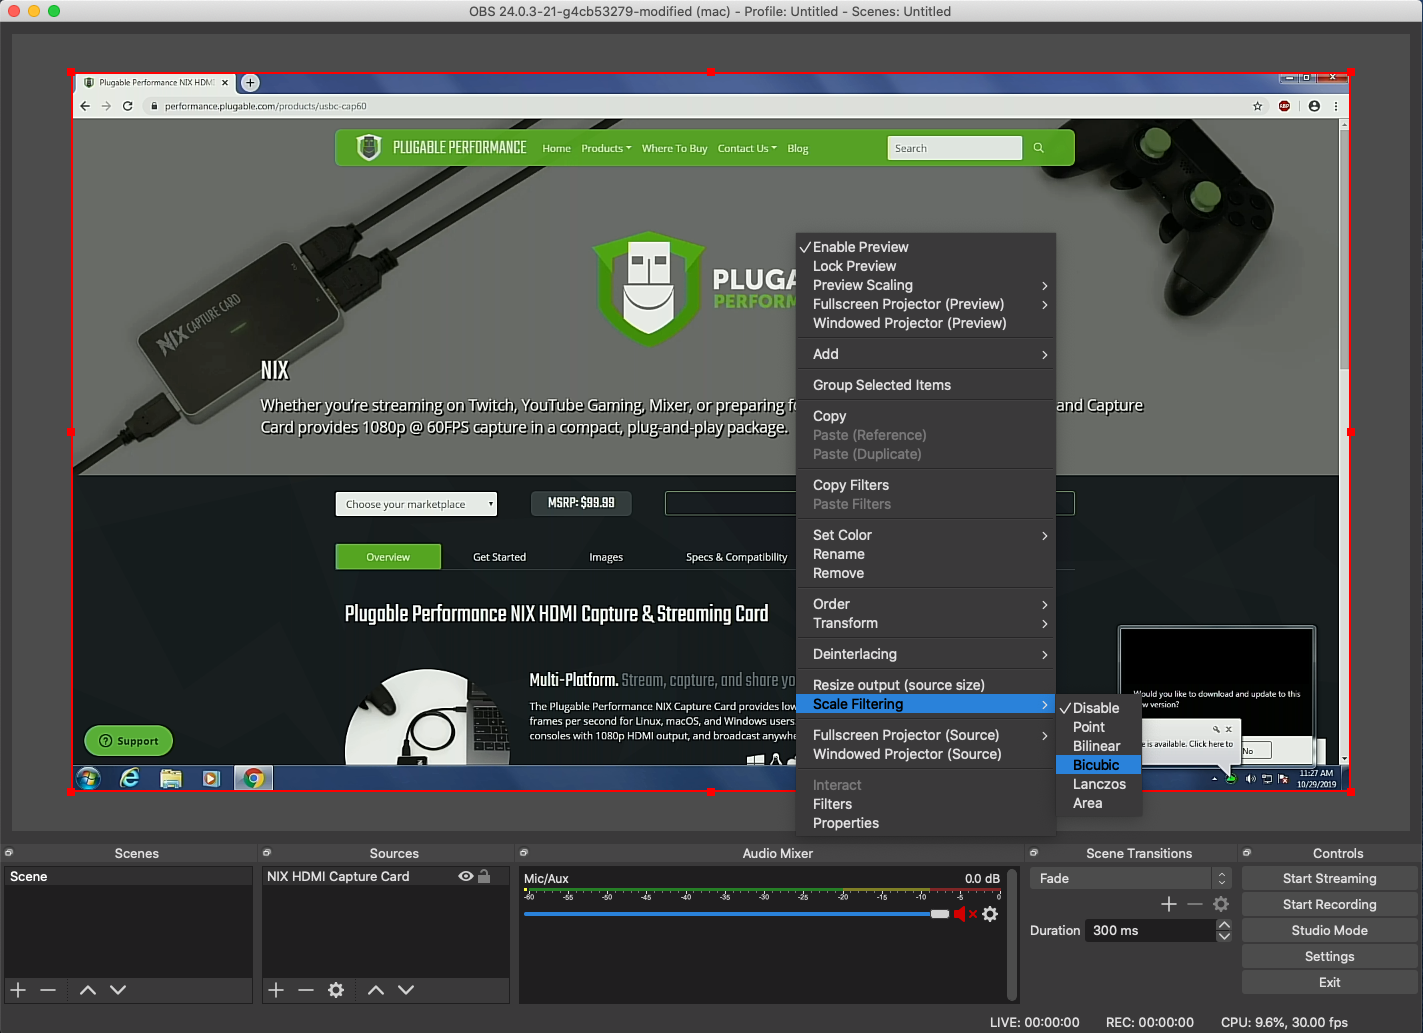
- You may notice the video is too large to fully preview in OBS, as shown below, or that the image doesn't fit correctly in the canvas area
- Right-click the video capture preview and choose Transform then Fit To Screen
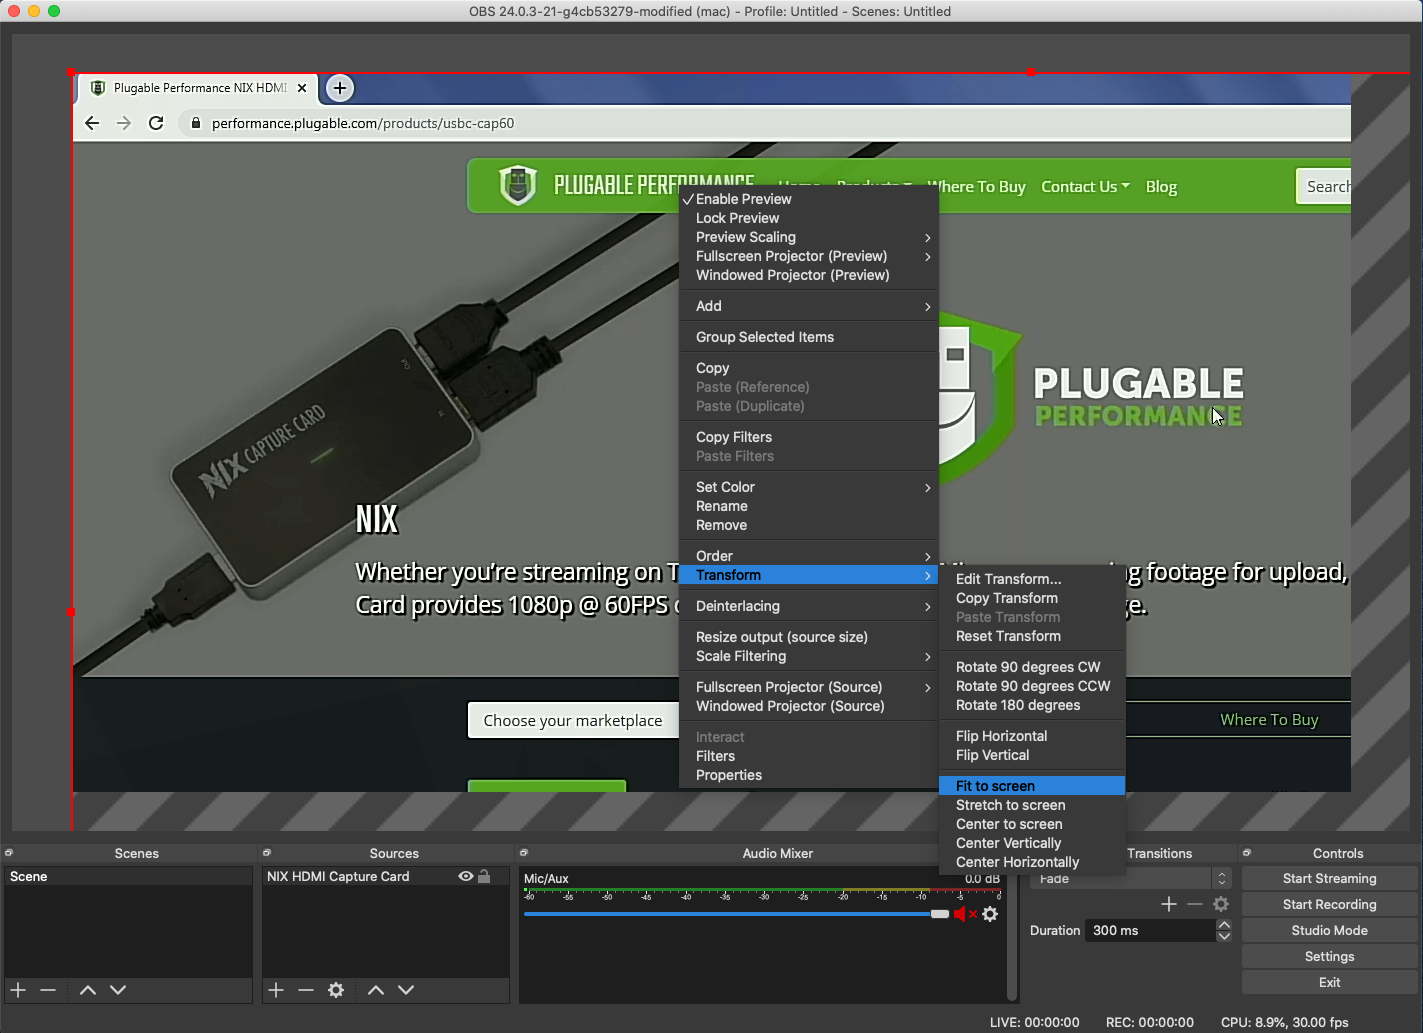
- After the image has been properly sized to your preview canvas, you may also want to right-click the capture preview again, then go to Scale Filtering and choose Bicubic or Lanczos to make the preview a little sharper. This will have some impact on CPU performance, so it may be best to leave this disabled on lower-performance systems
- Right-click the video capture preview and choose Transform then Fit To Screen
- In OBS, go to the Sources frame and click the + icon
- Select Audio Input Capture
- Name the entry whatever you would like, then click OK
- In the window that appears, change the Device dropdown to FHD Capture and click OK
- You will now have two entries for the NIX Capture Card in OBS, one for audio and one for video
- In the main OBS window you'll now find audio settings for the NIX capture card (named whatever you chose in the last step) in the OBS mixer

- On the right side of the mixer, there will be a gear/cog icon , click it and select Advanced Audio Properties
- In the Advanced Audio Properties window, look for row for the NIX Caputure Card and set the Sync Offset value to 470
- Ensure that the device you intend to capture from is plugged into the Inport of the NIX capture card
Congratulations, your capture card is now ready for use in your streaming software!
Linux
- With the device already connected, please open OBS on the PC you are planning on streaming from
- Once OBS is open look for the Sources panel in the bottom left of OBS
- Click the + button at the bottom left of the panel and select Video Capture Device
- Once Video Capture Device is selected a separate window will open allowing you set a name for the device
Input any name you wish, then click OK - Another window will appear, this shows detailed video settings for video capture characteristics of the NIX Capture Card
Once these settings are correctly set, click OK (the device should read as 'FHD Capture') - In the Sources panel, click the + button again, and choose Audio Input Capture (Pulse Audio) and click OK
- A small window will appear allowing you to name the device, choose whichever name you wish.
- In the window that appears for Audio Input Capture properties, select FHD Capture Digital Stereo (IEC958), then click OK
- You will now have two entries for the NIX Capture Card in OBS, one for audio and one for video
- In the main OBS window you'll now find audio settings for the NIX capture card (named whatever you chose in the last step) in the OBS mixer
- On the right side of the mixer, there will be a gear/cog icon , click it and select Advanced Audio Properties
- In the Advanced Audio Properties window, look for row for the NIX Caputure Card and set the Sync Offset value to 470

The capture card is now configured for use in OBS.
How To: Set the Display Refresh Rate in Windows 11
Many modern displays can support above the default 60Hz refresh rate, however this may need to be manually set within Windows 11. Please note, not all computers, graphics adapters, and docking stations can support all resolutions and refresh rates.
Setting the Display Refresh Rate in Windows 11
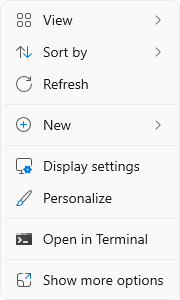
1. Right-click on the desktop and select Display Settings from the drop-down menu
2. Scroll down to the Related settings subsection and select Advanced display

3. At the top of the Advanced display window, select the external display from the drop-down menu

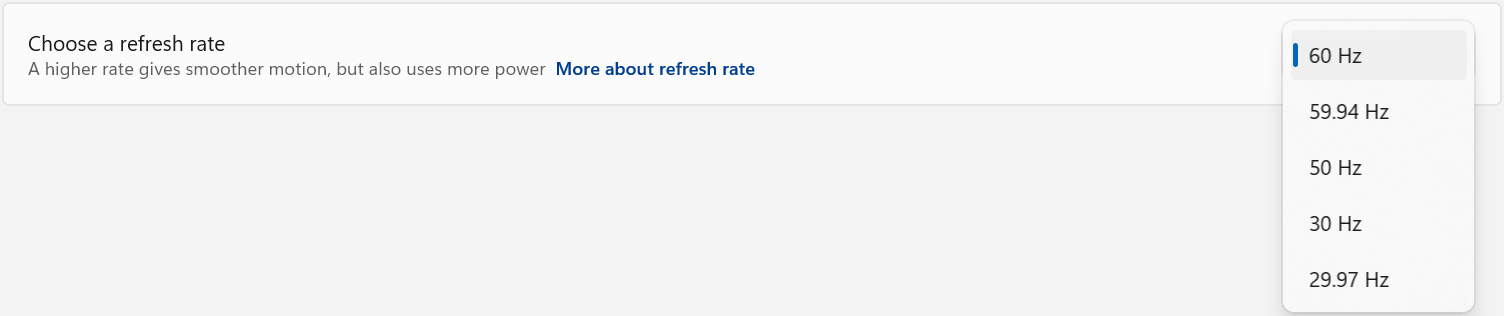
4. From the Choose a refresh rate drop-down menu select the desired refresh rate
Refresh Rate Limitations
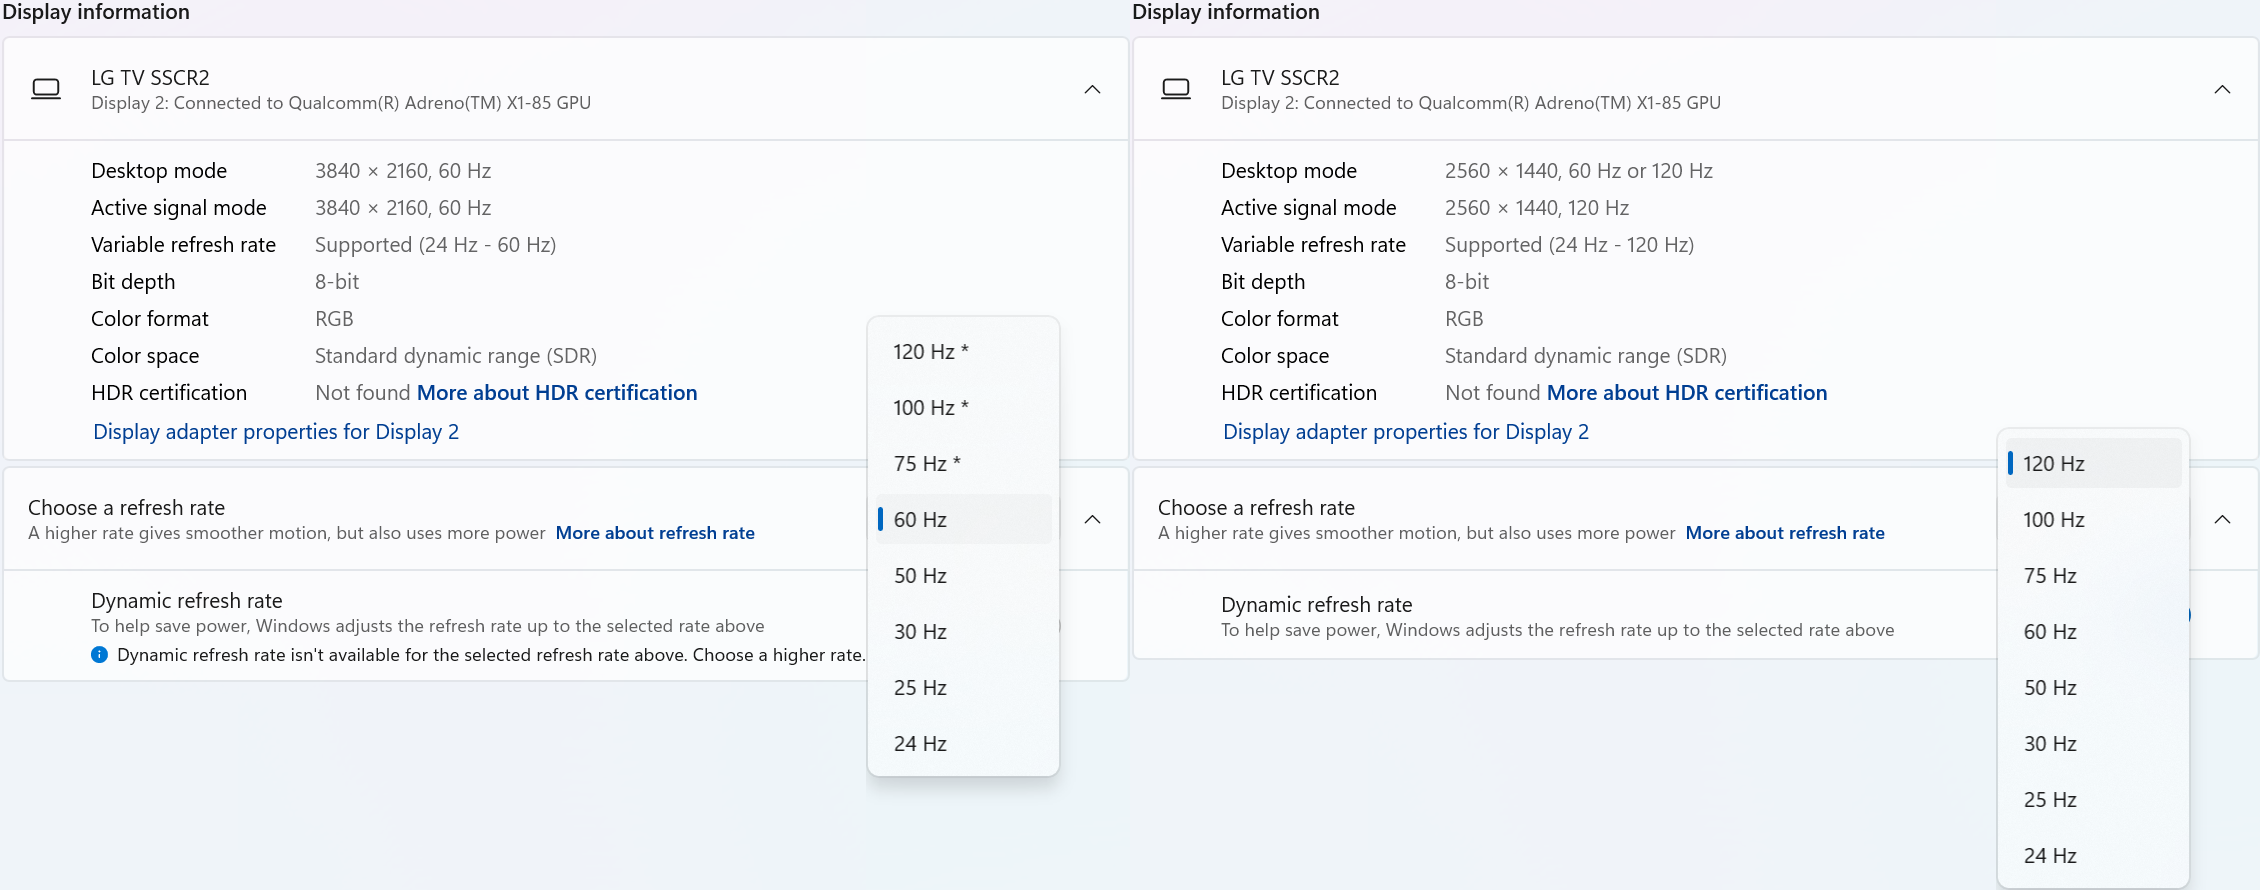
With Windows 24H2 and newer, dynamic refresh rates are supported, this allows the system to adjust the display refresh rate to save power, up to the selected refresh rate. As a consequence of this new mode, when selecting the display refresh rate you may see an asterisk. This indicates that selecting the specific refresh rate may reduce the display resolution or image quality in order to prioritize the refresh rate. This exposes the refresh rate option from the display even if the display cable or computer is incapable of supporting that refresh rate at the native resolution and is the intended behavior per Microsoft. [1]
In the screenshot below the left side shows the 4K 120Hz capable display limited to 60Hz refresh rate without asterisks, and on the right the same display after setting the refresh rate to “120 Hz*”, the “Desktop mode” resolution has been reduced to 2560 x 1440 (1440p) instead of 3840 x 2160 (4K UHD). Unlike when using the display scaling option this also causes a reduction in image quality. On the right side asterisks are no longer shown in the refresh rate list. Setting the refresh rate back to 60Hz does not change the resolution, you will have to go back one page and set the resolution manually.
References
[1] Windows Insider description of new behavior (https://blogs.windows.com/windows-insider/2023/08/31/announcing-windows-11-insider-preview-build-25941-canary-channel/)
Can I connect this product to a computer's Thunderbolt/Thunderbolt 2 port?
Many users assume that USB-C devices can work with older Thunderbolt 2 Macs if they use a Thunderbolt 3 to Thunderbolt 2 adapter, such as the one made by Apple. However, this is not the case. These adapters are specifically designed to support Thunderbolt devices only - not standard USB-C peripherals.
While Thunderbolt 3 and USB-C share the same connector type, they use different underlying data protocols. Non-Thunderbolt USB-C devices, rely on USB standards for data and power. The Thunderbolt 3 to Thunderbolt 2 adapter does not carry USB signals; it only passes Thunderbolt data. Because of this, plugging a USB-C device into a Thunderbolt 2 Mac using this adapter will not work - the computer will not detect or communicate with the device.
If you need to connect peripherals to a Thunderbolt 2 system, we recommend using a USB-A dock or hub (if available on your system). This ensures compatibility without relying on unsupported adapter chains.
In short, even though the connectors may fit, USB-C devices are not compatible with Thunderbolt 2 Macs via Thunderbolt adapters - only Thunderbolt devices will work in that setup.
Update Graphics Drivers in Windows
Up to date graphics drivers are necessary for ensuring the best performance of your computer's built-in display, as well as the capability and compatibility with external displays and docking stations.
Windows has a built-in system update service: Windows Update, however this may not provide up to date drivers or timely updates. We often see systems with out of date drivers, in some cases systems may not receive updated graphics drivers for months or even years, leaving the computer with drivers incompatible with the installed version of Windows 11.
However, we can manually update the graphics drivers to ensure the best possible performance, reliability, and compatibility.
The first step is to identify the graphics hardware, then downloading, and installing the latest drivers.
Identifying Graphics Controller
For notebooks and many desktop computers, the primary graphics controller is embedded in the processor, both AMD and Intel provide graphics driver updates based on the processor model, as well as for discrete graphics controllers. Our first step is to identify up the processor or graphics hardware model details:
- Right-click on the Start Menu and select Settings from the pop-up menu
- From the left column select System and from the bottom of the right side select About
- From the top of the about page the processor details will be on the right side, and duplicated lower down on the page.

- In this example the processor is a 12th Gen Intel(R) Core(TM) i7-1260P, we'll keep that detail for the next step.
If your computer has two graphics controllers (it may show "Multiple GPUs Installed" under Graphics Card) then we can get the graphics card model details from the Windows System Information Utility.
- Open the Start menu and search for "msinfo32"
- Select the first result
- From the left-column expand the Components section, then select Display

- In this example the Intel Iris(R) Xe Graphics is enabled by the processor, while the Intel(R) Arc(TM) Pro B60 Graphics is a discrete graphics controller.
Downloading the Drivers
Intel Graphics
- In a web browser navigate to the Intel Driver Download Page
- In the "Search Drivers & Software" field, search for the Intel graphics card model or CPU model, "Arc Pro B60" in this example

- Select the appropriate "Intel Arc Pro Graphics - Windows" or similar entry from the search results, for modern hardware Intel will normally have at least one release per month, the list should return recent results within the last month
- Select the Download button to save the installer to your Downloads folder or selected location
AMD Graphics
AMD provides an Auto-Detect utility, this works relatively well and can be used to update the system available from the AMD Drivers and Support page.
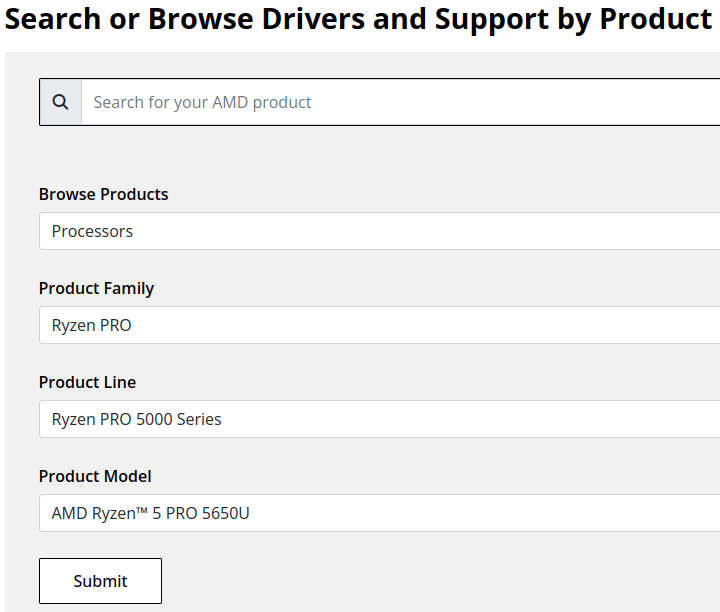
This page also provides a search and browse option for finding drivers and specific compatibility details, we'll look up the drivers for an AMD Ryzen Pro 5650U processor with Radeon Graphics:
- Navigate to AMD Drivers and Support page
- From the Browse section, fill out the processor details and click the Submit button
- Expand the "Windows 11 - 64-Bit Edition" section and select the Download button for the latest graphics drivers
NVIDIA Graphics
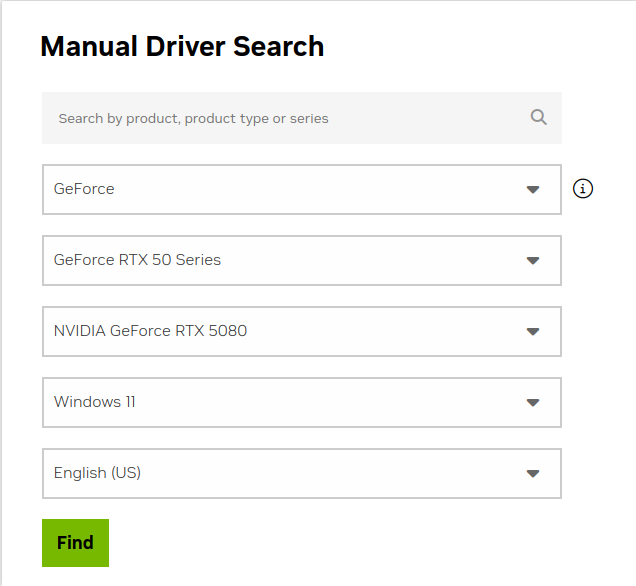
Like AMD, NVIDIA provides an automatic installation utility, as well as a Manual Driver Search on the NVIDIA Drivers support page. We will look up the drivers for an NVIDIA RTX 5080 graphics card.
- Navigate to NVIDIA Drivers support page
- Fill out the Manual Driver Search drop-downs and select the "Find" button when complete
- From the search results, select the "View" button for the GeForce Game Ready Driver or NVIDIA Studio Driver (if you need the studio driver features)
- Select the green Download button for the latest graphics drivers
Installing the Graphics Drivers
For the most part this is relatively simple, we recommend disconnecting any external docking stations or devices that are not necessary for the driver installation, and for notebook computers connecting the system's original power supply.
Double-click on the downloaded driver installation executable and follow the on screen steps.
For more in-depth details on Intel, AMD, and NVIDIA's driver installation processes check out our step-by-step guides here:
- Intel Driver Installation In Detail
- AMD Driver Installation In Detail
- NVIDIA Driver Installation In Detail
If you have any questions or would like a recommendation, feel free to reach out to our support at support@plugable.com
How-To: Install the latest Intel Graphics Drivers
For a step-by-step guide to identify your graphics hardware and download the appropriate drivers, check out our KB article here
Download the drivers for your GPU or Processor Graphics
- In a web browser navigate to the Intel Driver Download Page
- In the Search Drivers & Software field, search for the Intel graphics card model or CPU model, "Arc Pro B60" in this example
- Select the appropriate Intel Arc Pro Graphics - Windows or similar entry from the search results, for modern hardware Intel will normally have at least one release per month, the list should return recent results within the last month
- Select the Download button to save the installer to your Downloads folder or selected location
Install the Intel Graphics Driver
To update the Intel Graphics Drivers to the latest version from Intel's website:
- Save and close any open applications
- Navigate to the downloaded graphics driver, then right-click on the saved driver installation file and select Run as administrator to start the installation process
- Allow the Intel driver installation through the User account control window, the drivers will be extracted
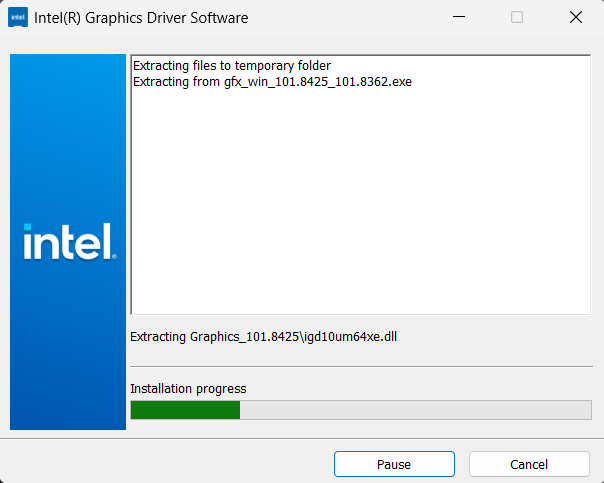
- When the extraction is complete select the Begin installation button

- Agree to the Intel Software License Agreement by selecting the I agree button
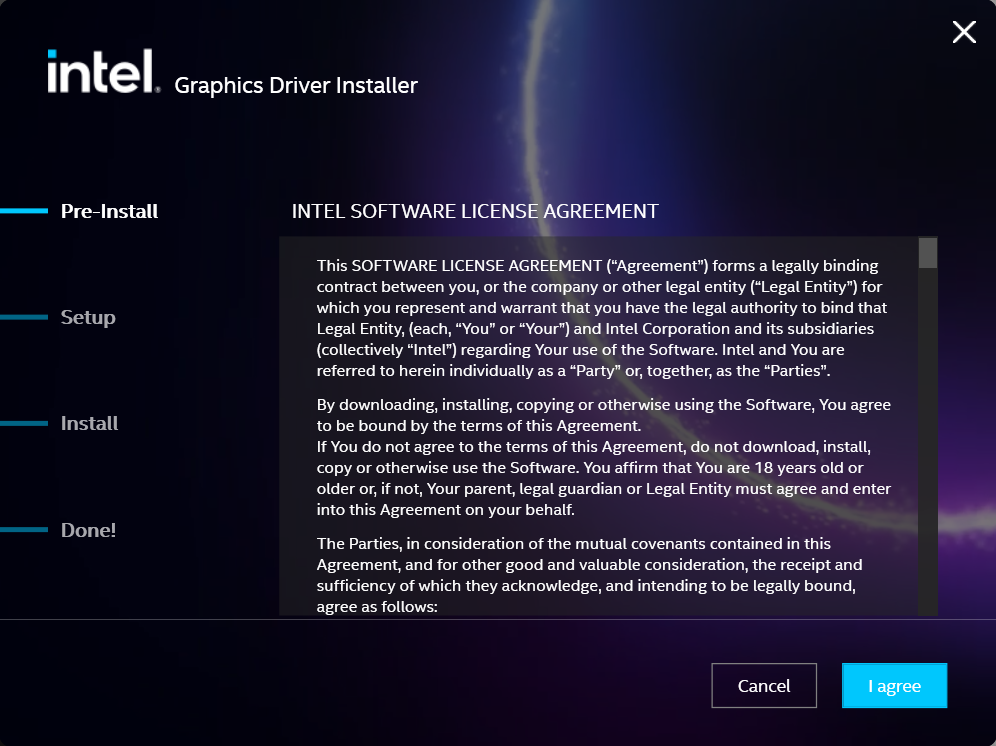
- Ensure all applications are saved and closed before selecting the I agree button
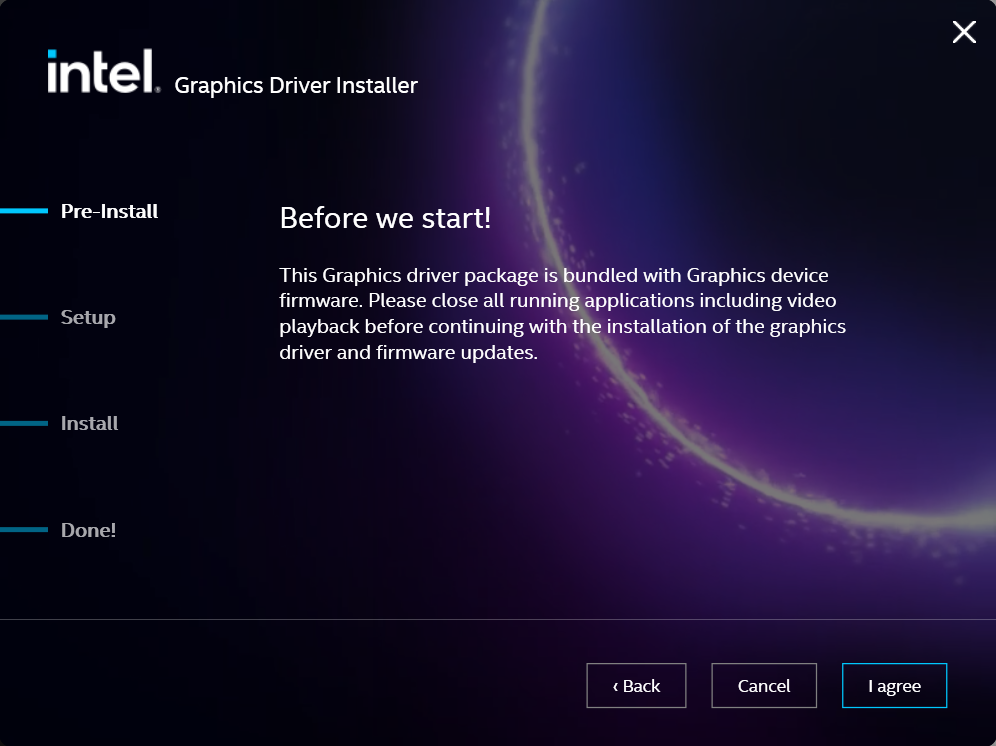
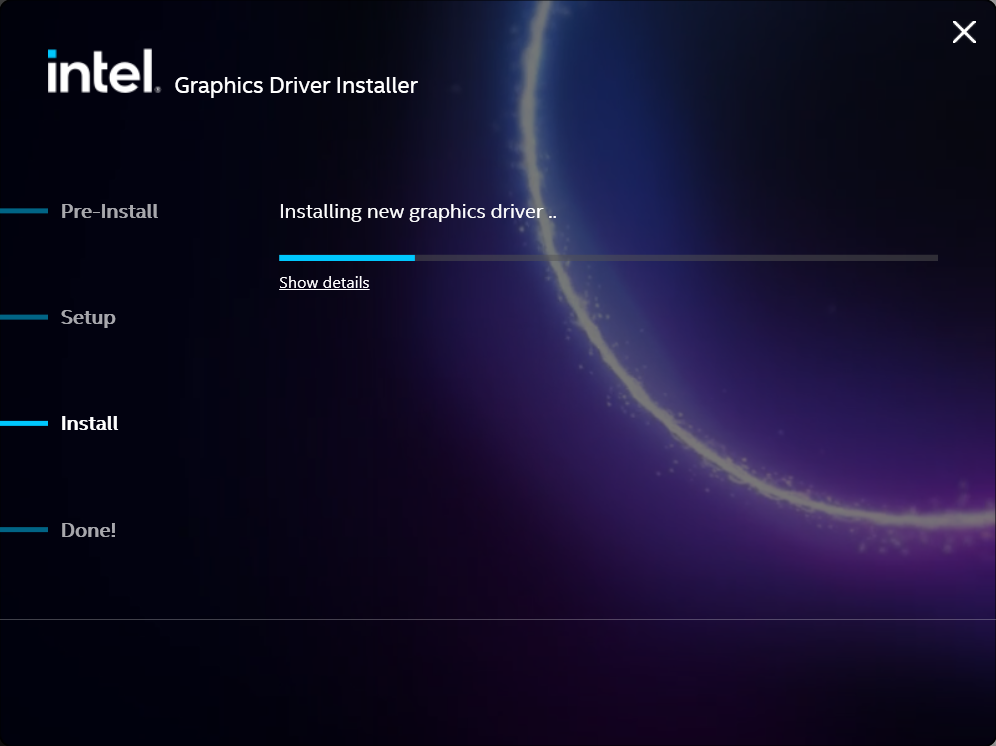
- For most installations, we recommend not selecting the Execute a clean installation checkbox. This option will remove previous driver versions and can lead to Windows Update reverting to an even older graphics driver. Select the Start button to proceed

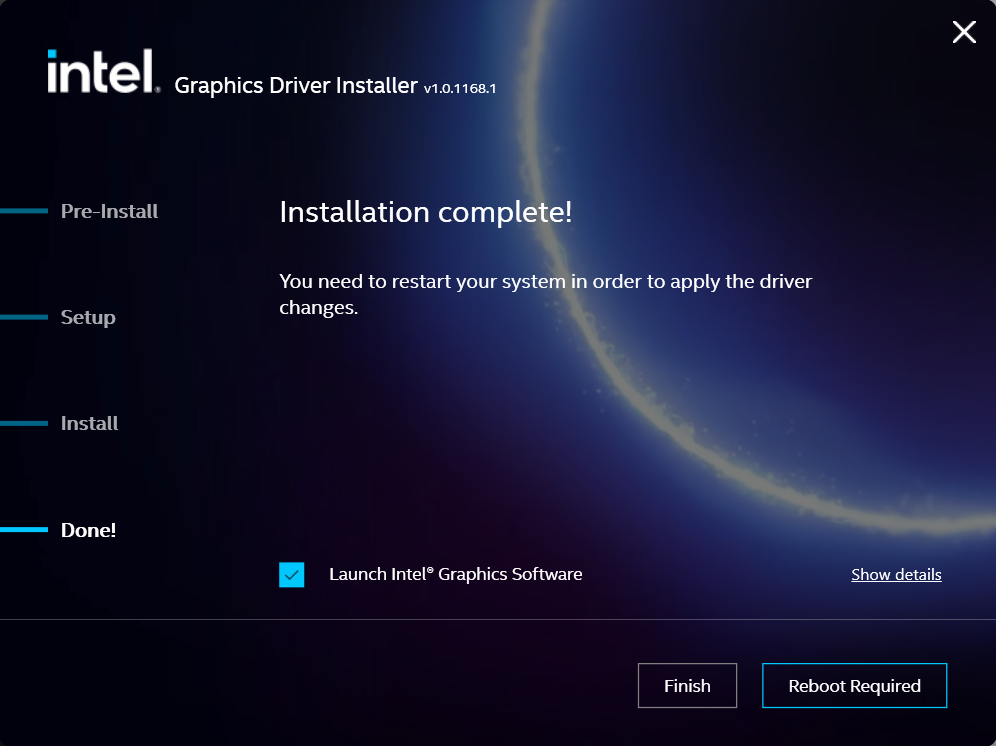
- The installation process will proceed, but can take some time to complete
- When the installation has completed, deselect the Launch Intel Graphics Software checkbox - we don't need that right now, select the Reboot Now button to restart the computer applying the new graphics drivers
Windows should now detect the Intel Graphics Controller in the Device Manager and show the latest drivers.
If you have any questions or would like a recommendation, feel free to reach out to our support at support@plugable.com
How-To: Install the latest AMD Graphics Drivers
For a step-by-step guide to identify your graphics hardware and download the appropriate drivers, check out our KB article here
Download the drivers for your GPU or Processor Graphics
- In a web browser navigate to the AMD Drivers and Support page
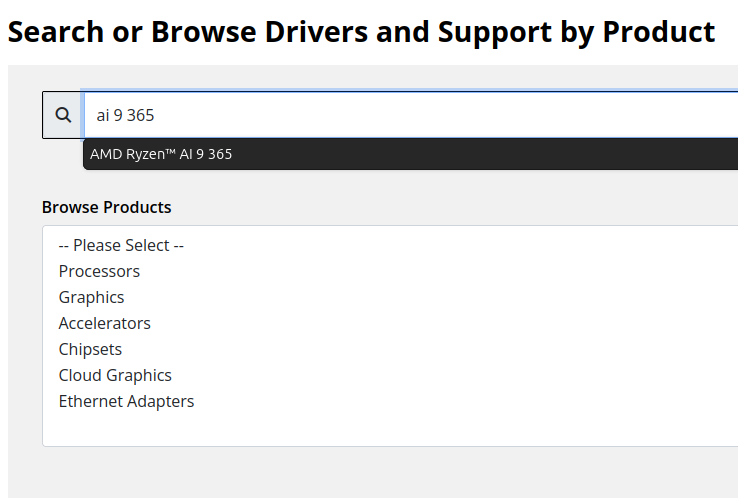
- In the Search for your AMD product field, type in the model name, for example “RX 5600XT” for the AMD Radeon RX 5600 XT graphics controller, or a processor model like "AI 9 365", then select the best fitting result and select the Search button - note: Searching for a processor the "™" is required, so I recommend searching for the text after that symbol.
- On the results page, expand the section for Windows 11 64-bit then select the Download button for the latest AMD Software: Adrenalin Edition drivers, AMD may not provide a direct download for all hardware, in that case use the Auto-Detect and Install option
- Save the installer to your Downloads folder or selected location
Install the AMD Graphics Driver
To update the AMD Graphics Drivers to the latest version from AMD’s website:
- Save and close any open applications
- Navigate to the downloaded graphics driver, then right-click on the saved driver installation file and select Run as administrator to start the installation process
- Allow the Intel driver installation through the User account control window, the drivers will be extracted
- For most users the express installation is fine, ensure all applications are saved and closed selecting the Accept & Express Install button. If you have been having issues with older graphics drivers causing crashes or errors the Factory Reset (Optional) checkbox may be selected, but it isn’t necessary for most installations.

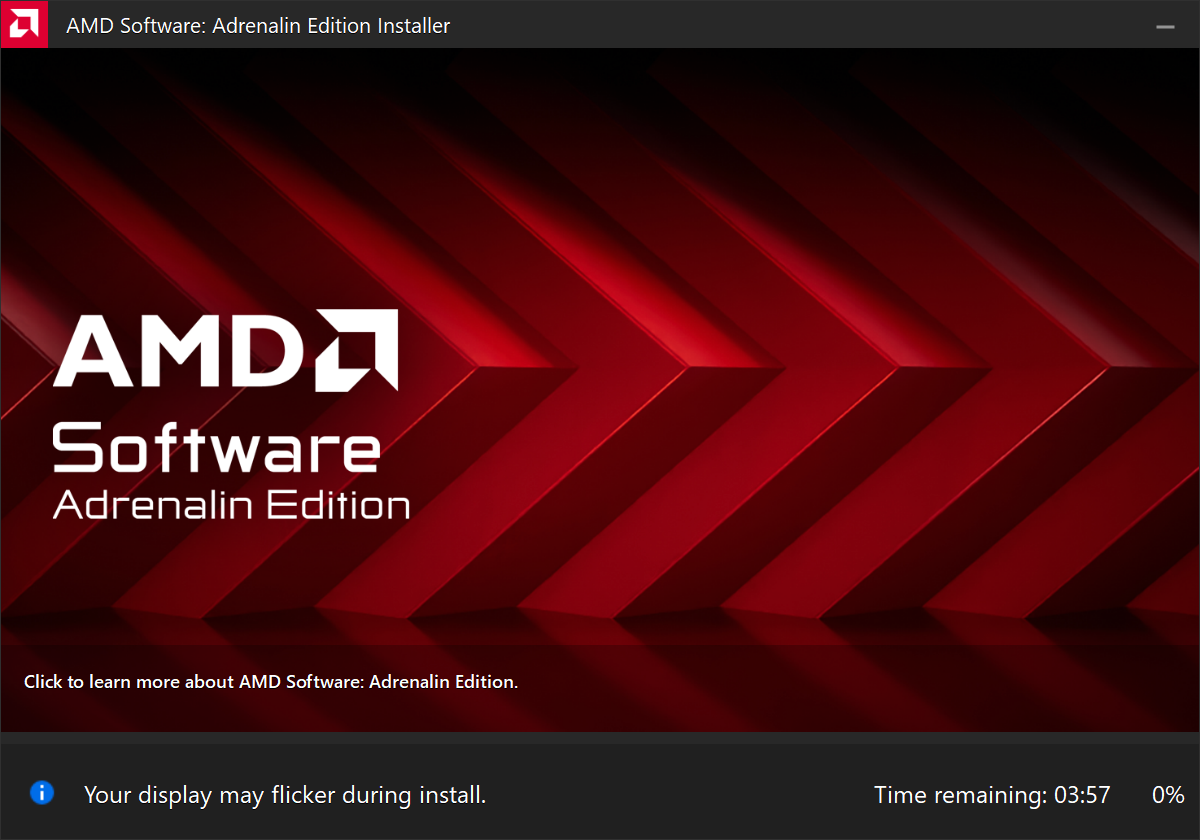
- The installation will proceed, the displays may flicker or flash off/on while the drivers are installing.
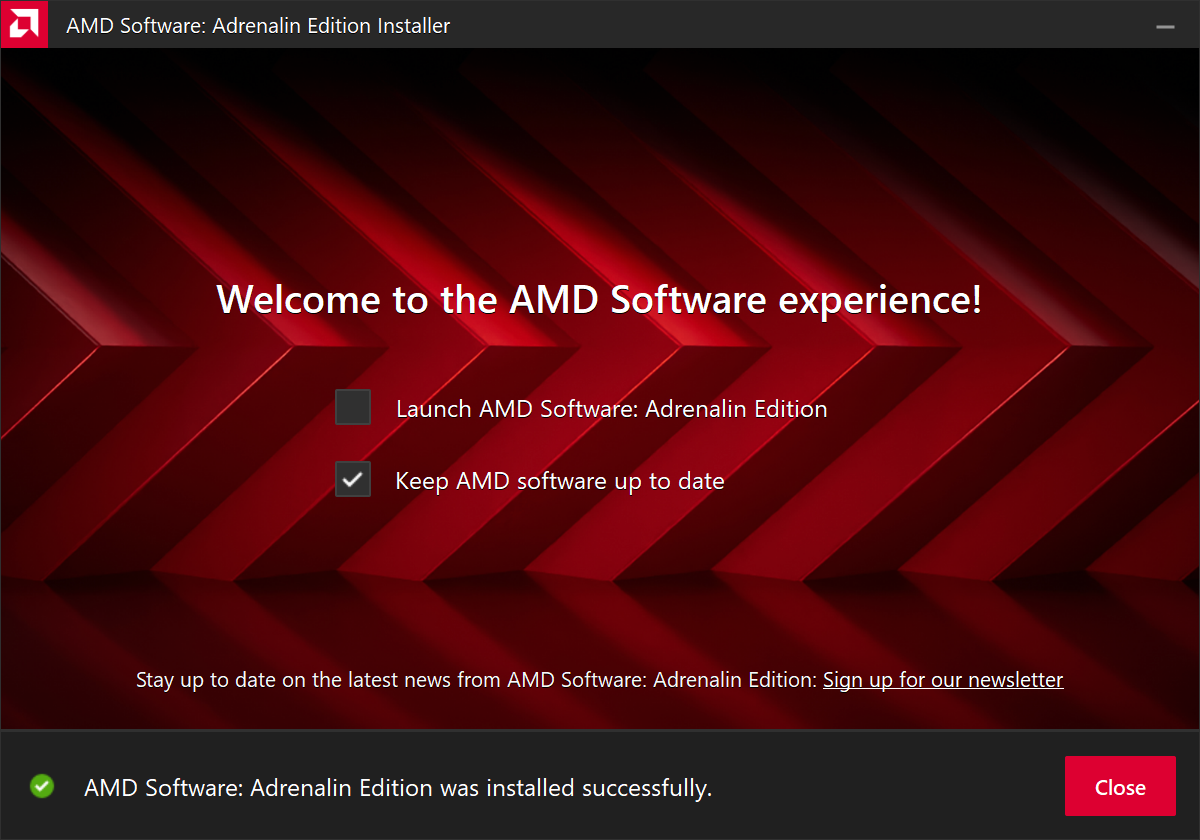
- When complete you will be prompted to Launch AMD Software: Adrenalin Edition and Keep AMD software up to date, you can uncheck the Launch AMD Software option
- Restart the computer to ensure the latest drivers are loaded from boot Start Menu > Power Icon > Restart
Windows should now detect the Intel Graphics Controller in the Device Manager and show the latest drivers.
If you have any questions or would like a recommendation, feel free to reach out to our support at support@plugable.com
How-To: Install the latest NVIDIA Graphics Drivers
For a step-by-step guide to identify your graphics hardware and download the appropriate drivers, check out our KB article here
Download the drivers for your GPU
Check your invoice for the specific model of NVIDIA graphics card, for this example we will use the RTX 5080 (the manufacturer is not relevant).
- In a web browser navigate to the NVIDIA Driver Download Page
- In the Manual Driver Search field, search for the NVIDIA graphics card model, "RTX 5080" in this example
- Select the GeForce RTX 50 Series | NVIDIA GeForce RTX 5080 | Windows 11 entry from the list
- Left-click the Find button
- Select either View buttons from the GeForce Game Ready Driver or NVIDIA Studio Driver
- Select the Download button to save the installer to your Downloads folder or selected location
Install the NVIDIA Graphics Driver
To update the NVIDIA Graphics Drivers to the latest version from NVIDIA's website:
- Save and close any open applications
- Navigate to the downloaded graphics driver, then right-click on the saved driver installation file and select Run as administrator to start the installation process
- Allow the NVIDIA driver installation through the User account control window
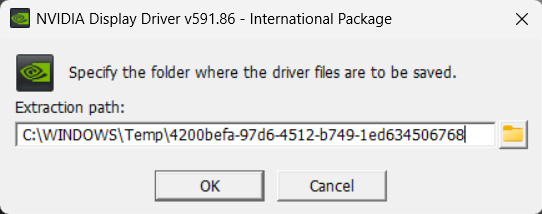
- Click OK to extract the NVIDIA Display Driver package contents
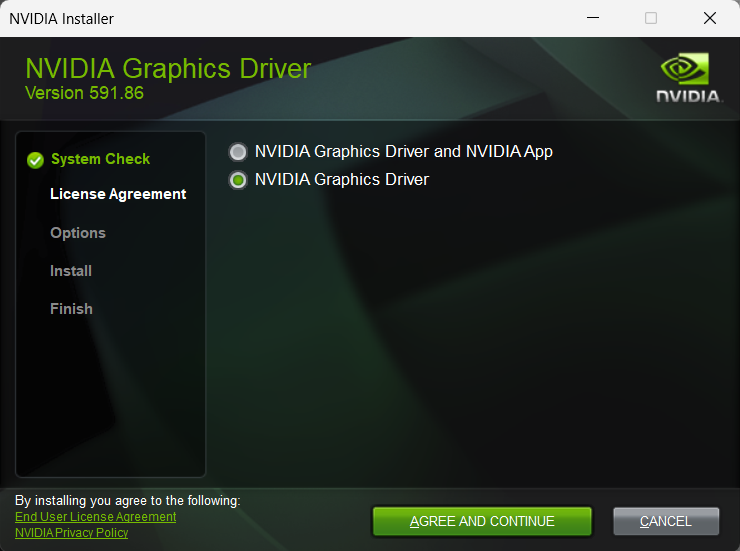
- At the System Check step, select either the NVIDIA Graphics Driver with NVIDIA App or the NVIDIA Graphics Driver alone, the NVIDIA App is gaming oriented and unnecessary for most users. Select AGREE AND CONTINUE
- At the License Agreement step, select the Express (Recommended) radio button then select NEXT to continue

- The installation will take some time to complete
- When complete please restart the computer Start > Power > Restart
Windows should now detect the NVIDIA Graphics Controller in the Device Manager and show the latest drivers.
If you have any questions or would like a recommendation, feel free to reach out to our support at support@plugable.com


- Choosing a selection results in a full page refresh.